
Non-Fiction
Master Sewing Blueprint Matrix
by Marizelle Swanepoel
3 chapters1.1 hr read
Chapter 1
Understanding Sewing Patterns
The Pattern as a Technical Drawing
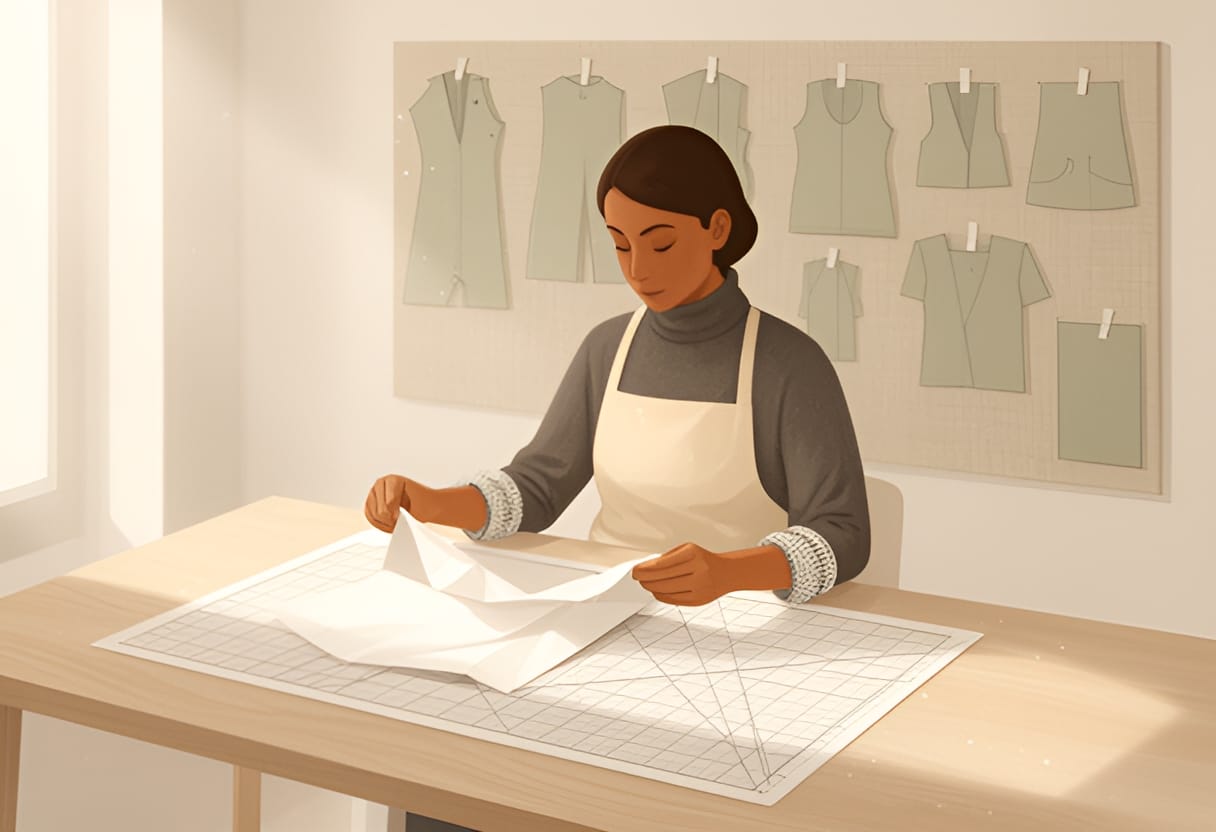
The first time you unfold a sewing pattern, it can feel like opening a foreign language textbook. Pages of tissue paper covered in lines, arrows, and cryptic symbols stare back, promising a garment but offering little immediate clarity. You might wonder why the cutting line doesn’t match the seam line, or what those little triangles along the edge are really for. This confusion is common, but it dissolves the moment you begin to see the pattern not as a template to follow blindly, but as a technical drawing— a scaled, annotated blueprint that communicates precisely how flat fabric becomes a three-dimensional garment. When you learn to read it this way, you gain the power to anticipate fit, diagnose issues before cutting, and adapt designs with intention.
The Language of Lines
Every line on a sewing pattern carries specific meaning, and confusing them leads to errors in fit and construction. The two most fundamental are the cutting line and the seam line, which serve distinct purposes despite often appearing similar.
The cutting line is the outermost solid line on a pattern piece, marking where you cut the fabric. It includes seam allowance—the extra fabric beyond the final garment edge that allows for sewing seams. Without this buffer, you would have nothing to stitch together. The seam line, by contrast, is usually a dashed or fine solid line located inside the cutting line, indicating where the stitching should occur. It represents the actual edge of the finished garment. On a basic bodice block, for example, the cutting line at the shoulder might be 1.5 cm outward from the seam line, providing room for a standard seam allowance. If you cut along the seam line instead, your garment would be too small by that amount on every edge— a mistake that compounds across multiple pieces.
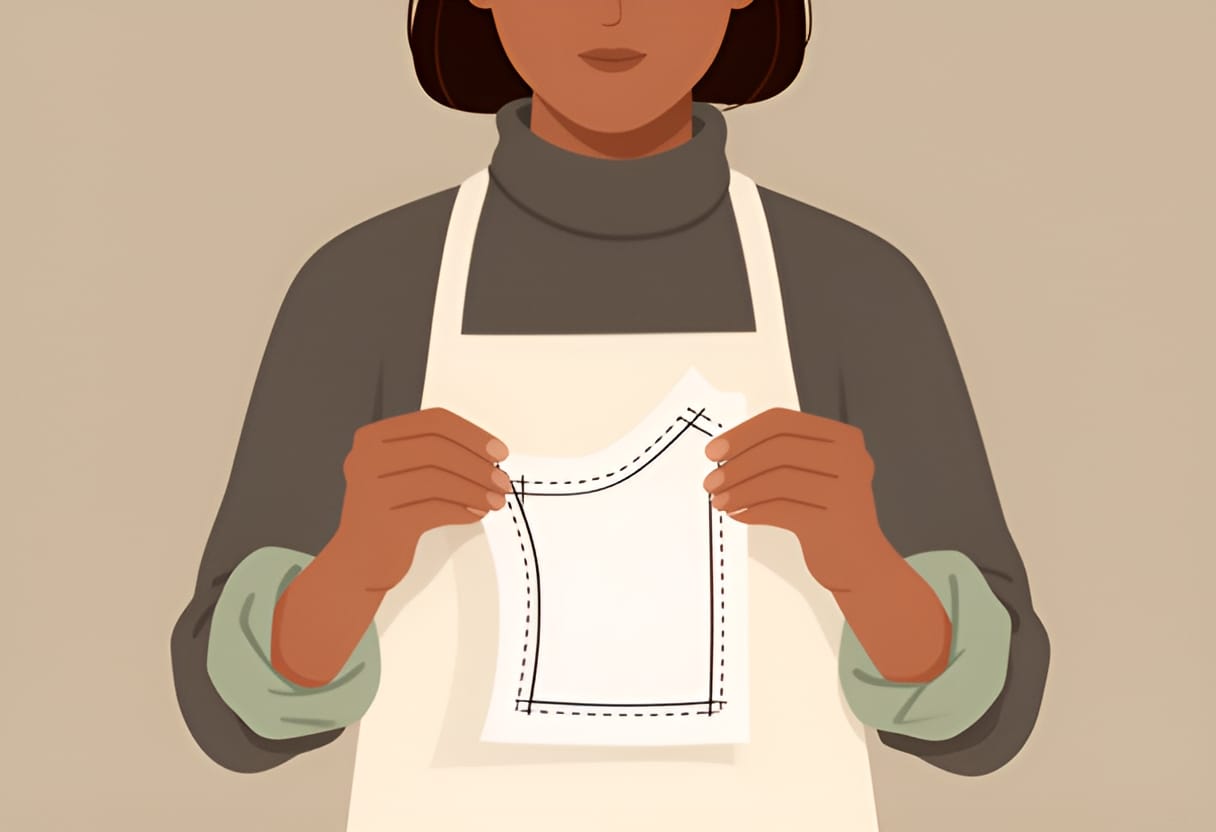
Understanding this distinction is not just technical; it changes how you approach preparation. When laying out fabric, you align the cutting line with your material’s edges, knowing the seam line will fall consistently inward. During fitting, you compare the seam line to your body measurements, not the cutting line, because it reflects the garment’s true dimensions. One home sewer recalled making a skirt where she cut on what she thought was the edge line, only to find the waistband wouldn’t meet— she had mistaken the seam line for the cutting line, losing 2 cm of fabric all around. Recognizing which line is which prevents such frustration and ensures your garment starts with the correct dimensions.
Symbols That Speak
Beyond lines, patterns use a standardized set of symbols to convey critical information about orientation, alignment, and construction. These are not decorative; they are instructions encoded in visual shorthand.
The grainline is a long, double-ended arrow showing how the pattern piece should be aligned with the fabric’s lengthwise grain—the direction parallel to the selvage. Placing it correctly ensures the garment hangs properly and resists distortion. A fold line, marked by a bent arrow with the words “place on fold,” indicates that the pattern piece should be positioned on the fabric’s folded edge, creating a symmetrical whole without a center seam—common for backs, fronts, or sleeves. Notches are small triangular or rectangular marks along the cutting line, used to match seams between pieces; a single notch might indicate the front of a sleeve, while a double notch signals the back. Finally, dots (or circles) are placement points for features like darts, pockets, or buttonholes, often matched to corresponding dots on adjacent pieces.
Consider a simple skirt pattern: the front piece has a single notch at the waistline side seam, the back has a double notch in the same location. When sewing the side seams, matching single to single and double to double ensures the front and back are oriented correctly— preventing the garment from being sewn on backward. Similarly, a dot at the bust point on a bodice pattern tells you where to end the dart legs, shaping the fabric over the curve of the body. Ignoring these symbols invites misalignment, but respecting them builds confidence in assembly. As M. Stitch often annotates in technical illustrations: “These marks are the silent supervisors of your sewing room— follow them, and the pieces will find their place.”
Scale and the Illusion of Size
Patterns are rarely drawn at full size, especially in books or packets where space is limited. Instead, they are issued at a reduced scale—commonly 1:4 or 1:5—meaning one unit on the paper represents four or five units in reality. This allows multiple pattern pieces to fit on a single sheet, but it requires the user to understand and apply the scale correctly before cutting.
When working with a scaled pattern, you must either transfer the pieces to full-size paper using a ruler and the scale ratio, or use a projector or lightbox to enlarge them directly onto fabric. For instance, if a bodice block’s waist measurement reads 20 cm on a 1:4 pattern, the actual waist circumference will be 80 cm (20 × 4). Failing to account for scale leads to garments that are dramatically too small— a frustrating error easily avoided by checking the pattern’s scale notation, usually found in the margin or title block.
Scale also affects how you perceive proportion. A dart that looks long and narrow on a 1:4 tracing might seem excessive until you enlarge it and see it corresponds to a realistic 6 cm taper over 12 cm of fabric— appropriate for a full bust adjustment. One learner, working from a magazine pattern without checking the scale, cut a bodice that fit a child’s doll— only later realizing the entire sheet had been drawn at 1:8, not 1:1. Developing the habit of verifying scale transforms pattern reading from guesswork to precision. It reminds us that sewing, like engineering, depends on accurate representation: what you see is not what you get, unless you know how to read the drawing.
Annotations as Assembly Instructions
Patterns do more than show shape—they communicate the sequence and intent of construction through annotations. These notes, often in the form of labeled arrows, shaded areas, or brief text, reveal how pieces relate and where fit adjustments are intended.
Arrows indicating “direction of greatest stretch” on knit patterns, for example, tell you to align the fabric’s most flexible direction with the part of the garment that needs to conform to the body—like the circumference of a hat or the width of a sleeve cuff. Shaded regions may highlight areas intended for ease—extra fabric built in for comfort or movement—such as the sleeve cap, where ease allows the arm to raise without pulling the shoulder seam. Labels like “CB” (center back) or “CF” (center front) provide quick reference points for alignment and fitting.
Imagine constructing a simple t-shirt: the front bodice piece has a shaded oval at the bust labeled “bust ease,” signaling that this area is cut slightly larger than the body to accommodate movement and curvature. The corresponding back piece lacks this shading, as it requires less vertical ease. When you sew the shoulder and side seams, matching the notches and aligning the grainlines, the ease distributes naturally over the curve, creating a smooth fit without puckering. Without recognizing this annotation, you might mistakenly trim the excess, resulting in a tight, uncomfortable garment. M. Stitch’s annotations often emphasize this point: “Ease is not error—it is intention. Learn to see it, and you’ll stop fighting the pattern and start working with it.”
These annotations transform the pattern from a static outline into a dynamic guide. They answer the unspoken questions: Where should this piece stretch? Where should it hold firm? How do the pieces talk to each other as they come together? By learning to read them, you shift from executing steps to understanding why they exist— the first step toward true pattern fluency.
Decoding Grainlines and Fabric Direction
The grainline arrow on a pattern piece is more than a suggestion—it is a directive rooted in the structure of woven fabric. To ignore it is to invite distortion, uneven drape, and garments that twist or pull in unintended ways. When aligned correctly, the grainline ensures the garment hangs as intended, moves with the body, and maintains its shape over time. Understanding how fabric behaves along its different grains allows the sewer to anticipate performance before a single stitch is sewn.
Lengthwise Grain: The Foundation of Stability
The lengthwise grain, also known as the warp, runs parallel to the selvage edge of the fabric. It is the most stable direction, exhibiting minimal stretch due to the tight interlacement of warp threads held under tension during weaving. This stability makes it ideal for vertical garment edges where support and minimal distortion are paramount—such as center fronts, center backs, and side seams.
When a pattern’s grainline is aligned with the lengthwise grain, the garment resists lengthening or shortening with wear. Consider a classic A-line skirt: if the grainline of each skirt panel is placed off-grain, the hem may begin to sway or twist as the wearer moves, causing one side to hang lower than the other. But when aligned with the warp, the skirt hangs evenly, the hem remains parallel to the floor, and the side seams stay plumb to the body.
M. Stitch often notes in technical drawings: “The lengthwise grain is the spine of the garment. Align with it, and the piece will stand true.” This principle applies equally to tailored trousers, where off-grain cutting can cause legs to twist, and to structured jackets, where misalignment leads to lapels that flare or collar stands that gape.
Crosswise Grain: Controlled Give for Comfort
Running perpendicular to the selvage, the crosswise grain (or weft) offers more give than the lengthwise grain but less than the bias. The weft threads are typically less tightly tensioned during weaving, resulting in moderate stretch and recovery. This makes the crosswise grain suitable for areas that benefit from a little flexibility—such as waistbands, cuffs, or the circumference of a hat—without sacrificing overall shape.
In garment construction, the crosswise grain is frequently used for linings, where slight give enhances comfort and ease of movement. For example, the lining of a blazer cut on the crosswise grain will accommodate the natural expansion of the torso during breathing or reaching, reducing strain on the seams. However, using the crosswise grain for vertical seams in a fitted garment can lead to unwanted horizontal distortion—imagine a sheath dress where the side seams begin to “ride up” or create a honeycombing effect due to excess stretch in the wrong direction.
A practical test: take a square of medium-weight cotton and pull gently along the selvage (lengthwise), then across (crosswise). You’ll feel the difference—minimal elongation versus a noticeable, though still controlled, give. This tactile awareness helps the sewer make informed decisions when pattern instructions suggest crosswise placement for specific components.
Bias Grain: The 45-Degree Advantage
At a 45-degree angle to both the lengthwise and crosswise grains lies the bias—the direction of maximum drape and stretch. Cutting on the bias allows fabric to flow and conform to the body in ways that straight-grain cuts cannot. This property is harnessed in garments designed to cling, flow, or move with fluidity, such as bias-cut skirts, draped dresses, or spaghetti-strap tops.
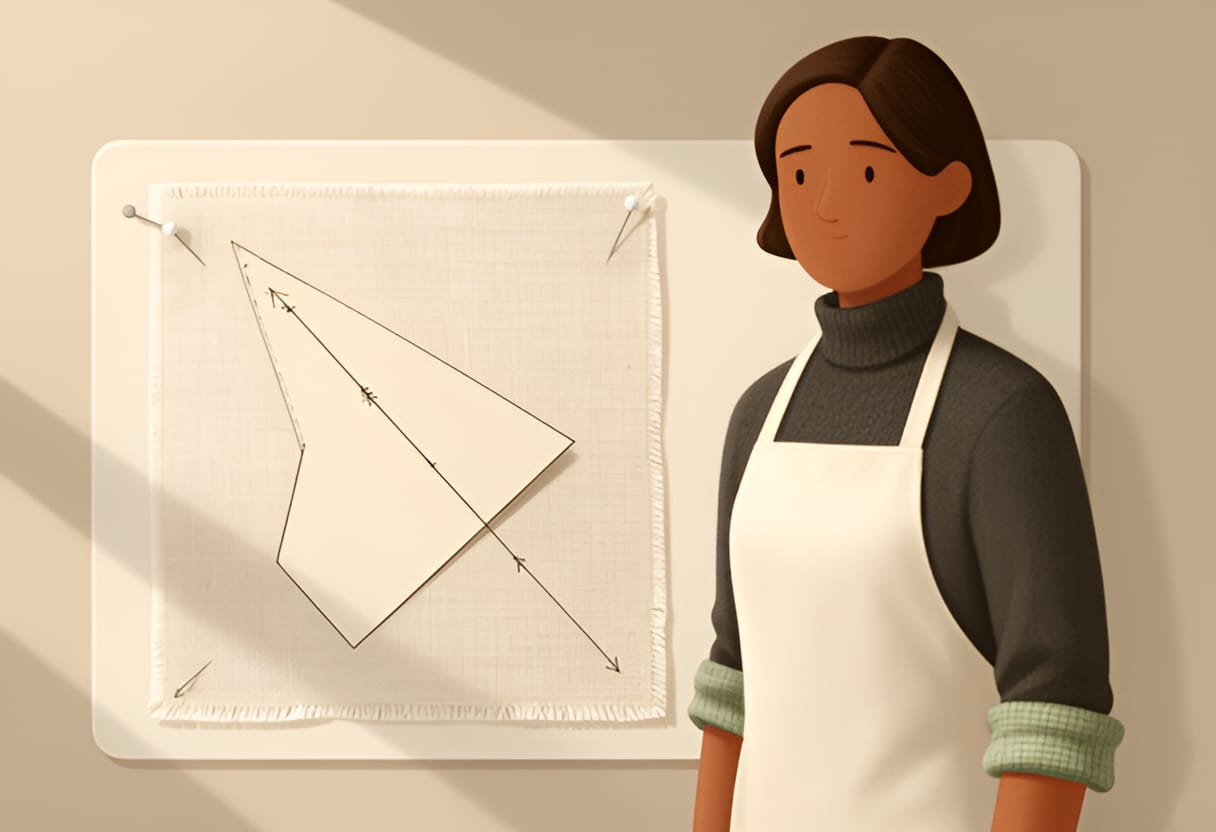
When fabric is cut on the bias, the interlaced threads are no longer aligned with the direction of pull. Instead, they shift and slide relative to one another, creating a soft, stretchy hand that molds to curves. A classic example is the bias-cut slip dress popularized in the 1930s: the fabric skims the body, accentuating the natural silhouette without darts or seams, because the bias allows it to stretch over the hips and narrow at the waist.
However, this very stretch demands careful handling. Bias-cut edges are prone to distortion during sewing and may require stabilization—such as stay-stitching or interfacing—to prevent excessive growth. Hems on bias-cut garments often need to be hung for 24 hours before final trimming to allow for vertical stretch, a phenomenon known as “bias drop.” Skipping this step can result in an uneven hem that appears longer on one side after wearing.
M. Stitch illustrates this with a fabric simulation: a square of silk charmeuse marked with a grid. When pulled along the bias, the grid distorts into a diamond shape, demonstrating shear. When released, it slowly returns—not instantly, but with a lingering delay, highlighting the fabric’s memory and the need for patience in construction.
Consequences of Off-Grain Cutting
Cutting a pattern piece off-grain—whether slightly askew or significantly rotated—undermines the intended behavior of the garment. The consequences vary by degree and fabric type but consistently affect fit, appearance, and wearability.
A common issue is twisting. A sleeve cut off-grain may begin to spiral toward the front or back of the arm as it is worn, requiring constant adjustment. Similarly, a pant leg that lacks proper grainline alignment can develop a lateral twist, causing the inseam to migrate toward the front or back thigh. This is especially noticeable in solid-colored or subtly textured fabrics where the distortion isn’t masked by pattern.
Puckering is another frequent outcome. When fabric is forced into a shape that resists its natural grain, stress builds at the seams. This is evident in garments where the hem ripples or the fabric gathers unevenly along a seam line, even after pressing. Lightweight fabrics like voile or chiffon are particularly susceptible, as their low mass offers little resistance to distortion.
Uneven hems often result from inconsistent grainline placement across pattern pieces. If the front of a skirt is cut on-length grain while the back is slightly off, the two sides will respond differently to gravity and movement, leading to a hem that sags or lifts unpredictably. This problem compounds in flared or circular skirts, where any deviation from true grain is amplified by the garment’s width.
To prevent these issues, the sewer should always begin by aligning the grainline arrow with a true lengthwise reference—either the selvage or a pulled thread. For fabrics without a clear selvage (such as knits or certain upholstery weights), establishing the grain through a thread-pull or fabric simulation is essential. Once aligned, secure the pattern with weights or pins before tracing or cutting, and double-check that the arrow runs perfectly parallel to the fabric’s lengthwise direction.
As M. Stitch reminds us in the margin of a complex jacket pattern: “The grainline is not a suggestion—it is the first stitch in the garment’s integrity. Get it right, and everything that follows has a chance to be right too.” By mastering grainline alignment, the sewer moves from guesswork to certainty, laying the groundwork for garments that not only fit well but behave as they were designed to.
Symbols, Notches, and Matching Points
Patterns speak through a silent language of marks—small, deliberate symbols that guide the sewer from flat paper to finished garment. These are not decorative; they are functional cues, as essential as seam lines and grainlines, ensuring that pieces align correctly during assembly. Misreading or ignoring them leads to mismatched seams, crooked hems, or sleeves set in backward. Mastering this visual code transforms pattern reading from guesswork to precision.
Decoding Notch Systems
Notches are the most common matching points on a pattern, appearing as small triangular or rectangular cuts along the cutting line. Their purpose is simple: to indicate where two or more pattern pieces should align when sewn together. But their power lies in variation—single, double, and triple notches form a coding system that prevents confusion, especially in complex garments with multiple similar seams.
A single notch typically marks the front or simpler side of a seam. For example, on a basic bodice, the shoulder seam might have one notch on the front piece and one on the back—these match directly. But when a sleeve is introduced, the system evolves: the sleeve cap often features a double notch to indicate the back of the armhole, while the front armhole carries a single notch. This distinction ensures the sleeve is not inserted backward, a mistake that would cause the elbow seam to face forward.
Triple notches are less common but critical in high-precision areas, such as the center back of a coat or the crotch seam of trousers. Here, they serve as a clear, unambiguous signal—no other seam in the garment should bear three marks, reducing the chance of misalignment during assembly.
M. Stitch often annotates these systems in the margins:
“Notches are the pattern’s sentence structure. One notch is a period—simple closure. Two is a semicolon—related but distinct. Three is a colon—what follows must be exact.”
To apply this, the sewer should first identify all notch groupings on the pattern pieces before cutting. Laying pieces side by side and matching notch counts builds mental familiarity. During cutting, these marks should be transferred to the fabric as small snips or chalk dots, preserving the code for assembly.
Construction Dots and Matching Points
Beyond notches, patterns use solid or hollow dots to mark precise points of alignment—often where seams begin, end, or intersect. These are critical for shaping elements like darts, set-in sleeves, and collars, where accuracy affects both fit and appearance.
A dart, for instance, is defined by two key dots: the dart point (where the fabric converges) and the dart base (where the stitching starts at the seam edge). The sewer must match these dots precisely when folding and stitching the dart; even a slight misplacement can cause puckering or distort the garment’s contour. In a bust dart, the base dots align with the side seam and waistline, while the point aims toward the fullest part of the bust—off by just a quarter inch, and the fit feels “off.”
Set-in sleeves rely on a system of dots and notches working together. The sleeve cap is marked with notches (single for front, double for back) and often a series of dots along the curve to ease the fabric into the armhole. The shoulder seam dot is especially vital—it must align exactly with the shoulder seam dot on the bodice to set the sleeve at the correct angle. If this dot is missed, the sleeve may hang too far forward or backward, creating drag lines or restricting movement.
Collars and cuffs use similar logic. A collar band might feature a center front dot and two end dots to match the garment’s neckline opening. When these are misaligned, the collar twists or gaps at the front.
Transferring these dots accurately requires care. The sewer can use a tracing wheel and carbon paper, placing the carbon face-down on the fabric and rolling firmly over each dot. Alternatively, a punch tool creates a small hole through the pattern and fabric, allowing a fabric pen to mark the spot beneath. For delicate fabrics, a pinprick followed by a chalk dot minimizes damage. Whatever the method, the goal is the same: preserve the point’s location so it survives handling and guides the sew.
Specialty Marks: Pockets, Vents, and Pleats
Certain marks serve specific structural purposes, guiding the placement of functional or decorative elements. Squares and triangles often appear in these roles, standing out from the more common notches and dots due to their distinct shape.
A square mark typically indicates pocket placement. On a shirt front, a square may appear 4 inches below the shoulder seam and 1.5 inches from the center front—this is where the top corner of a patch pocket should align. The sewer uses this mark to position the pocket template, ensuring symmetry and consistency between left and right sides. On pants, a square might denote the top of a rear patch pocket, often placed 3 inches below the waistband and centered over the seam.
Triangular marks frequently guide vent construction, especially in skirts and jackets. A vent allows ease of movement and is created by leaving a gap in the seam, reinforced with binding or facing. The triangle marks the pivot point where the seam turns to form the vent’s mitered corner. Accurate transfer of this mark ensures the vent lies flat and opens cleanly without distortion.
Pleats, too, rely on specific markings. A pleat pattern may show a series of parallel lines with arrows indicating fold direction, accompanied by dots at the top and bottom to mark where the pleat begins and ends. The sewer folds the fabric so that the dots align, creasing along the lines to form uniform pleats that hang correctly.
M. Stitch notes in a jacket pattern:
“That triangle isn’t just a mark—it’s the hinge. Miss it, and your vent will twist like a screw.”
These specialty marks are often labeled with abbreviations—“PKT” for pocket, “VENT” for vent, “PLT” for pleat—helping the sewer identify their function at a glance. When transferring them, the sewer should preserve both shape and label, using a clear, durable method that won’t fade during handling.
Transferring Marks: Tools and Techniques
Accurate mark transfer is the bridge between pattern and fabric. Even the most intelligently designed symbols fail if they are not reproduced clearly and correctly on the material. The sewer must choose tools suited to the fabric’s weight, texture, and color, ensuring marks are visible enough to guide but not so harsh as to damage or show through.
For medium-weight cottons and linens, tracing paper and a tracing wheel work well. The sewer places the paper (carbon side down) on the fabric, pins the pattern on top, and rolls the wheel over each mark. This creates a dotted line that is easy to follow and washes out later. For dark fabrics, white or yellow carbon provides contrast; on light fabrics, blue or red is preferable.
Tailor’s tacks offer a thread-based alternative, ideal for delicate or sheer fabrics where chalk or ink might stain or be invisible. To create a tack, the sewer threads a needle with contrasting cotton, takes a small stitch through the pattern and fabric, leaves a loose loop, and snips the thread, leaving a tiny tuft on each layer. This method is especially useful for dart points and matching dots where precision is paramount.
Chalk pencils or pens provide direct application, best for temporary marks on sturdy fabrics. A chalk line can quickly indicate a hem or seam, while a fine pencil dot marks a notch or dart base. However, chalk can brush off easily, so it’s best used when sewing follows soon after marking.
For long-term projects or fabrics that resist chalk (like silk or satin), water-soluble pens or air-erasable markers offer a clean solution. These marks fade with time or moisture, reducing the risk of permanent residue. Still, the sewer should test on a scrap first—some markers leave a ghost mark or react unpredictably with certain dyes.
Regardless of method, the sewer should always:
- Secure the pattern with weights or pins to prevent shifting.
- Use a hard, flat surface to ensure even pressure.
- Double-check that all marks—especially dots and specialty symbols—are transferred before removing the pattern.
- Verify symmetry by folding the fabric and checking that corresponding marks align.
As M. Stitch reminds us in a skirt pattern with complex pleating:
“A mark not seen is a mark not kept. Transfer with intention, or sew with doubt.”
By treating each symbol as a deliberate instruction—not a suggestion—the sewer builds confidence in the pattern’s logic. The notch, the dot, the square: each is a stitch in the language of construction. Learn to read them, and the pattern stops being a mystery. It becomes a conversation.
From Flat Pattern to 3D Garment: Visualizing Shape
Flat pattern pieces are not just outlines to cut around; they are engineered flat representations of three-dimensional body contours. To see a garment in the pattern, one must mentally fold, curve, and ease the paper shapes into the volumes they will become. This transformation hinges on three core principles: dart manipulation, ease distribution, and seam placement. Together, they dictate how a flat shape gains curvature, how it moves with the body, and what silhouette it ultimately describes.
How Darts Create Curvature
A dart is a tapered fold of fabric that, when stitched and pressed, removes excess material to allow the cloth to conform to a protruding body part—most commonly the bust, waist, or hip. On paper, a dart appears as a V-shaped wedge pointing toward the fullest part of the curve. When sewn, the wedge closes, pulling the fabric edges together and releasing the surplus as a smooth, three-dimensional curve.
Consider a bodice front pattern for a fitted blouse. The bust dart typically originates at the side seam, about two inches below the armhole, and angles toward the bust apex—the fullest point of the bust. The dart’s width at the base (where it meets the side seam) might be 1.5 inches, tapering to nothing at the apex. When the sewer stitches from the base to the point and presses the excess toward the center front, the flat paper transforms: the area over the bust now curves outward to match the body’s contour, while the fabric above and below the dart lies flatter against the torso.
Without this dart, the same bodice front would either strain across the bust or hang loosely, creating unsightly wrinkles. The dart does not merely shape fabric—it resolves a geometric mismatch between the flat pattern and the rounded body. As M. Stitch often annotates in fitting diagrams:
“The dart is not decoration. It is the solution to a volume problem.”
This principle extends beyond the bust. A waist dart in a skirt or trousers removes excess fabric above the hips to create a smooth transition from waist to hip. A contour dart at the back of a jacket shoulder accommodates the curve of the upper back. In each case, the dart’s direction and width are calculated to match the body’s topography, turning a flat expanse into a tailored fit.
The Role of Ease: Movement and Comfort
Ease is the intentional difference between body measurements and garment measurements. It exists in two forms: wearing ease and design ease. Wearing ease is the minimum amount of space required for basic movement and comfort—typically 2 to 4 inches at the bust, 1 to 2 inches at the waist, and 2 to 3 inches at the hips for woven fabrics. Design ease, by contrast, is stylistic; it creates the garment’s silhouette, whether close-fitting, relaxed, or voluminous.
A pattern’s flat shape reveals how ease is distributed. Take a simple t-shirt block: the front and back pieces are nearly identical rectangles, slightly wider than the bust measurement to accommodate wearing ease across the chest and back. The side seams are straight, and there are no darts—this simplicity reflects the garment’s relaxed, casual intent. Now compare it to a fitted bodice: the side seams curve inward at the waist, and bust and waist darts shape the fabric to the body. The flat pieces are no longer symmetrical; they are sculpted to reduce excess where the body curves and retain it where movement is needed.
Ease also affects drape. In a bias-cut skirt, the fabric’s natural stretch at a 45-degree angle allows it to cling and flow, so less ease is built into the pattern. The same skirt cut on the straight grain would require more ease to achieve a similar fluidity, as the fabric lacks inherent stretch in that direction. M. Stitch notes this interplay in a draped evening gown pattern:
“Ease isn’t just added—it’s balanced against the grain’s behavior. Work with the fabric, not against it.”
Understanding ease helps the sewer anticipate fit before cutting. If a pattern feels too tight in the flat, it likely lacks sufficient wearing ease. If it billows excessively, the design ease may be greater than intended. By measuring the flat pattern and comparing it to body measurements—plus the desired ease—the sewer can predict whether the garment will feel snug, comfortable, or loose.
Comparing Fitted and Relaxed Silhouettes
The difference between a fitted and a relaxed garment is often visible in the pattern’s silhouette. A fitted bodice, such as that of a sheath dress, shows pronounced shaping: side seams that curve significantly inward at the waist, bust and waist darts that remove fabric to follow the body’s contours, and possibly a back dart or princess seams for additional shaping. The flat pieces are narrow at the waist and flare gently over the bust and hips, mirroring the body’s natural curves.
In contrast, a relaxed silhouette—like that of a shift dress or an oversized shirt—shows minimal shaping. Side seams are straight or slightly flared, darts are absent or minimal, and the pattern pieces maintain a consistent width from chest to hem. The fabric skims or hangs away from the body, relying on design ease for its look rather than contouring seams.
Consider two sleeve patterns: one for a fitted blazer and one for a loose linen top. The blazer sleeve tapers from shoulder to wrist, with a slight curve at the elbow to accommodate bending. The linen top sleeve, however, is nearly rectangular, with uniform width and minimal taper. The blazer’s shaping allows it to follow the arm’s taper; the linen sleeve’s looseness provides comfort and a casual drape.
These visual differences in the pattern directly forecast the garment’s behavior. A sewer who reads the flat shape can anticipate not only how the garment will fit but also how it will move—whether it will bind at the elbow, pull across the bust, or flow freely in the wind.
Using Draping Principles to Predict Shape
Draping—the process of molding fabric directly on a dress form—offers insight into how flat patterns translate to form. Though not all sewers drape, understanding its principles aids in visualizing pattern transformation. Key among these is the concept of grain alignment and how fabric responds to tension and release.
When a dart is sewn, the fabric along the dart legs experiences tension as it is pulled together, while the area over the apex releases into a curve. This mirrors draping, where excess fabric is pinned out to create smoothness over a prominence. Similarly, ease distributed across the back of a garment allows the fabric to drape softly over the shoulder blades, just as it would on a form.
A sewer can use this mindset to evaluate a pattern before cutting. Lay the bodice front flat and imagine pulling the dart closed: does the paper buckle or lie smooth? If it buckles, the dart may be too wide or poorly angled. Now imagine the side seam sewn: does the waist curve inward naturally, or does it require forcing? These mental simulations help identify fit issues early.
M. Stitch often uses annotated cross-sections in his teachings to illustrate this. In one example, he shows a flat bodice pattern with a bust dart, then draws a semi-transparent overlay of the expected 3D shape:
“See how the dart closes like a purse string? That’s where the curve is born.”
By training the eye to see volume in line and angle, the sewer moves beyond replication to anticipation. The pattern becomes a predictive tool, not just a template.
Try This
This week, take a simple bodice or skirt pattern you’ve used before and analyze it for shape and intent:
- Identify all darts: note their location, width, and direction. Sketch how you believe they will shape the fabric when sewn.
- Measure the pattern’s bust, waist, and hip measurements (at the seam line, not the cutting line). Compare them to your body measurements, adding 2.5 inches of wearing ease at the bust and hips and 1 inch at the waist. Does the pattern match? If not, where is it off?
- Lay the front and back pieces side by side. Observe the side seams: are they straight, curved, or tapered? What does this suggest about the garment’s silhouette—fitted, relaxed, or somewhere in between?
Key Takeaways
- Darts remove excess fabric in a controlled way to create curves that match body contours, transforming flat pattern pieces into three-dimensional shape.
- Wearing ease ensures comfort and movement; design ease defines the garment’s silhouette; both are visible in the pattern’s flat dimensions.
- Fitted garments show shaping through curved seams and darts; relaxed silhouettes rely on straight lines and minimal shaping for their look.
- Visualizing how fabric will behave when darts are closed and seams are joined helps predict fit and anticipate adjustments before cutting.
Chapter 2
Pattern Alteration Fundamentals
Length Adjustments: Shortening and Lengthening
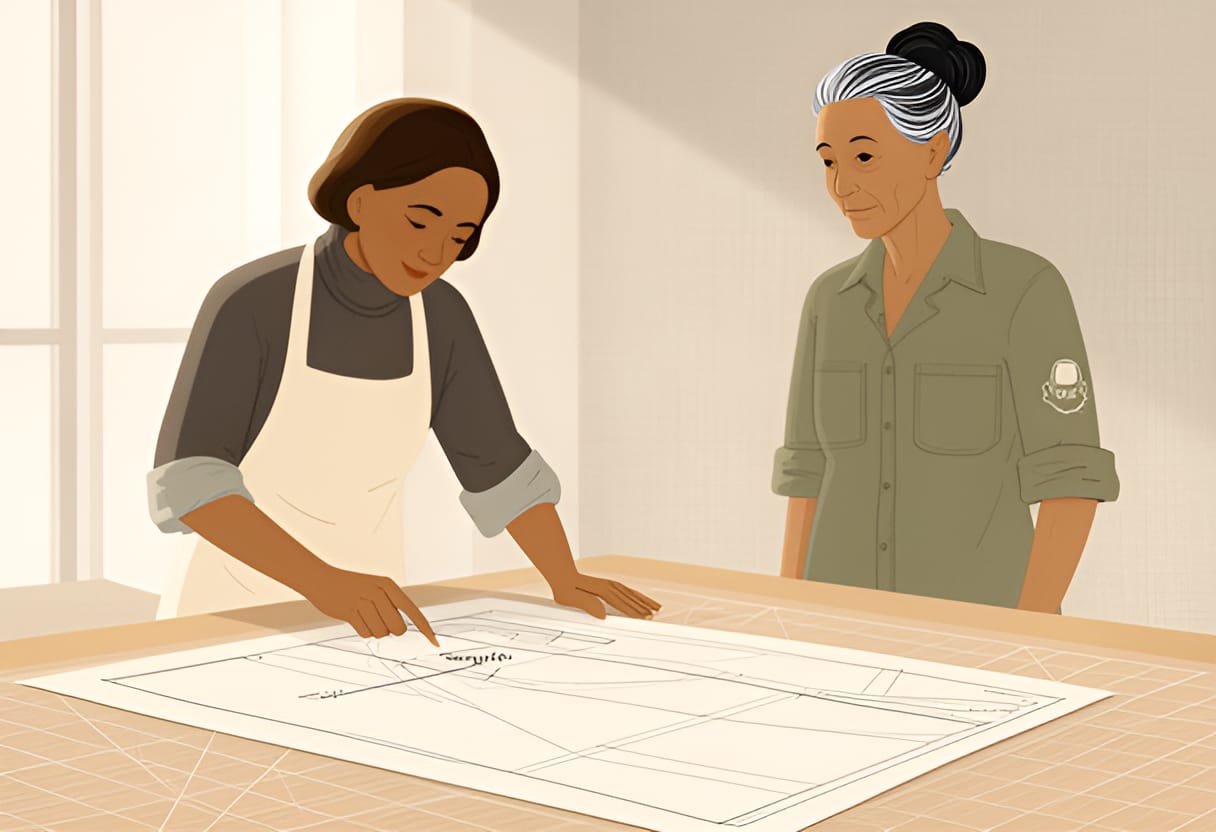
The pattern lies flat on the table, its edges crisp and its lines clear, yet something feels off. Perhaps the hem rides too high on a favorite skirt, or a sleeve ends mid-forearm when it should brush the wrist. These small frustrations are common, and they often stem not from poor sewing, but from a mismatch between the pattern’s length and the body it’s meant to fit. Fortunately, adjusting length is one of the most straightforward alterations a sewer can learn—provided it’s done in the right place and with the right technique.
Identifying Lengthen/Shorten Lines
Most commercial patterns include built-in guides for length adjustments, marked clearly as lengthen or shorten lines. These are typically double lines placed parallel to the grainline, often found at logical points along a pattern piece where adding or removing length won’t disrupt the garment’s design. On a pant leg, they might appear below the crotch and above the knee; on a sleeve, near the bicep and elbow; on a bodice, at the waist or just below the bust.
These lines are not arbitrary. They sit in areas where the fabric hangs straight or flows uniformly—zones that can absorb length changes without distorting curves, darts, or style details. Altering here preserves the intended silhouette while achieving a better personal fit. If a pattern lacks these marks, the sewer can add them, but only after studying the piece to find a suitable location—ideally midway between two structural elements, such as between the hip and knee on a skirt, or between the underarm and waist on a bodice.
M. Stitch often reminds readers that the grainline is the anchor. “Never slash across it,” he advises in a margin note beside a diagram of a trouser leg. “Lengthen or shorten only on grain, so the fabric hangs true.” This ensures that any change maintains the fabric’s natural drape and prevents twisting or skewing after construction.
Slash and Spread for Adding Length
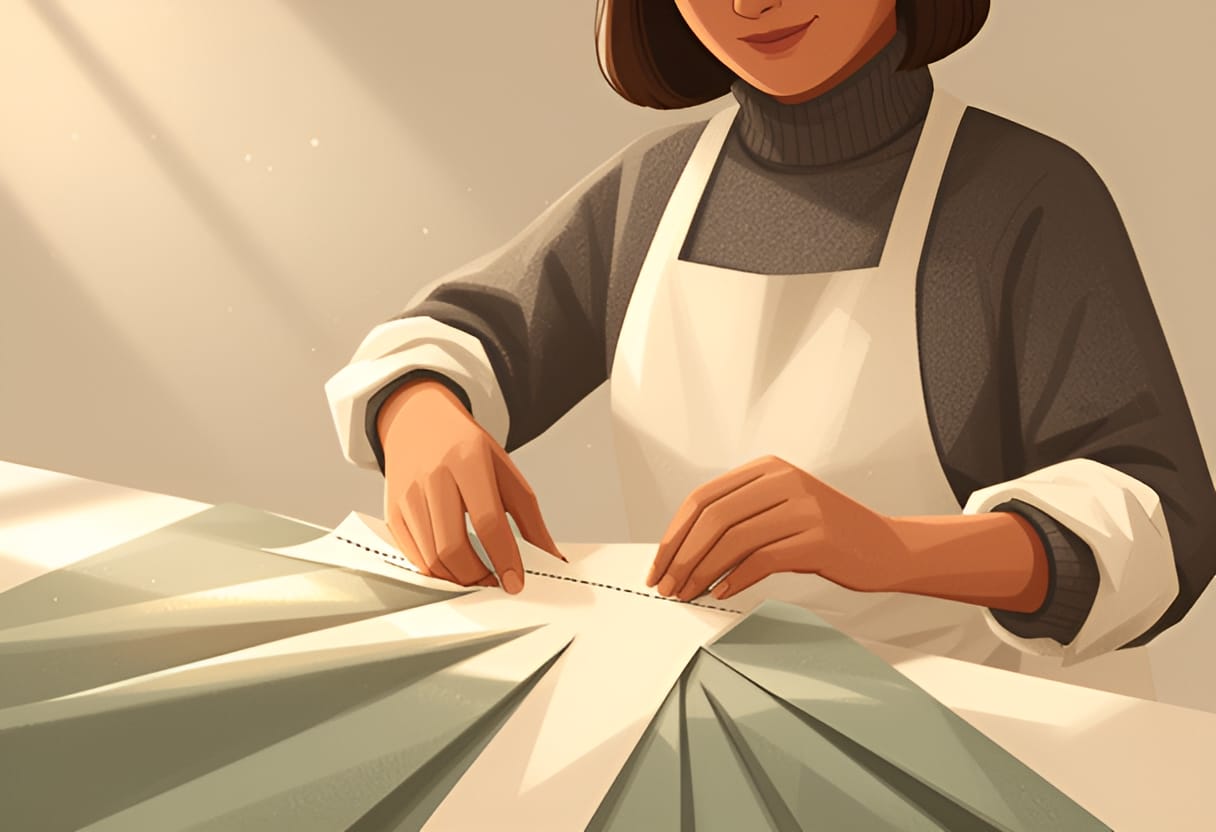
To lengthen a pattern piece, the slash and spread method is used. First, cut along the lengthen/shorten line from one edge to the other, stopping just short of the opposite edge to create a hinge. This allows the two halves to pivot apart like a door opening. Then, place a strip of pattern paper beneath the gap and secure it with tape. The amount of spread determines how much length is added—say, 1.5 inches for a taller torso or longer legs.
Once spread, the grainline must be realigned. Draw a new grainline through the center of the added strip, parallel to the original edges, to maintain proper fabric alignment. Next, true the edges: use a ruler or curved tool to redraw the cutting and seam lines so they flow smoothly across the adjustment, with no jogs or sharp angles. This step is vital—it ensures the pattern will cut and sew without puckering or distortion.
Consider a reader adjusting a simple A-line skirt. The pattern calls for a length of 22 inches, but she needs 25 inches to hit mid-calf. She identifies the lengthen/shorten line just above the hem, cuts along it, and spreads the pieces 1.5 inches apart. After taping in a paper strip, she redraws the side seam as a gentle, continuous curve from hip to hem. The grainline runs straight down the center, unchanged in direction but now spanning the longer piece. When sewn, the skirt hangs evenly, with no pull at the waist or flare at the hem—just the intended A-shape, scaled to her height.
Overlap Technique for Removing Length
Shortening follows the reverse process. After cutting along the lengthen/shorten line, the two halves are overlapped instead of spread. The amount of overlap equals the length to be removed—for example, 1 inch taken off a sleeve that runs too long. The pieces are secured with tape, and the grainline is redrawn through the center of the overlap, maintaining its original angle and position.
As with lengthening, the edges must be trued. The cutting and seam lines are blended across the overlap to eliminate any abrupt changes in shape. This is especially important on curved edges like a princess seam or a rounded hem, where even a small misalignment can create a visible bump or dip when sewn.
Imagine a reader shortening a child’s jacket sleeve. The pattern is sized for an older child, but she’s making it for a younger one. She locates the lengthen/shorten line just above the cuff, cuts along it, and overlaps the pieces by 2 inches. After taping, she redraws the sleeve edge as a smooth curve that matches the original cuff shape, now positioned higher up the arm. The grainline runs true from shoulder to cuff, and when the sleeve is set in, it bends naturally at the elbow with no excess fabric pooling or restriction.
Preserving Style Integrity
Not all places on a pattern are safe for length adjustment. Altering too close to a dart, pocket, notch, or design detail can shift their position, break a motif, or distort a seam’s intended curve. For example, lengthening a bodice just below the armhole might push the bust dart too low, misaligning it with the fullest part of the chest. Similarly, shortening a pant leg above the knee could bring a decorative seam or topstitching line into an awkward position, disrupting the visual balance.
The key is to respect the pattern’s architecture. Lengthen or shorten only in the “plain” zones—areas between major design elements where the silhouette is uninterrupted. When in doubt, test the change with a muslin or use quarter-scale pattern paper to simulate the effect before cutting fashion fabric.
M. Stitch includes a comparison table in his workshop handouts to help sewers evaluate alteration points:
| Alteration Location | Preserves Style Lines? | Risk of Distortion | Best For |
|---|---|---|---|
| Mid-thigh on pant leg | Yes | Low | Height adjustments |
| Below bust on bodice | Yes, if above dart | Medium | Torso length |
| Above elbow on sleeve | Yes | Low | Arm length |
| Just below armhole | No | High | Avoid—alters dart placement |
| Across a curved hip line | No | High | Avoid—distorts silhouette |
This kind of analysis turns alteration from a guesswork task into a reasoned decision. By understanding where changes will and won’t affect the design, the sewer gains control—not just over fit, but over the garment’s final expression.
The ability to adjust length is more than a technical skill; it’s a gateway to confidence. Once a sewer knows how to lengthen or shorten without compromising the pattern’s intent, she begins to see the flat piece not as a rigid template, but as a responsive framework—one that can be shaped, within limits, to honor both the designer’s vision and her own unique form. That mindset carries forward into every alteration to come.
Width Adjustments: Letting Out and Taking In
Width adjustments address how a garment fits around the body, responding to excess fabric or tightness at key points. Unlike length changes, which often occur along straight, uninterrupted zones, width alterations must consider the body’s three-dimensional shape and how darts, seams, and style lines interact. The goal is to add or remove fabric symmetrically while preserving the pattern’s balance and design intent.
M. Stitch emphasizes that width changes are rarely uniform across the entire piece. A tight waist may need letting out at the side seams, while excess fabric at the hip might require taking in. These decisions depend on where the fit issue occurs and what structural elements are available for adjustment.
Adjusting Side Seams for Uniform Change
The side seam is the most common location for width adjustments because it runs vertically along the body and often offers ample seam allowance for letting out or taking in. When a garment is too tight or too loose evenly around the torso—such as a blouse that pulls across the bust or a dress that gaps at the waist—the side seam provides a straightforward path for correction.
To let out a side seam, measure the total amount needed, divide it equally between the left and right sides, and mark that distance outward from the original seam line. For example, if a bodice is 2 inches too tight across the bust, add 1 inch to each side seam. Cut along the original seam line, spread the pieces, and insert a paper strip of the calculated width. Retape the grainline if it crosses the adjustment zone, then true the edges by redrawing the cutting and seam lines to ensure a smooth transition.
Taking in follows the reverse process. If a skirt is 3 inches too large at the waist, remove 1.5 inches from each side seam. Overlap the pattern pieces by that amount, secure them, and redraw the waist and hip curves to maintain continuity. M. Stitch warns against over-trimming seam allowance—always check that enough remains for sewing and future alterations.
Illustration
A bodice pattern piece showing the original side seam, a 1-inch outward spread on both left and right sides for letting out, and revised seam lines drawn smoothly from armhole to waist. Grainline remains vertical and centered.
This method works best when the fit issue is distributed evenly. However, if tightness or looseness is concentrated in one area—such as the bust or waist—adjusting only the side seam can distort the silhouette. In such cases, dart modification offers a more precise solution.
Modifying Darts for Contour-Specific Fit
Darts shape fabric to the body’s curves, so altering them allows for contour-specific width changes without affecting the overall silhouette. A dart that is too narrow creates pulling or horizontal wrinkles; one that is too wide results in excess fabric or gaping. Adjusting dart width changes how much fabric is suppressed or released at a specific point, such as the bust, waist, or hip.
To increase dart width—for example, to accommodate a fuller bust—measure the needed addition, divide it equally between the two dart legs, and mark that distance outward from each leg at the dart base. Cut along the dart legs, spread the pieces, and insert paper to create a wider dart. Redraw the dart point to maintain its original length, then true the seam lines from the dart point to the dart base and beyond.
To decrease dart width—for a flatter bust or narrower waist—overlap the dart legs by half the desired reduction on each side. Secure the overlap, redraw the dart legs to converge at the original dart point, and true the surrounding seams. M. Stitch reminds readers that altering dart width shifts the dart’s effective position slightly; if the dart point moves too far from the apex, the shaping will misalign with the body’s curve.
Illustration
A bust dart showing original legs, a 0.5-inch outward spread on each leg to increase width, and revised dart shape with the same point but wider base. Seam lines are smoothed from side seam to dart tip.
This technique preserves the garment’s style lines because it alters fit without changing seam placement. It is especially useful for garments with design details—like princess seams or color blocking—that should not be shifted.
Altering Center Front or Back Seams
Center front and center back seams offer adjustment opportunities when side seams and darts are insufficient or would disrupt design symmetry. These seams are particularly valuable for addressing posture-related fit issues, such as swayback or rounded shoulders, where the body’s shape requires more fabric in one area and less in another.
For example, a swayback alteration often involves taking in the center back waist to reduce excess fabric while letting out the center back lower spine to accommodate the curve. This creates a subtle wedge shape that follows the body’s natural contour. The process begins by marking the adjustment amounts on the pattern, cutting along the center seam, and either overlapping or spreading the pieces accordingly. After securing the change, the grainline must be re-established if it crosses the seam, and all edges trued to ensure smooth transitions.
M. Stitch notes that center seam adjustments affect the garment’s symmetry and should be made in equal but opposite amounts on left and right sides—such as taking in 0.5 inch at the waist and letting out 0.5 inch at the hip on both center back halves—to maintain balance. He also cautions against altering center front on garments with zippers, buttons, or appliqués, as it can disrupt closures or motifs.
Illustration
A center back pattern piece showing the original waist and hip curves, a 0.5-inch inward taper at the waist and a 0.5-inch outward flare at the lower spine, with revised seams drawn to create a smooth, swayback-accommodating shape.
These adjustments are less common than side seam or dart changes but become essential when fitting complex postures or adapting patterns for non-standard figures.
Balancing Left and Right Adjustments
Symmetry is critical in garment construction. Even when a fit issue appears on only one side of the body—such as a higher hip or uneven shoulders—adjustments should be mirrored on both sides unless the asymmetry is intentional or accommodated through other means, such as adjustable straps or removable pads.
For example, if a reader identifies that the right side of her waist is 0.5 inch larger than the left due to posture, she should not take in only the right side seam. Doing so would shift the side seam off-center, cause twisting, and create uneven drape. Instead, she should take in 0.25 inch from each side seam to remove the total excess while keeping the seam centered.
The same principle applies to dart adjustments. If one bust dart needs to be wider than the other, the difference should be addressed through dart rotation or repositioning—not by altering one dart in isolation. M. Stitch uses a simple rule: alter both sides equally unless the pattern is deliberately asymmetrical. This preserves the garment’s hang and prevents torque in the fabric.
To check symmetry, fold the pattern vertically along the center front or center back and compare corresponding points. Notches, dart points, and seam intersections should align. Any discrepancy signals an imbalance that must be corrected before cutting fabric.
By mastering width adjustments—whether at the side seam, dart, or center seam—readers learn to respond to fit with precision and purpose. Each technique builds on the last, forming a toolkit that transforms flat pattern pieces into garments that honor both the body’s shape and the designer’s line.
Pivot Method for Dart Manipulation
The pivot method allows a sewer to move a dart from one location to another without changing the garment’s fit or shaping. Unlike slash and spread or overlap techniques, which alter the amount of fabric, the pivot method redistributes existing dart volume by rotating it around a fixed point—the bust apex. This preserves the dart’s value, meaning the total amount of shaping remains constant while its direction changes. The technique is essential for adapting patterns to different design styles, such as converting a basic waist dart into a French dart, shoulder dart, or armhole dart, while maintaining the intended silhouette.
M. Stitch emphasizes that the pivot point must always be the apex of the curve the dart is meant to shape—for a bust dart, this is the fullest part of the bust. Moving the dart away from this point without adjustment would misalign the shaping with the body, causing wrinkles or poor fit. The pivot method ensures the dart continues to radiate from the correct anatomical landmark, even as its legs shift to a new seam line.
Closing the Original Dart and Opening the New One
To pivot a dart, begin by identifying the dart’s value—the amount of fabric taken up by the dart when closed. This is measured as the distance between the dart legs at the base, perpendicular to the grainline. For example, a standard waist dart might have a 1.5-inch wide base. This value must be conserved when the dart is moved.
Next, draw a line from the dart point to the bust apex—the pivot point. Then, draw a second line from the apex to the desired new dart location, such as the shoulder seam or armhole. Cut along the original dart legs up to the dart point, but do not cut through the apex. Instead, close the original dart by overlapping the legs and securing them with tape. This releases the dart’s value as a pivotable wedge.
Now, place a second piece of paper under the pattern where the new dart will open. Keeping the apex anchored, rotate the pattern piece until the original dart legs are aligned, opening a space at the new dart location equal to the original dart value. Insert paper to fill this gap, then redraw the new dart legs from the apex to the edge of the inserted paper. The dart point remains at the apex; only its base shifts.
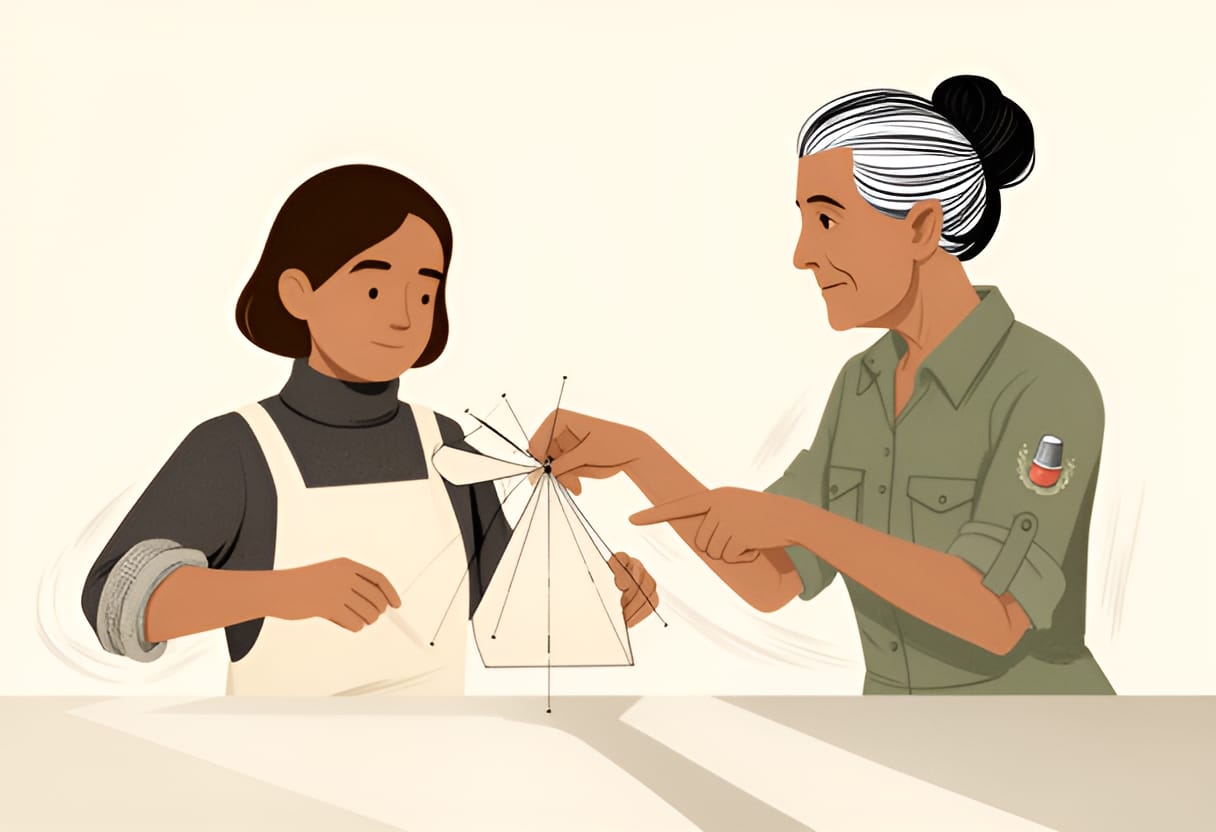
For instance, converting a 1.5-inch waist dart to a shoulder dart requires closing the waist dart, pivoting the piece around the apex until the waist dart is sealed, and opening a 1.5-inch space at the shoulder. The new shoulder dart will have the same depth and shaping effect as the original, but its exit point is now at the shoulder seam rather than the waist.
Illustration
A waist dart being pivoted to the shoulder. The original dart legs are taped closed at the waist, the pattern rotates around the bust apex, and a 1.5-inch gap opens at the shoulder, filled with paper to form a new shoulder dart. Dart point remains fixed at the apex.
Trueing the Pattern After Pivoting
After inserting the new dart, the seam lines must be trued to ensure smooth transitions and accurate stitching. The dart legs may not align perfectly with the seam edge after pivoting, especially if the new dart exits at a curve like the armhole or neckline. Use a French curve or flexible ruler to redraw the seam line from the dart point to the seam intersection, creating a gradual, natural flow.
Check that the seam length remains unchanged on both sides of the dart. If the new dart alters the edge length—for example, by making the shoulder seam longer—adjust the opposing seam or ease the difference during sewing. In most cases, the pivot method conserves seam length because the dart value is simply redirected, not added or removed.
M. Stitch advises truing the dart legs themselves: they should be straight lines from the apex to the base, or slightly curved if following a contour like the bust. Avoid angular breaks at the dart point, which can cause puckering. Instead, blend the dart legs into the seam over a 1/4- to 1/2-inch distance for a professional finish.
For example, when pivoting a waist dart to create a French dart that exits at the side seam near the bust, the new dart leg may cross the original side seam at an angle. Truing involves redrawing the side seam to sweep smoothly from the waist to the armhole, incorporating the dart leg as part of the shaping curve rather than a sharp interruption.
Common Dart Conversions and Their Applications
The pivot method enables several standard dart transformations, each suited to different garment styles and fitting needs.
Converting a waist dart to a side seam dart increases shaping at the hip and is useful for fitted skirts or dresses where waist definition is desired without bulk at the front. The dart value is transferred from the waist to the side, often creating a more flattering line for curvier figures.
A waist-to-shoulder dart conversion creates a shoulder dart that lifts the bust and improves fit in the upper chest. This is common in tailored jackets and blouses, where shoulder darts provide upward shaping that complements neckline adjustments. The pivot must originate at the bust apex, and the new dart typically ends at the shoulder seam, 1 to 2 inches from the neck.
Converting a waist dart to an armhole dart—sometimes called a French dart when it angles toward the bust—enhances fit in the bicep and upper arm while maintaining waist suppression. This technique is valuable in sleeveless garments or those with set-in sleeves, where armhole shaping affects sleeve cap fit.
Each conversion follows the same steps: close the original dart, pivot at the apex, open the new dart to match the original value, and true the edges. The choice of destination depends on the design goal—whether to emphasize the waist, lift the bust, or ease tension across the chest or back.
Illustration
Three pattern transformations from a single waist dart: (1) pivoted to side seam for hip contouring, (2) pivoted to shoulder for bust lift, (3) pivoted to armhole for upper arm ease. All retain the same dart value and apex.
By mastering the pivot method, readers gain the ability to reshape a pattern’s internal lines to match both body and design intent. The dart’s value becomes a movable asset, not a fixed feature, allowing for greater creativity and precision in garment adaptation. This technique bridges the gap between basic fitting and true pattern manipulation, setting the stage for more complex alterations in the sections to come.
The Layered Approach to Complex Fit Adjustments
When a garment requires changes in multiple areas—such as length, width, and contour—making adjustments in the correct sequence prevents cascading errors. Altering vertical measurements first establishes the garment’s foundational proportions. Only after length is corrected should horizontal and contour changes be addressed. This order respects how the body’s dimensions relate: a swayback adjustment, which adds length to the center back, must precede taking in the side seams or adjusting the bust, as those changes rely on the garment’s vertical alignment.
Consider a pattern for a fitted bodice that needs three simultaneous changes: a swayback adjustment to eliminate fabric pooling at the lower back, a full bust alteration to accommodate a larger cup size, and a narrow shoulder adjustment to prevent gaping at the neckline. Starting with the swayback ensures the back length matches the body’s curve before width is taken in at the sides. If the side seams were narrowed first, the swayback adjustment might later require letting them out again, wasting effort and risking over-correction.
Each adjustment should be made on a separate copy of the pattern piece or clearly marked on a working version. After each change, the edges are trued and the grainline re-established if disturbed. This incremental approach allows the sewer to isolate the effect of each edit and verify fit before proceeding.
Illustration
A bodice pattern piece showing three stages of alteration: (1) original pattern with swayback pin, (2) same piece after swayback adjustment—length added to center back with a wedge insert, (3) after full bust adjustment—slash and spread at the bust apex, (4) after narrow shoulder adjustment—shoulder seam tapered and dart rotated toward the neck. Each stage is labeled with the change made and the date.
Tissue Fitting as a Validation Step
Before cutting fashion fabric, tissue fitting provides a low-risk way to test the altered pattern. The sewer bastes the adjusted pattern pieces together using lightweight tissue or muslin, leaving seam allowances unpressed and darts unstitched. The garment is then tried on, inside out, to assess fit at key points: the waistline, bust apex, shoulder seam, and center back.
During the fitting, pins mark areas that still need adjustment. For example, if the swayback alteration was insufficient, a horizontal fold will appear just above the waistline at the center back. If the bust is still tight, horizontal strain lines will radiate from the apex. If the shoulders gap, the neckline will pull away from the body. These visual cues guide the next round of changes, which are made directly on the tissue or transferred back to the paper pattern.
Tissue fitting also reveals unintended consequences. Lengthening the center back for swayback might cause the armhole to drop slightly; taking in the side seams for a full bust might create excess fabric under the arm. Catching these issues in tissue prevents costly mistakes in fashion fabric.
M. Stitch recommends using contrasting thread for basting so stitches are easy to remove and adjust. He also advises marking the tissue with the same symbols used on the pattern: notches for matching, dots for dart points, and arrows for grainline. This consistency makes transferring successful changes back to the pattern straightforward.
Documenting Changes for Future Use
Every alteration should be recorded directly on the pattern piece with clear, standardized labels. Instead of vague notes like “made bigger,” the sewer writes the specific change, its location, and the date. For example: “Swayback +1.5” at CB, 4/5/24” or “FB +1” at bust apex, tapered to side seam, 4/5/24.” This creates a personal reference library that speeds up future projects.
When multiple changes coexist, each is labeled separately but viewed in relation to the others. A pattern might show:
| Adjustment Type | Location | Amount | Date | Notes |
|---|---|---|---|---|
| Swayback | Center back | +1.5" | 4/5/24 | Added as wedge, grainline realigned |
| Full bust | Bust apex | +1.0" | 4/5/24 | Slash and spread, dart value unchanged |
| Narrow shoulder | Shoulder seam | -0.75" | 4/5/24 | Seam tapered, dart rotated to neck |
This table-style annotation keeps information scannable while preserving detail. Over time, the sewer begins to recognize patterns in their own fit needs—such as consistently requiring a swayback and full bust together—and can apply those insights to new designs without starting from scratch.
Documentation also aids in reproducing garments. If a sewer loves the fit of a particular blouse, the annotated pattern becomes the blueprint for making another in a different fabric. Without such notes, achieving the same result relies on memory alone, which fades or distorts over time.
Try This
This week, select a simple bodice or skirt pattern that you’ve sewn before but never altered.
- Identify one fit issue you’ve noticed—such as a waistband that gaps or a hem that’s too long.
- Make a single adjustment using the appropriate method (lengthen/shorten line, slash and spread, or pivot).
- Tissue fit the result, mark any remaining issues, and try on the garment in fashion fabric to compare the before and after.
Repeat the process with a second issue, but this time apply the adjustment to the already-altered pattern. Observe how the first change influences the second, and note whether the sequence mattered.
Key Takeaways
- Adjust vertical measurements (length) before horizontal or contour changes to maintain proportional integrity.
- Tissue fitting reveals fit issues and unintended side effects before cutting fashion fabric.
- Label every alteration with its type, location, amount, and date to build a reusable fit reference.
- Common combinations like swayback, full bust, and narrow shoulder adjustments are best addressed in sequence, with re-truing after each step.
- The pivot and slash-and-spread methods remain reliable even when layered, as long as each change is made deliberately and checked for accuracy.
The process of layering adjustments becomes intuitive with practice, but it begins with deliberate, mindful editing. Each change should be treated as a conversation between the pattern and the body: the sewer listens to where the fabric strains or gaps, responds with a precise alteration, then checks the response before speaking again. This iterative dialogue prevents overcorrection and builds confidence in interpreting the body’s unique geometry.
For instance, after completing a swayback adjustment that adds length to the center back, the sewer might notice that the side seams now feel slightly tighter at the hip, not because the hips are large, but because the added back length has shifted the side seam forward relative to the body’s plane. This is not a new fit issue but a consequence of the first change. Addressing it requires letting out the side seam just enough to restore balance—not to accommodate width, but to realign the garment’s orientation. Documenting this as a “post-swayback side seam ease adjustment” clarifies intent and prevents mislabeling it as a hip alteration.
Similarly, a full bust adjustment that adds width at the apex may cause the armhole to feel restrictive if the sleeve cap was not also adjusted. In such cases, the sewer might need to slightly reduce the sleeve cap height or alter the underarm curve to maintain comfort and mobility. These secondary edits are not failures of the primary adjustment but natural companions to it, reflecting the interconnected nature of garment geometry.
M. Stitch often reminds readers that perfection is not the goal—harmony is. A garment does not need to eliminate every wrinkle or gap to fit well; it needs to move with the body, accommodate posture, and feel intentional. Sometimes, a small ease at the waist or a subtle fullness at the upper back contributes more to comfort and appearance than a perfectly smooth line would.
The true value of mastering combined adjustments lies not in memorizing sequences but in developing a mental framework for diagnosing fit. Over time, the sewer learns to distinguish between cause and effect: whether a tight shoulder seam is due to narrow shoulders, a forward head posture, or an overly long center back pulling the neckline down. This diagnostic skill transforms pattern alteration from a mechanical task into a responsive, creative act—one that honors both the technical blueprint and the living form it clothes.
Chapter 3
Advanced Pattern Applications
Combining Pattern Elements: Mixing Sleeves, Collars, and Skirts
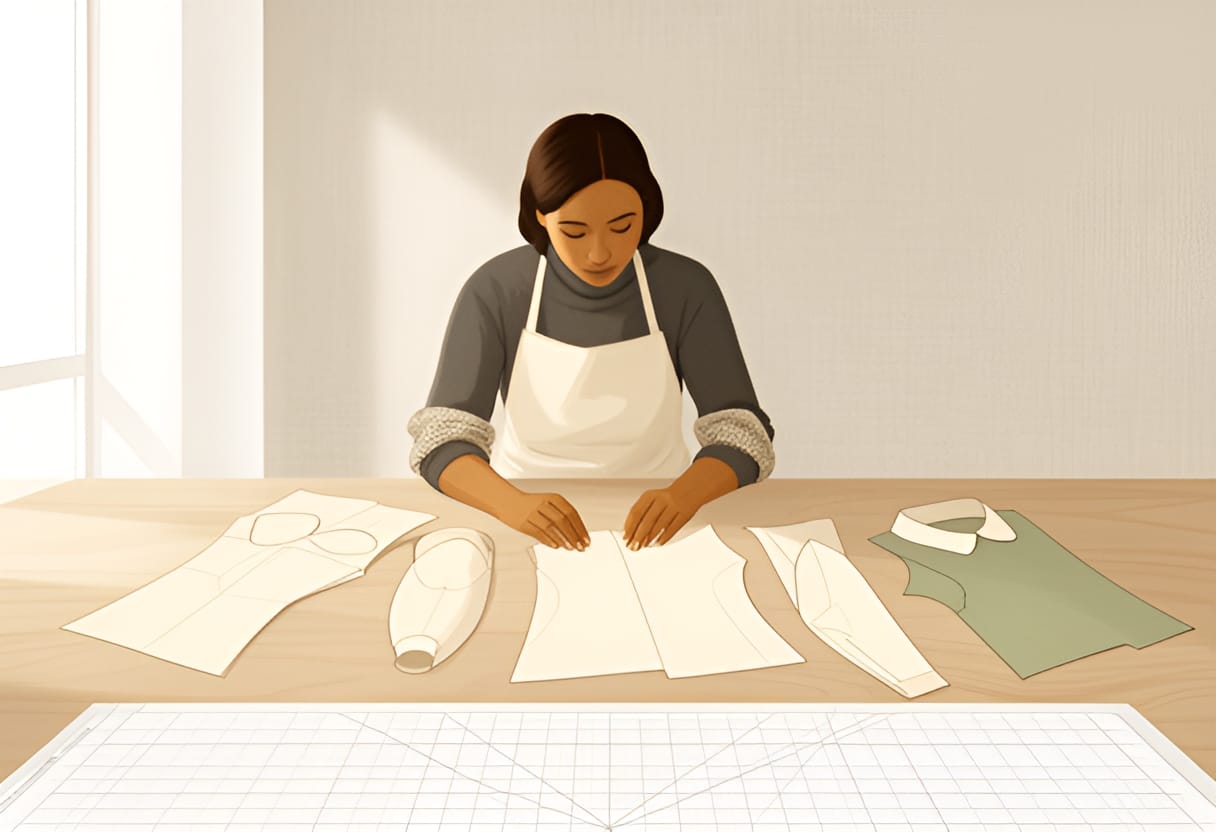
The Reader stands before a stack of pattern pieces: a fitted bodice block, a sleeve with a pronounced cap, and a Peter Pan collar. Each was drafted for a different garment, yet the idea of combining them sparks curiosity. Can these elements truly work together, or will the seams refuse to align? This question opens Chapter 3, where the focus shifts from altering single patterns to intentionally combining distinct components into cohesive designs. Building on the alteration techniques from Chapter 2, this section introduces a systematic approach to mixing sleeves, collars, and skirts by understanding their structural relationships.
Armhole Shape and Sleeve Compatibility
The armhole is the critical junction where sleeve and bodice meet, and its shape dictates which sleeve types can be successfully attached. A set-in sleeve requires an armhole with a gentle curve that matches the sleeve cap’s height and width, allowing ease to be distributed evenly for smooth movement. In contrast, a raglan sleeve extends from the collar to the underarm, eliminating the traditional armhole seam; instead, it relies on diagonal seams from neckline to armhole, which means the bodice must have a neckline that accommodates this diagonal join. A kimono sleeve, cut as one with the bodice, needs no separate armhole seam at all—its width is built into the bodice’s side and underarm, requiring a deep, wide armhole curve to allow ease of motion.
Consider a bodice block designed for a set-in sleeve. Its armhole curve is relatively deep and narrow, with a pronounced notch at the shoulder seam to match the sleeve cap’s peak. To adapt this block for a raglan sleeve, the Reader must redraw the armhole and shoulder seam into a single diagonal line from neckline to underarm, removing the set-in notch and adjusting the curve to allow fabric to drape smoothly along the bias. For a kimono sleeve, the side seam and underarm are extended outward, and the armhole is reshaped into a wide, shallow curve that begins at the neckline and flows into the side seam, eliminating any distinct armhole notch. In each case, the armhole must be trued—its curve smoothed and balanced—after alteration to prevent twisting or puckering when sewn.
M. Stitch often reminds the Reader: “The armhole is not just a hole; it’s a functional joint. Treat it like a hinge—its shape must support motion, not fight it.” This mindset shift helps the Reader see beyond tracing lines and toward understanding how fabric behaves at stress points.
Neckline Finish and Collar Integration
Once the armhole and sleeve are compatible, the neckline becomes the next focal point. The method of finishing the neckline—whether with a facing, binding, or attached collar—depends on the neckline’s shape and the desired edge treatment. A facing, cut from the same fabric as the garment, works best for curved or irregular necklines like a sweetheart or V-neck, where a clean, invisible finish is desired. Binding, a strip of fabric folded over the raw edge, suits straight or gently curved necklines such as a crewneck or square neck, offering durability and a decorative touch. Collar attachment, however, requires the neckline to match the collar’s base shape precisely; a Peter Pan collar needs a rounded, shallow neckline, while a Mandarin collar demands a narrow, vertical edge with minimal curve.
Imagine adapting a basic bodice block with a round neckline to accept a shirt-style collar. The Reader must first true the neckline after any alterations, ensuring it is a smooth, continuous curve. Then, using the collar pattern as a guide, they measure the neckline’s length and compare it to the collar’s inner edge. If the collar is designed to stand, a small amount of ease (typically 3/8 to 1/2 inch) is added to the neckline to allow the collar to roll properly. For a flat collar like a Peter Pan, the neckline and collar edge should match exactly in length, with notches placed at center front, center back, and shoulder seams to align the pieces during sewing. After sewing, the seam allowance is trimmed and graded, and the neckline is pressed flat or toward the collar, depending on the design.
A figure would help here: [FIGURE: A side-by-side comparison of three neckline finishes—facing, binding, and attached collar—on identical round necklines, showing how each method affects the edge appearance and internal structure.]
Truing Joined Seams After Combination
After altering pattern pieces to combine elements, the seams where they meet must be trued to ensure they sew together smoothly. Truing involves checking that seam lines match in length and shape, that notches align correctly, and that any excess fabric or gaps are resolved before cutting. This step is especially important when combining independently drafted blocks, as even small discrepancies can accumulate and cause fitting issues.
For example, when attaching a raglan sleeve to a modified bodice, the Reader first sews a basting stitch along the seam line to test the fit. If the sleeve pulls or gaps appear, they adjust the seam line by either taking in or letting out fabric, then redraw the stitching line on both pieces. Notches are added or relocated to mark key points—such as the shoulder apex or underarm—ensuring that during sewing, the pieces can be matched accurately. The seam allowance is then checked for consistency; if one piece has a 5/8-inch allowance and the other 1/2 inch, the Reader trims the wider one to match or notes the difference for adjustment during sewing.
M. Stitch advises: “Trueing is not about perfection—it’s about predictability. When your seams match, you can sew with confidence, knowing the fabric will behave as expected.” This practice transforms pattern combination from guesswork into a reliable process.
Using a Design Worksheet for Planning
To manage the complexity of combining multiple elements, the Reader benefits from a design worksheet—a simple grid that tracks compatibility and alterations. The worksheet lists core components (bodice, sleeve, collar, skirt) down one side and key attributes (armhole shape, neckline type, seam type, ease distribution) across the top. For each combination, the Reader marks whether the elements are compatible, notes required alterations, and records any changes to seam allowances or notch placement.
Consider a worksheet entry for combining a bodice block with a set-in sleeve and a Mandarin collar. Under armhole shape, the Reader confirms the bodice’s curve matches the sleeve cap and adds a note: “No change needed.” Under neckline type, they note: “Must narrow and deepen slightly to fit Mandarin collar base; add 3/8 inch ease for roll.” Under seam type, they specify: “Neckline will be sewn with collar attached; finish with topstitching.” The worksheet also includes a small sketch of the altered neckline and sleeve cap, with notches and grainlines marked.
This method prevents oversight and creates a reference for future projects. Over time, the Reader builds a personal library of proven combinations, turning the worksheet into a living document of their growing expertise. By treating pattern combination as a modular system—where each element follows logical rules—the Reader gains the freedom to innovate while maintaining structural integrity. The foundation laid here leads directly into the next section, where design details like pockets and pleats are added to these combined blocks.
Adding Design Details: Pockets, Pleats, and Gears
The Reader now turns their bodice block—already adapted with a set-in sleeve and Mandarin collar—to the task of adding functional and decorative details. M. Stitch emphasizes that design elements are not merely applied to the surface but must be integrated into the pattern’s structure from the outset. A patch pocket, for instance, is not simply sewn onto finished fabric; its placement affects balance, its reinforcement bears stress, and its edges require precise notching to align with grainlines and seams. The same principle applies to pleats and gathers, which manipulate fabric volume and must be accounted for in the flat pattern before cutting.
Integrating Patch Pockets with Structural Awareness
When adding a patch pocket to a garment, the Reader begins by determining its purpose and location. A chest pocket on a shirt, for example, serves both utility and aesthetics, typically placed so its top aligns with the bust level and its outer edge parallels the center front or side seam. M. Stitch advises that the pocket’s grainline should match the garment’s grainline at that point to prevent distortion; if the bodice block has a lengthwise grain running vertically, the pocket’s lengthwise grain must follow the same direction.
Placement is marked on the pattern using a combination of measurements and notches. The Reader measures down from the shoulder seam or up from the waistline to set the vertical position, then marks the horizontal offset from center front or the side seam. Notches are added along the pocket’s top edge to indicate where it will align with a seam or dart—such as a bust dart—ensuring the pocket sits flat without pulling. For a pocket placed over a dart, the Reader may choose to avoid the dart’s point entirely or split the pocket to straddle it, adding notches on both sides of the dart’s legs to maintain alignment.
Once positioned, the pocket pattern is drafted with a seam allowance around all edges, typically 1/4 inch for the top and 3/8 inch for the sides and bottom. The top edge often includes a facing or a fold-down hem, which requires additional length and a crease line marked on the pattern. Before cutting, the Reader verifies that the pocket does not extend into a seam allowance or cross a grainline shift—such as at a yoke seam—where fabric behavior changes. M. Stitch notes: “A pocket that crosses a grainline will pucker or ripple because the fabric underneath is moving differently than the pocket itself.”
Topstitching guidelines are also built into the pattern. The Reader marks a stitching line 1/8 inch from the pocket’s edge, parallel to the outline, to guide even sewing. For durability, especially at the corners, the pattern includes reinforcement points—small triangles or bars—where bar tacks or double stitching will later be applied. These are labeled on the pattern with abbreviations like “BT” for bar tack or “2X” for double stitch, ensuring the sewer knows where to reinforce during assembly.
Mastering Pleat Types: Fold Direction and Spacing
Pleats transform flat fabric into controlled volume, and their success depends on accurate pattern preparation. The Reader learns that each pleat type—box, knife, and inverted—requires a specific fold direction and spacing to achieve the desired effect. A box pleat, formed by two outward-facing folds, creates a wide, rectangular trough and is often used at the back of a skirt or the center back of a shirt. To draft it, the Reader adds extra width to the pattern equal to twice the desired pleat depth (since each fold consumes fabric equal to the pleat depth). For a 1-inch box pleat, 2 inches of width are added per pleat.
Knife pleats, all folded in the same direction, produce a streamlined, stacked effect ideal for skirts or sleeves. Here, the Reader adds width equal to the pleat depth multiplied by the number of pleats, then marks fold lines at regular intervals. For five 1/2-inch knife pleats, 2.5 inches of width are added, with fold lines spaced every 1/2 inch. The direction of the fold—left or right—is indicated on the pattern with arrows showing which way the fabric will be folded.
Inverted pleats, where the folds face inward to create a recessed effect, are commonly used at the waistline of skirts or the back of bodices for subtle fullness. The drafting process mirrors that of the box pleat: extra width is added, but the fold lines are placed so the fabric folds toward the center of the pleat. M. Stitch cautions that inverted pleats require careful pressing to maintain their shape, and the pattern should include a note to press the folds toward the inside of the garment.
Spacing is critical for visual harmony. The Reader uses a ruler or pleat guide to mark consistent intervals, ensuring pleats are evenly distributed. Notches are placed at the fold lines to help align the fabric during folding and pressing. For pleats that cross a seam—such as a side seam on a skirt—the Reader trues the seam after pleating, adjusting the seam line to account for the folded fabric’s thickness and ensuring the seam sews smoothly without bulk.
Calculating Gather Ratio for Controlled Fullness
Gathers create soft, even fullness by compressing a longer fabric edge onto a shorter one, such as a sleeve cuff onto a sleeve placket or a skirt waistband onto a bodice. The Reader learns that the gather ratio—the proportion of fabric length to finished edge length—determines the fullness’s density and drape. A 2:1 ratio (two inches of fabric for every one inch of edge) creates moderate gathers, suitable for sleeves or yokes, while a 3:1 or 4:1 ratio produces deeper, more dramatic fullness, often used in skirts or puff sleeves.
To calculate the required fabric length, the Reader multiplies the finished edge length by the desired gather ratio. For a sleeve placket measuring 8 inches around, a 3:1 gather ratio requires 24 inches of sleeve fabric at the cap. This extra length is added to the pattern piece along the edge to be gathered, typically marked with a wavy line or the label “GATHER” and the ratio noted nearby.
Notch placement is essential for even distribution. The Reader divides both the fabric edge and the finished edge into equal sections—often quarters or eighths—and places matching notches at each division. For example, with a 3:1 ratio over 8 inches, the sleeve edge is divided into six 4-inch segments (since 24 ÷ 4 = 6), and the placket into two 4-inch segments. Notches are placed at each division point, allowing the sewer to pull the gathering threads evenly and avoid bunching in one spot.
M. Stitch reminds the Reader that gathering affects grainline stability. If the edge being gathered is cut on the bias, the fabric will stretch more easily, requiring careful tension control. For lengthwise or crosswise grains, the gather behaves more predictably. The pattern should indicate the grainline direction so the sewer can anticipate how the fabric will respond to gathering.
Reinforcing Stress Points for Longevity
Design details often concentrate stress at specific points—pocket corners, pleat folds, and gather seams—making reinforcement essential for durability. The Reader learns to identify these points during pattern drafting and mark them for specific treatments. Bar tacks, short zigzag stitches, are ideal for pocket tops and pleat bases where perpendicular stress occurs. Interfacing, applied to the wrong side of the fabric, stabilizes areas like pocket openings or collar points that undergo repeated flexing. Double stitching, two parallel lines of straight stitch, reinforces long seams such as those attaching a gathered skirt to a bodice.
For a patch pocket, the Reader marks the top corners for bar tacks, knowing these points bear the most weight when items are inserted or removed. The pattern includes a small square or triangle at each corner labeled “BT,” with a note to stitch a 1/8-inch bar tack through all layers. If the pocket is large or intended for heavy use, the Reader may add a second bar tack halfway down each side or apply fusible interfacing to the pocket’s top edge before sewing.
Pleat bases, particularly where the fold meets a seam or waistband, are prone to splitting under tension. The Reader reinforces these points with bar tacks or a small patch of interfacing on the underside. For an inverted pleat at the waistline, a 1/4-inch square of fusible interfacing is placed at each fold’s base before attaching the waistband, preventing the fabric from tearing when the pleat opens and closes.
Gather seams, especially those attaching a full sleeve to a cuff or a skirt to a bodice, benefit from double stitching. The Reader sews the initial seam, then stitches a second line 1/8 inch outside the first, within the seam allowance. This distributes stress and prevents the seam from breaking under tension. M. Stitch notes: “Reinforcement isn’t overbuilding—it’s foresight. A garment that lasts isn’t just sewn well; it’s designed to endure.”
By treating each design detail as a structural component with specific placement, ease, and reinforcement needs, the Reader moves beyond decoration to informed integration. The patch pocket, pleat, and gather are no longer afterthoughts but considered elements that enhance both the garment’s function and its longevity. This attention to detail prepares the Reader for the final stage of Chapter 3, where these components are combined into a cohesive system for generating original design variations.
The Blueprint Matrix Framework
The Blueprint Matrix transforms pattern adaptation from isolated tweaks into a systematic exploration of design possibilities. By organizing variations in a grid, the Reader isolates one design element at a time while holding others constant, making cause-and-effect relationships visible. This method builds a personal library of adaptable templates grounded in proven blocks, reducing guesswork and accelerating the journey from concept to wearable garment.
Matrix Structure and Purpose
At its core, the Blueprint Matrix is a simple table where rows represent foundational pattern blocks and columns represent key design variables. Each cell contains a sketch or annotated pattern piece showing how that specific block responds to a particular change. The power lies in holding all but one variable fixed, allowing the Reader to see the pure effect of altering, say, neckline depth without interference from sleeve or hem modifications.
For example, starting with a basic fitted bodice block, the Reader might create a matrix with three rows: the original bodice, a bodice with added bust dart ease, and a bodice with princess seams. Across the top, three columns represent neckline variations: crew, V-neck, and boat neck. The resulting nine cells reveal how each block interprets the same neckline style—showing, for instance, that a V-neck on a princess-seamed bodice requires different facing shaping than on a darted block due to seam placement.
This approach prevents overwhelm. Instead of juggling multiple changes simultaneously, the Reader masters one lever before adding another. M. Stitch reinforces this in a margin note: “Complexity is managed, not avoided. Master one variable, then introduce the next.” The matrix becomes a reference library—each variation labeled, dated, and stored for future retrieval when designing a new garment.
Building the Matrix: A Worked Example
To illustrate, the Reader begins with a trusted set-in sleeve bodice block that fits well through the bust and shoulders. Their goal is to explore how neckline alterations affect the upper garment’s balance and proportion, keeping sleeve length, armhole depth, and hem shape constant.
They draw a 3x3 grid. Rows are labeled: Row 1 – Original Bodice Block (with bust and waist darts), Row 2 – Bodice with Side Seam Dart Moved to Armhole (for softer side contour), Row 3 – Bodice with Vertical Princess Seams (from armhole to hem). Columns are labeled: Column A – Crew Neck (high, round), Column B – V-Neck (moderate depth, 6 inches from CB), Column C – Boat Neck (wide, shallow, extending to shoulder points).
In Row 1, Column A, they trace the original bodice and redraw the neckline as a crew neck, adjusting the facing to follow the new curve. They label it “V1-Crew” and note: “Standard facing width 1.5”, grainline unchanged.” In Row 1, Column B, they draft a V-neck by marking 6 inches down from CB on the front pattern piece, blending the shoulder slope into the V point. They add a facing that mirrors the V shape and label it “V1-VNeck”, noting: “Requires staystitching along V to prevent stretching.” In Row 1, Column C, they widen the neckline to shoulder points, creating a boat neck with minimal drop. They label it “V1-Boat” and add: “Neckline now crosses shoulder seam; facing must wrap over shoulder.”
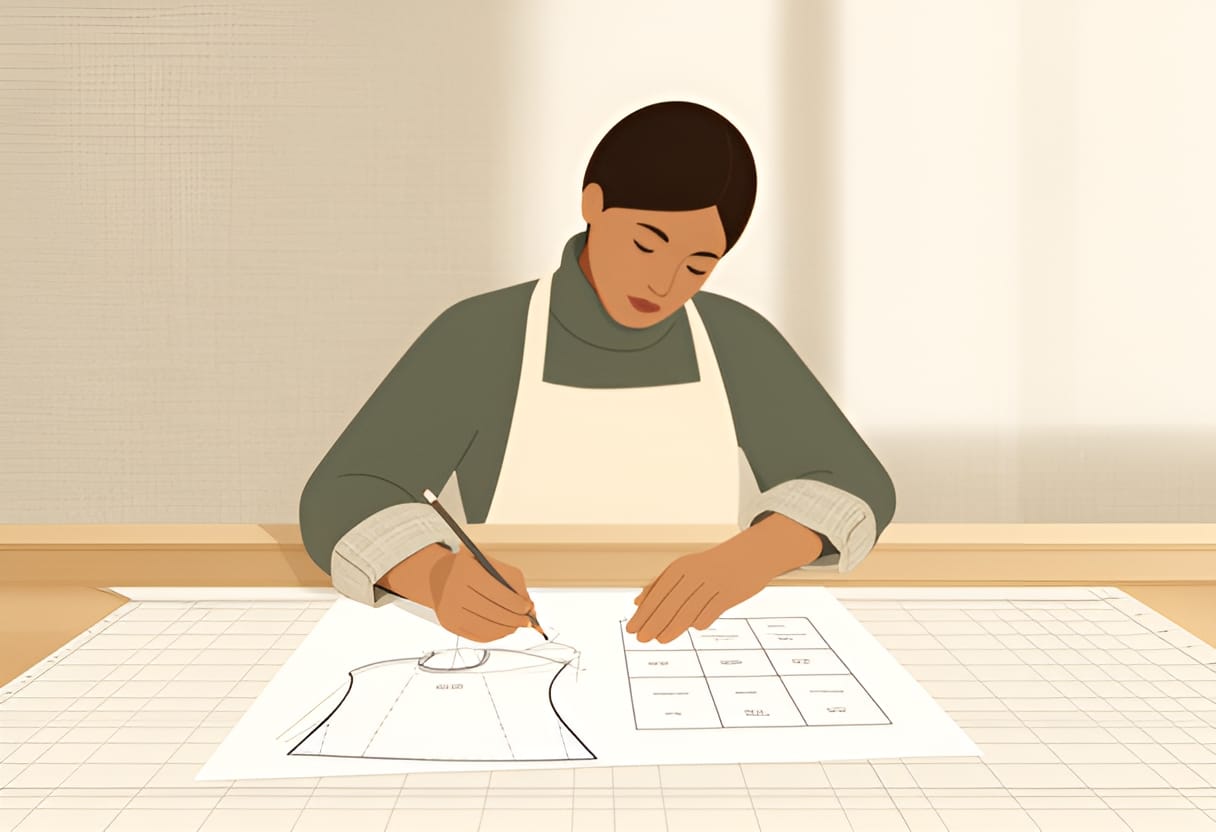
Repeating this for Rows 2 and 3, they observe how block structure influences neckline execution. In Row 2 (dart moved to armhole), the side contour is smoother, so the V-neck lays flatter without pulling at the waist. They label it “V2-VNeck” and note: “Improved drape at side bust due to dart relocation.” In Row 3 (princess seams), the V-neck must intersect two seams, requiring careful notching and facing assembly. They label it “V3-VNeck” and add: “Facing pieced in three sections; match notches at each seam intersection.”
By holding sleeve, hem, and armhole constant, the Reader isolates the neckline’s behavior across different foundational structures. They now have a validated set of nine neckline variations, each tied to a specific block, ready to be mixed with other elements in future matrices.
Tracking Changes and Building a Reference Library
Each matrix cell receives a clear version label, sketch notes, and a swatch of intended fabric if possible. The Reader uses a consistent labeling system: “V” for bodice variation, followed by the row number, a hyphen, and the column letter or descriptor (e.g., V2-VNeck). Sketch notes include key measurements (neck depth, facing width), grainline direction, and any special construction tips like staystitching or interfacing points.
Over time, these matrices accumulate into a personal design atlas. The Reader stores them in a dedicated binder with transparent sleeves, grouping by garment type: bodices, sleeves, skirts, collars. When planning a new project—say, a summer capsule wardrobe—they flip to the bodice section, select a V-neck variation from Row 2 (known for its smooth side drape), and pair it with a sleeve matrix exploring short puff versus elbow-length set-in styles.
This system turns abstract inspiration into actionable steps. Instead of starting from scratch, the Reader begins with a proven foundation and applies a documented variation. M. Stitch likens it to a “visual vocabulary”: “Each matrix cell is a word. Combine them, and you speak fluent design.”
Applying the Matrix to Wardrobe Planning
The Blueprint Matrix excels in planning cohesive collections. For a capsule wardrobe of five interchangeable tops, the Reader creates a master matrix with bodice variations as rows and sleeve/hem combinations as columns. They fix the neckline to a moderate V (from their validated V2-VNeck cell) and explore how sleeve length (cap, short, 3/4) and hem shape (straight, high-low, peplum) interact with that fixed element.
In one cell, they combine V2-VNeck with a short set-in sleeve and straight hem, labeling it “V2-VNeck-SleeveStraight-Hem”. In another, they pair the same neckline with a 3/4 raglan sleeve and peplum hem, noting how the raglan’s diagonal seam affects peplum balance. By varying only two columns while holding the neckline row fixed, they see how sleeve and hem choices alter the garment’s character without re-testing the neckline fit.
This method ensures harmony across the wardrobe. All tops share the same neckline fit and bust shaping, so they layer predictably under jackets or scarves. Yet the variation in sleeves and hems creates visual interest—essential for a cohesive yet non-repetitive collection. The Reader can now cut fabric with confidence, knowing each piece stems from a tested, documented variation.
Through the Blueprint Matrix, the Reader evolves from following patterns to directing them. The grid becomes a thinking tool—one that makes design variation transparent, traceable, and deeply personal. With each matrix completed, their internal library grows, bringing them closer to the ability to draft original garments not from imagination alone, but from a structured, visual logic rooted in fit and function.
Workflow From Inspiration to Garment
The Reader begins with a spark—perhaps a vintage photograph, a fabric swatch, or a gap in their wardrobe. Instead of reaching for a commercial pattern immediately, they first define the garment’s purpose: Is it for work, weekend, or layering? They sketch a rough silhouette, noting key details like neckline, sleeve length, and hem shape. This ideation phase keeps the project grounded in function before diving into technical execution.
Next, they consult their Blueprint Matrix binders. For a lightweight summer blouse, they open the bodice section and select a validated variation—say, V2-VNeck from Row 2, which offers smooth side drape due to the dart moved to the armhole. They pair it with a sleeve matrix, choosing a short set-in style with moderate ease, and a skirt matrix for a high-low hem. Each selection comes with documented notes: facing width, grainline direction, and any interfacing points.
Before cutting fashion fabric, they prepare the pattern. They trace the selected bodice, sleeve, and hem pieces onto drafting paper, adding seam allowances if not already included. They true all seam lines—especially where the dart was moved to the armhole—ensuring smooth transitions. They double-check grainlines on each piece, realigning them if altered during slashing or pivoting. Notches are added or verified at seam junctions: shoulder, armhole, and side seams.
The Muslin as Fit Laboratory
The Reader cuts the assembled pattern in muslin, a plain, inexpensive cotton that mimics the drape of their chosen fashion fabric. They sew the bodice using staystitching along curved edges like the neckline and armholes to prevent stretching. Seams are sewn with a 1.5 cm allowance, pressed open, and notches matched precisely.
They try on the muslin inside out, pinning the center back and center front to assess balance. The V2-VNeck lies flat without pulling, confirming the dart relocation improved side bust drape. The armhole feels comfortable—neither binding nor gaping—validating the set-in sleeve cap height. The high-low hem hangs evenly, with the back slightly longer as intended.
They note one adjustment: the sleeve feels slightly tight at the bicep. They let out the seam by 0.5 cm, re-true the underarm curve, and adjust the muslin. After re-pinning, the fit improves. They transfer this change to the paper pattern, reducing the sleeve width accordingly.
This toile phase prevents costly mistakes. Had they cut fashion fabric first, the tight sleeve would have required unpicking or discarding the piece. Instead, the muslin served as a low-risk laboratory, confirming fit and guiding precise alterations.
Construction With Confidence
With the pattern validated, the Reader cuts the fashion fabric—a lightweight linen-cotton blend. They lay the pieces according to grainline, using weights instead of pins to avoid distorting the weave. Notches are clipped inward, and seam allowances are marked with tailors’ chalk.
They begin assembly: staystitching the neckline and armholes, sewing shoulder seams, and attaching the sleeve using the armhole notches for alignment. The sleeve cap eases smoothly into the armhole, thanks to the earlier muslin test. They sew the side seams in one continuous stitch from hem to underarm, pressing them open.
The facing is cut from the same fabric, interfaced along the outer edge, and sewn to the neckline. They clip the seam allowance, turn the facing inward, and press. Topstitching 0.3 cm from the edge secures it and adds a refined finish. The hem is folded twice, pressed, and stitched with a blind hem stitch for invisibility.
Throughout, they refer to their matrix notes: “V2-VNeck requires staystitching along V to prevent stretching,” and “Standard facing width 1.5”, grainline unchanged.” These reminders ensure consistency with the validated variation.
Documenting Makes and Building a Library
After the final press, the Reader photographs the finished blouse from front, back, and side. They record the date, fabric type, and any alterations made during construction. These details go into a garment log alongside the matrix labels: V2-VNeck-SleeveStraight-Hem-Linen.
They return the paper pattern to its transparent sleeve in the bodice binder, adding a sticky note: “Tested in linen; sleeve let out 0.5 cm at bicep.” Over time, this binder becomes a living archive—each pattern annotated with real-world performance.
When planning a fall capsule, they revisit the sleeve matrix, comparing elbow-length set-in versus bell styles. They recall the linen blouse’s success with the short set-in and opt to test the elbow version in a medium-weight chambray. The documented history reduces guesswork, turning past makes into future guidance.
Try This
This week, apply the workflow to a simple project: a gathered skirt with an elastic waist.
- Choose a skirt block from your matrix or draft a basic rectangle based on your hip measurement plus ease.
- Cut a muslin, sew the side seams, and attach elastic to the waistband; test the fit and comfort.
- Adjust the pattern based on the muslin, then cut fashion fabric, assemble, and document the make with photos and notes.
Key Takeaways
- A muslin (toile) is essential for validating fit before cutting fashion fabric, saving time and materials.
- The Blueprint Matrix turns pattern adaptation into a repeatable, traceable system for building a personal design vocabulary.
- Documenting each make—through labels, photos, and notes—creates a reference library that informs future projects.
- Workflow integrity—from ideation to construction—ensures that design intentions translate accurately into finished garments.
- Sewing mastery grows through iteration: each tested variation adds to your ability to draft original garments with confidence.
They lay the muslin pieces on a flat surface, smoothing out wrinkles with their hands before pinning. The bodice front and back align at the side seams, the notches matching perfectly after the earlier dart relocation adjustment. They sew a basting stitch along the shoulder seams first, allowing them to try on the muslin with minimal construction. The neckline lies smooth against their collarbone, the V-shape flattering without gaping or pulling. They pin the sleeves in place, matching the notches at the armhole seam, and note how the cap ease distributes evenly—no puckering at the shoulder, no tightness under the arm.
They step back and assess the silhouette in the mirror. The high-low hem creates a subtle cascade at the back, the longer length providing coverage while the front remains lightweight for warm weather. They pinch the side seam slightly, feeling for ease; there’s just enough room to move without excess fabric pooling. Satisfied with the fit, they mark the muslin with a fabric pen: “Side seam let out 0.3 cm at waist for comfort.” They remove the pins, take apart the muslin, and lay the pieces flat to transfer the adjustment to the paper pattern.
On the bodice pattern, they redraw the side seam line, tapering the adjustment from waist to hip so it disappears into the existing contour. They true the seam by folding the pattern along the stitching line, ensuring the curve is smooth and continuous. The grainline arrow remains parallel to the center front, unchanged. They repeat the process for the sleeve, adjusting the underarm seam where the bicep felt tight, redrawing and truing the line before re-measuring the cap height against the armhole.
With the altered pattern ready, they proceed to fashion fabric. They pre-wash the linen-cotton blend to prevent shrinkage, then iron it smooth. On the cutting table, they place the bodice pieces first, aligning the grainline with the selvage. They use pattern weights to hold the pieces in place, tracing around them with a chalk pencil. Notches are snipped inward with small scissors, and seam allowances are marked with dashed lines. They cut the sleeve and hem pieces with the same care, double-checking that each grainline runs parallel to the fabric’s lengthwise threads.
They begin construction by staystitching the neckline and armholes, stitching just inside the seam line to stabilize the curves. Shoulder seams are sewn with a 1.5 cm allowance, backstitched at the start and end, then pressed open. They attach the sleeves, matching the notches and easing the cap gently with their fingers as they sew. The side seams are sewn in one continuous motion from hem to underarm, pressed open, and finished with a zigzag stitch to prevent fraying.
The facing is cut from the same fabric, interfaced with a lightweight fusible on the half that will sit against the neckline. They sew the facing to the neckline right sides together, clip the seam allowance at curves, and turn it to the inside. They press the seam flat, then topstitch 0.3 cm from the edge to secure the facing and add a refined finish. The hem is folded twice—first 0.6 cm, then another 0.6 cm—pressed, and stitched with a blind hem stitch for invisibility.
They try on the nearly finished blouse, checking the sleeve length and neckline fit. The fabric drapes well, the V-neck lying flat thanks to the staystitching. They sew the final hem stitch, give the garment a thorough press, and hang it to air out. The result feels both familiar and new—a proven variation brought to life in fresh fabric, ready to wear.