Non-Fiction
Pan to plate
by Krishaang Upadhyay
3 chapters1.1 hr read
Chapter 1
Foundations of Technique
Knife Skills and Ingredient Preparation
The first thing a cook learns is that the knife is an extension of the hand, not a tool separate from it. When the grip is secure and the motion fluid, ingredients yield predictably, cooking times align, and flavors develop as intended. Without this foundation, even the best recipe becomes a gamble.
Proper Grip and Stance
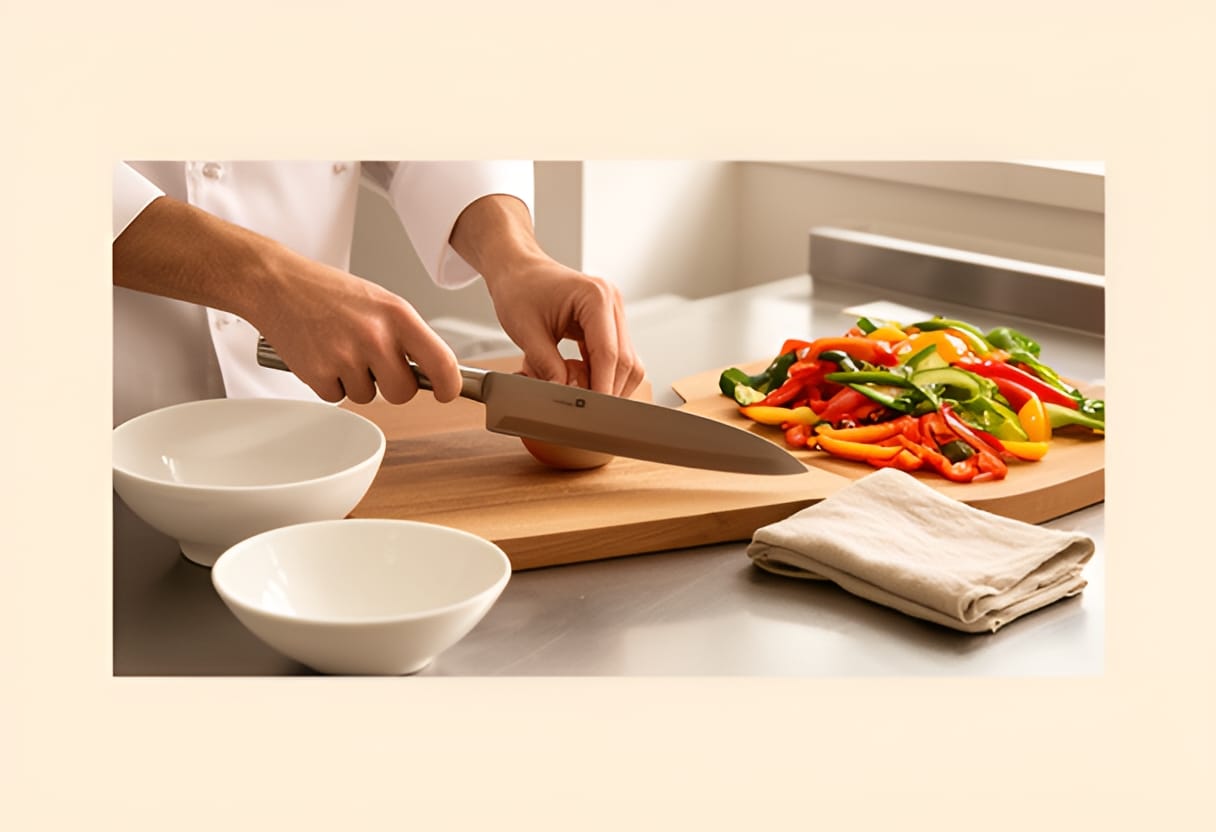
Control begins with how the knife is held. The pinch grip places the thumb and forefinger on opposite sides of the blade, just ahead of the handle, while the remaining three fingers wrap loosely around the handle for support. This grip transfers dexterity from the fingers to the blade, allowing for precise adjustments mid-cut. The wrist remains straight, aligned with the forearm, to prevent strain and maintain accuracy.
Equally important is the stance. Feet should be shoulder-width apart, with the dominant foot slightly back, knees soft, and weight balanced. The torso faces the cutting board at a slight angle, enabling the shoulder to drive the motion rather than the elbow alone. This full-body engagement reduces fatigue and improves consistency over repetitive tasks.
The guiding hand uses the claw position: fingertips curled inward, knuckles resting lightly against the side of the blade. This shields the fingertips while using the knuckles as a guide for slice thickness. The blade should glide along the knuckles with minimal pressure, letting the weight of the knife do the work. A common mistake is lifting the knife too high between cuts, which disrupts rhythm and increases risk. Instead, the tip stays in contact with the board, pivoting like a lever for each downward stroke.
Julienne: Precision in Strips
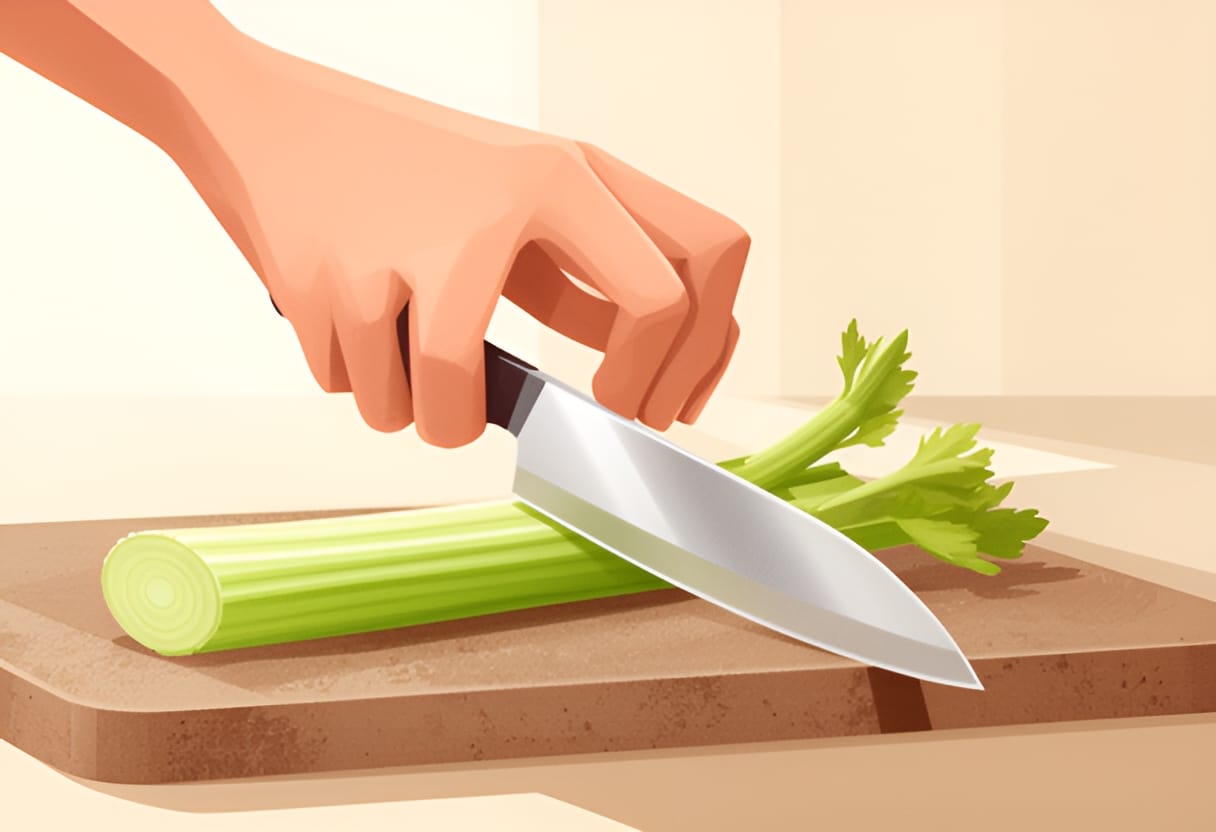
Julienne cuts produce uniform batonnets measuring 3mm × 3mm × 40mm. This size ensures even cooking when ingredients are sautéed or added to soups, preventing some pieces from turning mushy while others remain raw. To achieve this, begin with a squared-off piece of vegetable — a rectangle with flat sides and right angles. For a carrot, trim the ends, then cut a 50mm length. Slice a thin piece from one side to create a stable base, then rotate the piece to form a rectangular prism.
Using the pinch grip and claw guide, make a series of 3mm-thick lengthwise slices. Stack these slices neatly, then cut again at 3mm intervals to produce the batonnets. Consistency in the initial plank thickness is critical; variation here compounds in the final dice. A mandoline can speed this process, but hand-cutting builds the muscle memory essential for irregular ingredients.
An example: preparing celery for a sofrito. A single stalk yields about eight usable batonnets after trimming the leafy top and base. Each piece, when cooked in olive oil over medium heat, will soften uniformly in approximately four minutes. Irregular sizes would cause the thinner pieces to burn while the thicker ones stay crisp, unbalancing the flavor base.
Brunoise: From Strips to Dice
Brunoise refines the julienne into a 3mm dice, ideal for delicate sauces, garnishes, or dishes where texture must be unobtrusive. The process is straightforward: gather a small pile of julienned strips, align them parallel, and cut across at 3mm intervals. The key is to maintain slight downward pressure while keeping the tip anchored, using a rocking motion to slice cleanly without crushing the vegetables.
This cut demands sharp blades. A dull knife will mash the cell structure of ingredients like onions or celery, releasing excess water and altering texture. In a soffritto, for instance, waterlogged vegetables steam instead of sweat, delaying the Maillard reaction and resulting in a bland, uneven base.
Consider a brunoise of shallot for a béarnaise reduction. Six grams of finely diced shallot, cooked slowly in vinegar and tarragon, will dissolve almost completely into the liquid, contributing depth without detectable texture. If the dice were larger, the shallots would retain crunch, disrupting the sauce’s emulsion and mouthfeel. The 3mm standard ensures invisibility in the final product while maximizing surface area for flavor extraction.
Mirepoix: Building the Flavor Base
A classic mirepoix combines onion, carrot, and celery in a 2:1:1 ratio by weight, forming the aromatic foundation for countless stocks, soups, and braises. Uniformity in dice size ensures that each component breaks down at a similar rate, allowing their flavors to meld rather than segregate. For this exercise, prepare 300g of mirepoix: 150g onion, 75g carrot, 75g celery, all cut to a 5mm dice — a practical compromise between brunoise fineness and cooking efficiency.
Start with the onion. Cut it in half through the root, peel, and place flat-side down. Make three horizontal cuts (not through the root), then four vertical cuts. Finally, slice downward at 5mm intervals, yielding uniform dice. Repeat with the carrot and celery, using the same squared-off technique to create stable planks before dicing.
As the mirepoix hits the heated pan, listen for a steady sizzle — not a sputter, which indicates excess moisture, nor silence, which suggests the pan is too cool. Stir occasionally to promote even contact with the surface. After eight minutes, the onion should turn translucent at the edges, the carrot begin to soften, and the celery retain a faint crispness. This stage, known as sweating, builds sweetness without caramelization. Pushing further to a golden hue develops deeper notes, suitable for beef stock, while a pale sweat suits delicate consommés.
The precision of the cut directly influences timing. A 5mm dice ensures that all components reach the desired texture within the same window. Larger pieces would leave the celery fibrous; smaller ones risk disintegrating the onion into mush. By mastering this balance, the cook gains control over the flavor trajectory of the dish — a skill that scales from a simple vegetable soup to a complex demi-glace.
The mirepoix, once sweated, becomes more than a flavor base — it transforms into a diagnostic tool. Experienced cooks watch not just for color change but for the way the ingredients release their moisture and how they interact with the fat. If the onions begin to stick and brown too quickly, the heat is too high; if they sit in liquid without softening, the pan is overcrowded or the temperature too low. Adjusting in real time — lowering the flame, adding a splash of water to deglaze, or pushing the vegetables to the pan’s edge — prevents bitter notes from developing and keeps the sweet, rounded character essential for a clean stock.
This attentiveness extends to timing the addition of other ingredients. Garlic, for instance, is added in the final minute of sweating the mirepoix. Its volatile compounds burn easily, turning acrid if exposed to prolonged heat. By introducing it late, its sharpness mellows into the background without dominating. Similarly, herbs like thyme or bay leaf are best added after the vegetables have softened, allowing their oils to infuse the fat gradually rather than volatilize in the initial sizzle.
The mirepoix also teaches proportion through consequence. Doubling the carrot while halving the celery shifts the balance from earthy-sweet to vegetal and sharp, altering the perceived richness of the final dish. In a chicken stock, this might make the broth taste lighter, less rounded; in a tomato-based sauce, it could amplify acidity. These subtle shifts are only detectable when the base is uniform — when each bite of the mirepoix delivers the same ratio, the cook can trust that variations in flavor come from intentional adjustments, not inconsistent prep.
By the time the mirepoix is ready to receive liquid — whether water for stock or wine for a braise — it has already begun its work. The cell walls have softened, sugars have started to caramelize at the edges, and the foundation is laid for layered flavor. This moment, quiet and unassuming, is where technique meets intuition: the cook has done the precise, repetitive work, and now steps back to observe, adjust, and guide the transformation. It is in this space that the habit of mindfulness, begun at the cutting board, becomes second nature.
The Foundation of Flavor: Stock Principles
Stock forms the liquid backbone of countless preparations, extracting gelatin, minerals, and aromatic compounds from bones and vegetables through controlled simmering. The ratio of bones to water determines concentration and body: one part bones by weight to two parts water creates a balanced stock that reduces appropriately during cooking without becoming either insipid or overly gelatinous. For example, using 500g of beef or veal bones requires 1000g (or milliliters) of cold water to start. This proportion ensures that as moisture evaporates during the long simmer, the stock maintains sufficient viscosity to coat the back of a spoon when reduced to a glace.
Mirepoix contributes aromatic depth at 10% of the bone weight, reinforcing the continuity from the previous section’s preparation. With 500g of bones, 50g of mirepoix—divided as 25g onion, 12.5g carrot, and 12.5g celery, all cut to a 5mm dice—provides balanced sweetness and earthiness without overwhelming the bone-derived gelatin. Adding more than 10% risks vegetal notes dominating the stock, while less diminishes its complexity. The mirepoix should be added after the initial blanching of bones and before the simmer begins, allowing its sugars to gently caramelize in the residual heat of the pot, enhancing the Maillard reaction without scorching.
Temperature control is critical. Stock must never boil; a rolling boil emulsifies fats and impurities into the liquid, creating a cloudy, greasy result. Instead, maintain a bare simmer—just enough heat to produce occasional bubbles breaking the surface, roughly 85–95°C (185–203°F). This gentle agitation allows collagen to dissolve into gelatin gradually while keeping solids in suspension for easy skimming. Begin with cold water to facilitate the slow release of albumin, which coagulates and rises as scum that can be removed before it disperses. Skim frequently in the first 30 minutes, then less often as the stock clarifies. A properly made stock should be clear enough to read a newspaper through when chilled and defatted.
Blond and Brown: The Roux Spectrum
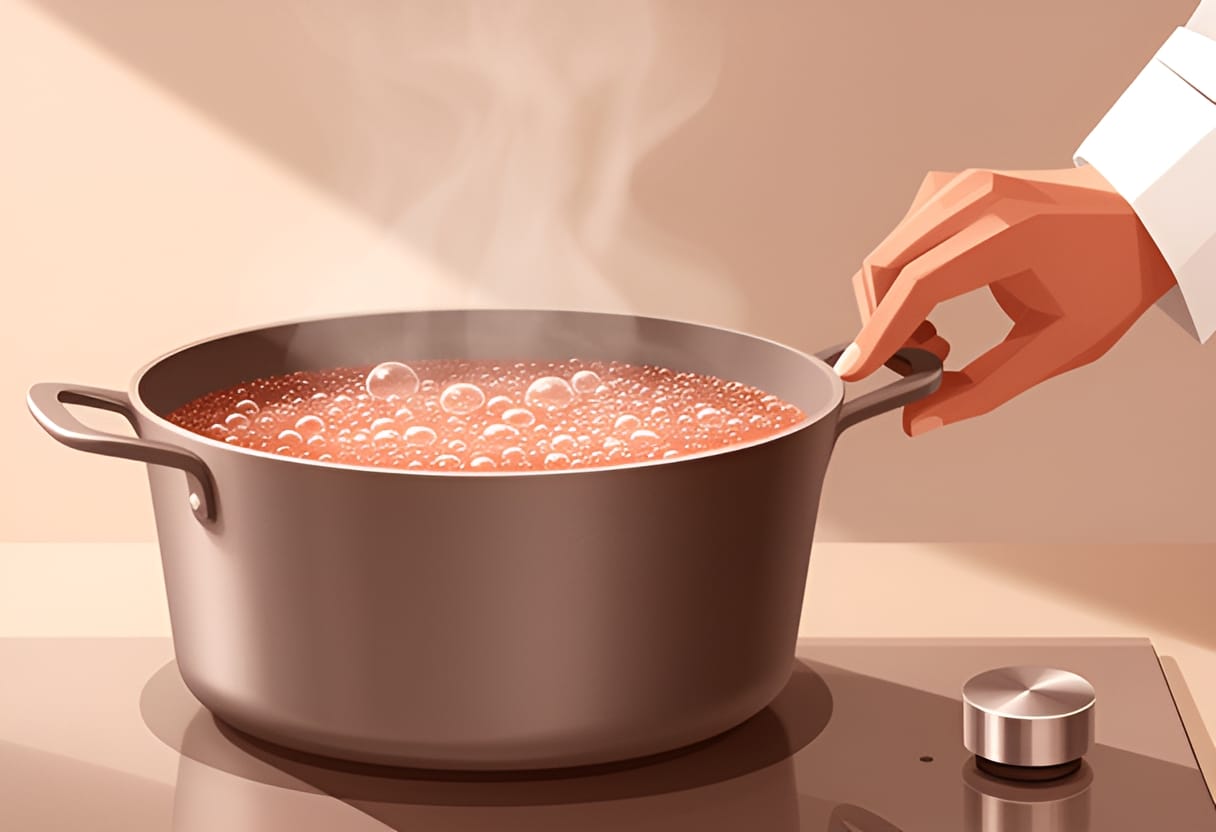
Roux, a cooked mixture of equal parts fat and flour by weight, serves as the thickener for three of the five mother sauces. Its color and cooking time directly influence both thickening power and flavor profile. A white roux, cooked just until the raw flour smell dissipates—about 2–3 minutes over medium heat—retains maximum starch integrity and thus the highest thickening capacity. It forms the base for béchamel and velouté, where a clean, neutral flavor is desired to let the dairy or stock shine.
A blond roux, cooked 4–5 minutes until it reaches the color of peanut butter, sacrifices approximately 10–15% of its thickening power for a nuttier, toasted flavor. This stage suits sauces requiring a subtle depth without darkening the final product, such as certain velouté derivatives. A brown roux, cooked 8–10 minutes to a mahogany hue, loses up to 40% of its thickening ability due to starch breakdown but gains rich, roasted notes essential for espagnole and its derivatives like demi-glace. The longer cooking also reduces the risk of a raw flour taste in long-simmered preparations.
To illustrate, 50g of butter combined with 50g of flour produces a white roux that can thicken approximately 500ml of liquid to a nappé consistency (coating the back of a spoon). The same quantity of blond roux thickens about 425ml, while the brown roux thickens only 300ml to the same degree. Therefore, when using a darker roux, increase the fat-flour proportion or reduce the liquid accordingly. For a demi-glace requiring a robust brown roux, 75g each of butter and flour would be needed to thicken 500ml of brown stock effectively.
Crafting the Mother Sauces: Technique and Application
The five mother sauces—béchamel, velouté, espagnole, hollandaise, and tomato—each pair a specific liquid base with a thickening agent, forming the cornerstone of classical sauce work. Béchamel begins with a white roux into which hot milk is gradually whisked to prevent lumps. The mixture simmers gently for 20–25 minutes to cook out the floury taste, then is seasoned with salt, white pepper, and a pinch of freshly grated nutmeg—no more than 1/8 teaspoon per 500ml—to add warmth without detection as a distinct spice. For a cheese sauce derivative, stir in 100g of grated Gruyère off the heat once the béchamel has thickened.
Velouté follows the same method but uses hot white stock—chicken, fish, or veal—instead of milk. The stock must be heated to near-boiling before incorporation to avoid lowering the roux’s temperature and causing seizing. After combining, simmer 15–20 minutes to develop body and flavor. A supreme sauce derives from chicken velouté enriched with cream and mushroom liquor, while an allemande sauce adds a liaison of egg yolks and cream finished with lemon juice.
Espagnole starts with a brown roux cooked to a peanut butter color, into which hot brown stock is whisked. Tomato purée (about 10% of the stock weight) and a mirepoix are often added to the roux before the stock to deepen flavor and color. The sauce simmers for hours, reduced by half or more, and is strained through a chinois. It serves as the base for demi-glace when combined with an equal volume of brown stock and reduced further, or for bordelaise with the addition of red wine, shallots, and bone marrow.
Hollandaise, an emulsion rather than a roux-based sauce, whiskes egg yolks with a reduction of white wine vinegar, peppercorns, and water over a bain-marie until thick and ribbony. Clarified butter, warmed to 60°C (140°F), is then drizzled in slowly while whisking continuously to form a stable emulsion. The final sauce should hold its shape when the whisk is lifted, breaking only slightly at the tip. A bearnaise variation replaces the acid reduction with one of tarragon, chervil, shallot, and white wine vinegar, finished with fresh tarragon and chervil.
Tomato sauce, the fifth mother, traditionally begins with salt pork or bacon rendered to extract fat, followed by sautéed onions, then tomato purée or fresh tomatoes cooked down with stock, herbs, and a ham bone for depth. Modern interpretations often start with olive oil and soffritto, simmering for 45–60 minutes to concentrate flavor. A creole derivative adds bell peppers, celery, and garlic; a provencale includes olives, capers, and anchovies.
Comparing Roux-Based Mother Sauces
The following table outlines the core characteristics of the three roux-based mother sauces, highlighting their bases, thickeners, thickening power, and common derivatives to clarify their distinct applications in the kitchen.
| Sauce | Base Liquid | Thickener | Thickening Power (per 50g fat/50g flour) | Common Derivatives |
|---|---|---|---|---|
| Béchamel | Hot milk | White roux | ~500ml to nappé | Mornay (cheese), Soubise (onion), Mustard |
| Velouté | Hot white stock (chicken, fish, veal) | White or blond roux | ~425–500ml to nappé | Supreme (cream, mushrooms), Allemande (egg yolk, cream, lemon) |
| Espagnole | Hot brown stock | Brown roux | ~300ml to nappé | Demi-glace (with brown stock), Bordelaise (red wine, shallot, marrow) |
This comparison underscores how thickening power diminishes with increased roux cooking time, necessitating adjustments in either roux quantity or liquid volume to achieve desired consistency. Understanding these relationships allows the cook to adapt recipes confidently, whether preparing a delicate fish velouté or a robust demi-glace for roasted meats. Mastery of these principles transforms sauce making from rote execution into informed craftsmanship, where each decision—from roux color to stock temperature—serves the final flavor and texture of the dish.
Emulsions and Vinaigrettes
The science of emulsions bridges the gap between fat and water, two components that naturally resist combination. In cooking, mastering this union allows for the creation of stable sauces and dressings that enhance texture, mouthfeel, and flavor distribution. Unlike roux-based sauces, which rely on starch gelatinization for thickening, emulsions depend on physical dispersion and molecular interaction. This section examines how emulsifiers like lecithin enable stable mixtures, the mechanics of vinaigrette formulation, and the precise technique required to build and rescue mayonnaise.
Emulsion Fundamentals: Dispersion and Stability
An emulsion is a colloidal system in which one liquid is dispersed as fine droplets throughout another immiscible liquid. In culinary applications, this typically means oil droplets suspended in an aqueous phase (oil-in-water emulsion), as seen in mayonnaise and vinaigrettes, or vice versa (water-in-oil), as in butter. The stability of an emulsion hinges on preventing droplet coalescence—the merging of droplets that leads to separation. This is achieved through emulsifiers, molecules with hydrophilic (water-attracting) and hydrophobic (oil-attracting) ends that position themselves at the oil-water interface, reducing surface tension and forming a protective barrier around droplets.
Lecithin, a phospholipid abundant in egg yolks, is a potent natural emulsifier. Its molecular structure allows it to anchor in oil with its hydrophobic tail while its hydrophilic head remains in the aqueous phase, creating a stable film around oil droplets. In mayonnaise, approximately 10% egg yolk by weight provides sufficient lecithin to emulsify up to 80% oil, forming a thick, viscous sauce. Without an effective emulsifier, oil and vinegar would separate within minutes, as the high interfacial tension between the phases drives rapid coalescence.
Droplet size is a critical factor in perceived texture and stability. Smaller droplets increase the total surface area, requiring more emulsifier to maintain coverage, but they also slow creaming or sedimentation due to reduced buoyancy forces. A well-emulsified mayonnaise typically has droplet diameters between 2 and 5 micrometers, contributing to its smooth, opaque appearance and resistance to separation. Mechanical energy—such as whisking or blending—provides the shear force necessary to break oil into these fine droplets, while the emulsifier stabilizes them.
Vinaigrette Formulation: Balancing Acid, Oil, and Emulsifiers
Vinaigrettes are temporary emulsions, meaning they separate over time unless stabilized. Unlike mayonnaise, which aims for permanence, a vinaigrette’s transient nature allows for easy adjustment and light coating of ingredients. The key to a functional vinaigrette lies in the vinegar-to-oil ratio, which balances acidity, richness, and mouthfeel. Too much vinegar results in a sharp, thin dressing that fails to cling; too much oil produces a greasy, unbalanced mixture.
Different culinary traditions favor varying ratios based on the acidity of the vinegar used and the intended application. French vinaigrettes, often made with wine vinegar (6% acidity), use a classic 1:3 ratio of vinegar to oil, yielding a bright but balanced dressing suitable for tender greens. American-style vinaigrettes, frequently using distilled or cider vinegar (5% acidity), tend toward a 1:2 ratio to compensate for the sharper palate and heartier ingredients like iceberg lettuce or chopped vegetables. Asian-inspired dressings, incorporating rice vinegar (4–5% acidity) or citrus juices, often employ a 1:1 or even 2:1 oil-to-acid ratio to highlight the bright, clean notes of soy, ginger, or sesame, especially when used as a marinade or dipping sauce.
The following table summarizes these ratios and their typical applications:
| Style | Vinegar Type | Acidity | Vinegar:Oil Ratio | Typical Use |
|---|---|---|---|---|
| French | Red or white wine vinegar | 6% | 1:3 | Mixed greens, herb salads |
| American | Distilled or cider vinegar | 5% | 1:2 | Chopped salads, slaws |
| Asian | Rice vinegar or citrus juice | 4–5% | 1:1 to 2:1 (oil:acid) | Noodle salads, grilled vegetables, dipping |
Beyond ratio, emulsifiers can extend the stability of a vinaigrette. A teaspoon of Dijon mustard per 100ml of vinaigrette adds mucilage, which increases viscosity and helps suspend oil droplets. Similarly, a small amount of honey or maple syrup not only balances acidity but also contributes to thickness through dissolved sugars. These additives do not create a permanent emulsion but significantly delay separation, allowing the dressing to remain homogeneous for the duration of a meal.
Building Mayonnaise: Technique and Emulsifier Activation
Mayonnaise represents a permanent oil-in-water emulsion, where the continuous phase is the aqueous mixture of egg yolk, vinegar or lemon juice, and water, and the dispersed phase is oil. Success depends on two factors: the availability of emulsifier (lecithin from yolk) and the controlled introduction of oil to prevent overwhelming the interface.
Begin with one large egg yolk (approximately 18g) at room temperature, which ensures optimal lecithin availability and viscosity. Whisk the yolk with 10ml of white wine vinegar or lemon juice and a pinch of salt until the mixture becomes slightly lighter in color and thickens to a ribbon stage. This step hydrates the yolk proteins and begins to unfold the lecithin molecules, preparing them to act at the interface.
The oil must be added in an extremely slow, steady stream while whisking constantly. For the first 25% of the total oil (about 30g for a 120g final batch), add drop by drop, allowing each addition to fully incorporate before proceeding. This initial phase is critical: if oil is added too quickly, the emulsifier becomes saturated, and droplets coalesce, causing the mixture to break. Once the emulsion begins to thicken and visibly emulsify—typically after 40–50g of oil has been incorporated—the rate can be increased to a thin, continuous stream, but whisking must remain constant to maintain shear and prevent localized overheating or oil pooling.
Using 120g of neutral oil (such as grapeseed or sunflower) with one yolk yields approximately 150g of mayonnaise. The final texture should be thick enough to hold a peak when the whisk is lifted, with a smooth, lustrous surface. If the mixture begins to thin or look curdled during oil addition, it indicates incipient breaking; stop adding oil immediately and whisk vigorously to recombine before continuing at a slower pace.
Fixing a Broken Mayonnaise: Rescue and Prevention
A broken mayonnaise appears thin, oily, and curdled, with visible oil separating from the yolk base. This occurs when the oil-to-emulsifier ratio exceeds the interface’s capacity to stabilize droplets, often due to rapid oil addition, insufficient whisking, or using cold ingredients that inhibit proper emulsifier dispersion.
The most reliable fix involves starting with a fresh egg yolk and slowly incorporating the broken mixture as if it were the oil phase. Begin by placing a new yolk in a clean bowl with 5ml of vinegar or lemon juice and a pinch of salt. Whisk until frothy. Then, add the broken mayonnaise drop by drop, whisking constantly, just as you would with oil. As the fresh yolk’s lecithin re-emulsifies the dispersed droplets, the mixture will gradually thicken and regain cohesion. Once about half the broken batch has been incorporated and the emulsion stabilizes, the remainder can be added in a thin stream.
This method works because the new yolk provides additional emulsifier to re-coat the oil droplets, effectively resetting the interface. It is more effective than simply adding more oil or vinegar, which would worsen the imbalance. To prevent breaking, always ensure ingredients are at room temperature, add oil slowly at first, and maintain constant motion. If the mayonnaise becomes too thick during emulsification, thin it with a few drops of warm water or vinegar—never cold liquid, which can cause sudden temperature shock and re-break the emulsion.
Understanding emulsions transforms sauce making from a matter of luck into a predictable process governed by interfacial science. By controlling droplet size, emulsifier availability, and energy input, the cook can create stable, luxurious textures that elevate both simple dressings and complex sauces. This mastery not only ensures consistency but also invites creativity—knowing how to fix a break means no mistake is final, and every batch can be brought back into harmony.
Heat Transfer and Cooking Methods
Heat transfer governs how energy moves from a heat source to food, determining not only doneness but also texture, flavor development, and safety. Understanding the three primary modes—conduction, convection, and radiation—allows cooks to select appropriate methods, troubleshoot issues like uneven browning or steaming, and achieve consistent results. This section explores each mode in the context of common cooking techniques, examines the science behind pan crowding and the Maillard reaction, and concludes with a practical decision tree for matching methods to ingredients.
Conduction: Direct Contact Cooking
Conduction occurs when heat transfers through direct molecular contact between surfaces, such as food touching a hot pan, grill grate, or baking sheet. It is the most immediate and controllable form of heat transfer in stovetop cooking, making it ideal for techniques requiring precise surface interaction, like searing, sautéing, or pan-frying.
The efficiency of conduction depends on the material and thickness of the cookware. Metals like copper and aluminum conduct heat rapidly and evenly, while stainless steel and cast iron have lower conductivity but higher heat retention. A heavy-bottomed skillet, for example, minimizes hot spots and maintains a stable temperature when food is added—a critical factor when searing a steak. If the pan is too thin or poorly conductive, the surface temperature drops sharply upon contact with cold meat, inhibiting browning and promoting steaming instead.
Consider a 200g strip steak at 5°C placed in a preheated stainless steel skillet. If the pan lacks sufficient thermal mass, its surface temperature may fall from 200°C to 140°C instantly, putting it at the lower threshold for the Maillard reaction. With inadequate time to recover, the steak releases moisture faster than it can evaporate, creating a humid microclimate that prevents crust formation. In contrast, a well-preheated cast iron pan of the same size might only drop to 180°C, allowing sustained surface dehydration and browning.
Conduction also applies to baking, where heat moves from the oven rack through the baking sheet into the dough or batter. A dark, heavy steel sheet pan conducts heat more effectively than a lightweight aluminum one, promoting better rise and browning in cookies or roasted vegetables. However, because conduction only transfers heat inward from the surface, thicker items rely on slower internal conduction to reach target doneness, which is why timing and thickness must be balanced.
Convection: Heat Transfer Through Fluid Motion
Convection involves heat transfer via the movement of fluids—liquids or gases—such as water in a pot, air in an oven, or oil in a deep fryer. Unlike conduction, which requires direct contact, convection circulates heat around food, enabling more even cooking but less intense surface browning unless combined with dry heat or high velocity.
In ovens, natural convection occurs as heated air rises and cooler air sinks, creating a slow circulation pattern. Forced convection, found in convection ovens, uses a fan to accelerate this process, reducing cooking times by approximately 25% and improving uniformity. This is especially beneficial when baking multiple trays of cookies or roasting vegetables, where consistent airflow prevents hot and cold spots.
However, convection’s effectiveness depends on humidity and airflow obstruction. A crowded roasting pan traps steam released from vegetables, increasing local humidity and lowering the effective surface temperature. As a result, instead of browning at 180°C, the vegetables may only reach 140°C at their interface with the pan, steaming in their own moisture. Spreading items in a single layer with space between them allows hot air to circulate freely, promoting evaporation and surface dehydration necessary for caramelization and Maillard browning.
Deep frying exemplifies high-efficiency liquid convection. Oil, particularly when maintained between 160–190°C, transfers heat rapidly and uniformly due to its high specific heat and fluid motion. Foods like potato chips or battered fish develop a crisp exterior quickly because the oil envelops them entirely, minimizing thermal gradients. Yet, if the oil temperature drops significantly upon adding food—due to excess moisture or overcrowding—it absorbs more fat, resulting in soggy, greasy outcomes. Maintaining proper oil temperature and avoiding overcrowding are as critical in frying as they are in sautéing.
Radiation: Infrared Energy in Grilling and Broiling
Radiation transfers heat via electromagnetic waves, primarily infrared, without requiring a medium. It is the dominant heat source in grilling, broiling, and toasting, where energy travels directly from a hot surface—such as charcoal, gas flames, or electric coils—to the food.
Unlike conduction and convection, radiation does not heat the air between the source and food; instead, it deposits energy directly onto the surface. This allows for intense, rapid surface heating, making it ideal for achieving a charred crust on steaks, caramelizing sugar on crème brûlée, or blistering peppers under a broiler. However, because radiation primarily affects the surface, thicker cuts rely on slower conduction to transfer heat inward, which can lead to a charred exterior and raw interior if not managed.
The intensity of radiant heat follows the inverse square law: doubling the distance between food and heat source reduces energy intake to one-quarter. This is why grill grates are positioned close to coals for searing and raised for slower cooking. Similarly, broiler placement in an oven—typically top-mounted—means food must be positioned correctly; too close risks burning, too far yields minimal browning.
Grilling also combines radiation with convection: hot air rises from the coals, contributing to convective heating, while radiant energy dominates direct contact zones. A two-zone fire—searing over direct radiant heat, finishing over indirect convection—allows precise control over doneness. For example, a 3cm-thick lamb chop might spend 2 minutes per side over direct flame (radiation/convection) to develop color, then move to the cooler side (convection only) to reach 55°C internal temperature without over-charring.
The Maillard Reaction: Browning Through Dry Heat
The Maillard reaction—a complex series of chemical reactions between amino acids and reducing sugars—creates the savory, complex flavors and brown pigments associated with seared meat, roasted coffee, and baked bread. It requires three conditions: a dry surface, temperatures between 140–165°C, and sufficient time for reactions to occur.
Moisture is the primary inhibitor. Water absorbs heat energy to evaporate (latent heat of vaporization), keeping the surface temperature at or near 100°C until all surface moisture is gone. Only then can the surface exceed 140°C and initiate browning. This explains why patting meat dry before searing is non-negotiable: a wet surface steams instead of fries, delaying crust formation and increasing cook time.
Crowding a pan exacerbates this issue. When multiple pieces of food are placed close together, they trap steam and lower the local pan temperature. For instance, adding six chicken thighs to a 28cm skillet may reduce the effective cooking surface temperature from 200°C to 150°C, prolonging the moisture-evaporation phase and preventing timely Maillard onset. The result is pale, steamed meat with poor flavor development—even if the total cooking time appears sufficient.
Time also matters. While the reaction begins quickly at 160°C, deeper flavor development occurs over several minutes as intermediate compounds rearrange into melanoidins. A steak seared for 90 seconds per side may achieve surface browning but lack the nutty, roasted notes of one cooked for 2 minutes per side—assuming temperature control is maintained. However, excessive time or temperature leads to pyrolysis (burning), producing bitter, acrid flavors.
Pan material influences this balance. Preheated cast iron retains heat well, resisting temperature drops when food is added, thus supporting sustained Maillard activity. Thin aluminum pans, despite rapid initial heating, lose energy quickly and may struggle to maintain the required surface temperature under load.
Decision Tree: Matching Method to Ingredient
Selecting the appropriate cooking method depends on ingredient thickness, water content, fat distribution, and desired doneness. The following decision tree outlines a practical framework for common proteins and vegetables, prioritizing texture, flavor, and safety.
| Ingredient Type | Thickness | Desired Outcome | Recommended Method | Why It Works |
|---|---|---|---|---|
| Thin cuts (e.g., skirt steak, fish fillet, scallop) | <1.5 cm | Quick sear, medium-rare to medium | High-heat sauté or grill (conduction/radiation) | Rapid surface heating achieves Maillard before overcooking interior; minimal time needed for thermal equilibrium |
| Medium cuts (e.g., chicken breast, pork chop, salmon fillet) | 1.5–3 cm | Juicy interior, browned exterior | Start high-heat sear (conduction), finish moderate oven (convection) | Sear creates flavor crust; gentler convection cooks through without drying |
| Thick cuts (e.g., ribeye, pork shoulder, whole chicken) | >3 cm | Even doneness, flavorful crust | Sear (conduction/radiation), then low-and-slow roast or braise (convection/conduction) | Initial sear for Maillard; slow transfer prevents exterior burning while interior reaches safe temp |
| Vegetables (e.g., broccoli, carrots, bell peppers) | Variable | Tender-crisp, caramelized edges | High-heat roast or grill (convection/radiation) | Dry heat dehydrates surface; convection ensures even cooking; radiation promotes char |
| Leafy greens (e.g., spinach, Swiss chard) | N/A | Wilted, not soggy | Quick sauté or steam (conduction/convection) | High heat and brief time evaporate surface moisture; avoids overcooking delicate structure |
For example, a 2.5cm pork chop benefits from a two-stage approach: sear in a hot pan (200°C) for 2 minutes per side to develop color via conduction, then transfer to a 160°C oven for 8–10 minutes to reach 63°C internal temperature via gentle convection. This prevents the exterior from overcooking while the center catches up.
In contrast, a 1cm shrimp cooks in 90 seconds total—45 seconds per side in a hot pan—because its thinness allows rapid thermal equilibrium. Extending the time risks toughness due to protein tightening.
This method-first approach ensures that technique serves the ingredient, not the reverse. By aligning heat transfer mode with food properties, cooks gain control over doneness, texture, and flavor development.
Try This: Practice Pan Temperature Awareness
This week, develop sensitivity to pan temperature and moisture management through three focused exercises:
- Dry vs. Wet Surface Test: Pat two identical chicken breast halves dry; leave the third wet with a paper towel. Sear all three in the same preheated pan over medium-high heat. Observe and note differences in browning time, color development, and pan temperature stability (if using an infrared thermometer). Record how moisture affects fond formation and sticking.
- Crowding Experiment: Cook 100g of sliced mushrooms in two batches: first, all at once in a 20cm pan; second, in two batches with space between pieces. Compare browning, liquid release, and texture. Note how crowding lowers effective pan temperature and promotes steaming.
- Oven Rack Positioning: Roast a tray of potato wedges on the top, middle, and bottom racks of a convection oven at 200°C. After 25 minutes, compare color and crispness. Relate results to proximity to heating elements and airflow patterns.
These exercises reinforce how surface dryness, pan load, and heat distribution directly influence Maillard reaction efficiency and final texture.
Key Takeaways
- Conduction enables precise surface heating for searing and sautéing but requires sufficient pan mass to resist temperature drops when food is added.
- Convection provides even heat distribution via fluid motion, but crowding or humidity can inhibit browning by lowering surface temperature and increasing steaming.
- Radiation delivers intense, direct surface heat ideal for grilling and broiling, though it penetrates poorly, making it best combined with other methods for thick items.
- The Maillard reaction demands a dry surface and sustained temperatures of 140–165°C; moisture and overcrowding prevent browning by keeping surface temps below threshold.
- Match cooking method to ingredient thickness and goals: thin cuts benefit from rapid direct heat, while thicker items need a sear followed by gentler, slower heat transfer to avoid overcooking the exterior.
Chapter 2
Dough and Batter Mastery
Bread Dough: Hydration and Gluten Development
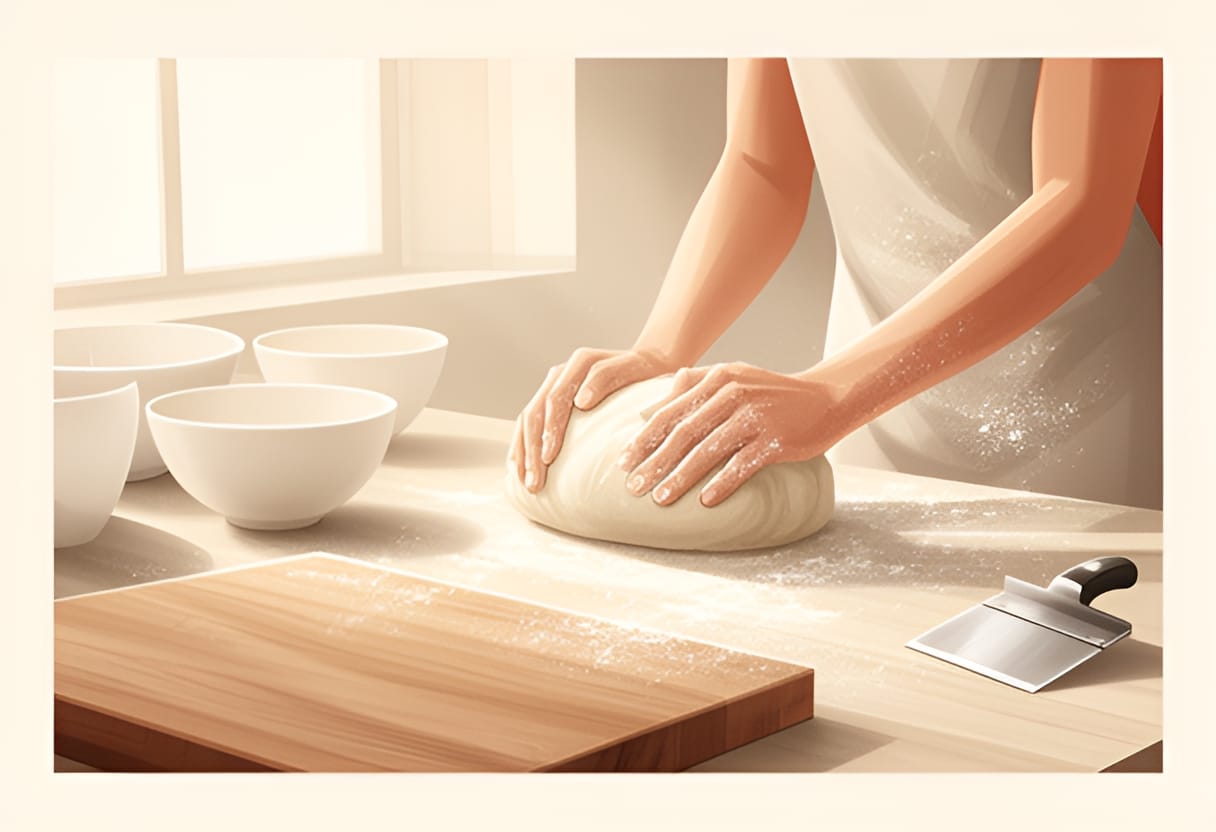
The transformation of flour and water into structured dough is one of the most fundamental yet alchemical processes in baking. When mixed, these two ingredients begin a cascade of biochemical changes that ultimately determine whether a loaf will be open and airy or dense and compact. Mastery of this stage — understanding how hydration influences gluten development and fermentation — provides the foundation for all bread making, from rustic boules to soft sandwich loaves.
Baker’s Percentage and Hydration
Baker’s percentage expresses each ingredient as a proportion of flour weight, with flour always set at 100%. This system allows bakers to scale recipes precisely and compare formulations across different batch sizes. For lean breads — those containing little to no fat, sugar, or enrichment — hydration typically ranges from 60% to 80% water relative to flour. At 60% hydration, a dough feels firm and dry to the touch, suitable for bagels or pretzels. At 75%, it becomes noticeably slack and extensible, characteristic of ciabatta or high-hydration sourdough.
Consider a 500g flour batch: at 65% hydration, the baker adds 325g of water. This ratio creates a balanced dough that develops sufficient gluten strength while retaining enough extensibility for good oven spring. Lower hydrations yield tighter crumbs and chewier textures; higher hydrations produce irregular, open crumb structures but require more skill to handle due to increased stickiness.
Water does more than hydrate starch and gluten proteins — it enables enzymatic activity, facilitates yeast metabolism, and influences heat transfer during baking. Insufficient water limits gluten formation, resulting in a dense loaf. Excess water, without adequate gluten development, leads to poor gas retention and collapse during proofing or baking. The baker must therefore match hydration to both flour type and desired outcome: high-protein bread flours absorb more water than all-purpose, and whole grain flours require even greater hydration due to bran’s water-binding properties.
Gluten Development and the Windowpane Test
When flour and water combine, the proteins gliadin and glutenin hydrate and begin to form gluten — a viscoelastic network that traps carbon dioxide produced by yeast or chemical leaveners. Development occurs through mechanical action during mixing and folding, which aligns and strengthens these protein strands. Underdeveloped gluten cannot hold gas, leading to flat, dense bread. Overdeveloped gluten, while rare in handmade doughs, can result in toughness and reduced extensibility.
The windowpane test provides a reliable, qualitative measure of gluten development. To perform it, take a small piece of dough (about walnut-sized) and gently stretch it between the thumbs and fingers of both hands. Well-developed gluten will stretch into a thin, translucent membrane without tearing — resembling a soap film. If the dough tears easily, it requires more mixing or folding.
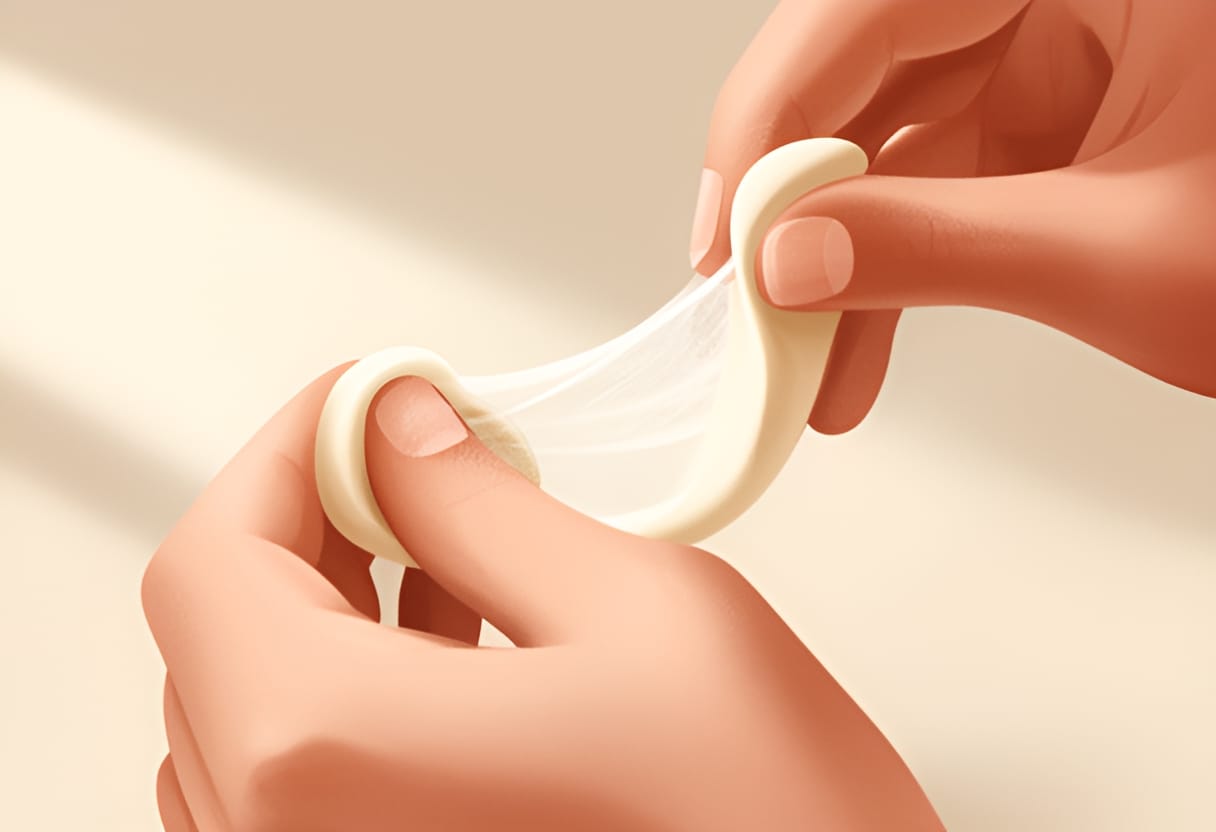
For example, after 10 minutes of mixing a 500g flour dough at 65% hydration, the windowpane may still tear at the edges. After a series of stretch-and-folds during bulk fermentation — performed every 30 minutes over two hours — the same dough will stretch smoothly into a near-transparent sheet. This improvement occurs not from additional mechanical work alone, but from the relaxation of gluten strands during rest periods, which allows them to reorganize into a stronger network.
Environmental factors affect this process. Salt strengthens gluten by neutralizing charges that cause repulsion between protein strands, but it also slows yeast activity. Oil or fat, when present, can inhibit gluten formation by coating proteins — a reason enriched doughs often require longer mixing or preferments to achieve adequate structure.
Fermentation, Proofing, and the Finger Dent Test
Fermentation begins as soon as yeast encounters water and fermentable sugars. During bulk fermentation, yeast metabolizes sugars, producing carbon dioxide and organic acids that flavor the dough and strengthen gluten through acidification. The duration and temperature of this phase significantly influence flavor development and gas retention. Cooler, longer fermentations (e.g., 12–18 hours at 4°C) yield more complex flavors, while warmer, shorter proofs (e.g., 2 hours at 24°C) prioritize speed.
As fermentation progresses, the dough expands and becomes more gaseous. Determining when it has proofed sufficiently — neither under- nor over-proofed — is critical for oven spring and crumb structure. The finger dent test offers a simple, effective method. Lightly flour a finger and press it about 1cm into the dough’s surface. Observe the recovery:
- If the indentation springs back quickly and completely, the dough is under-proofed; gluten tension is too high, and gas production is insufficient.
- If it springs back slowly and partially, leaving a slight depression, the dough is ready to bake.
- If it does not spring back at all and the indentation remains, the dough is over-proofed; gluten walls have weakened and may collapse during baking.
In practice, a baker shaping a boule at room temperature might perform the finger dent test after 90 minutes of bulk fermentation. A fast rebound indicates the need for another 30-minute rest. A slow, partial rebound signals readiness for shaping. After shaping, a final proof of 45–60 minutes — followed by another finger dent test — determines bake readiness. Over-reliance on time alone risks failure; visual and tactile cues, guided by the finger dent test, provide real-time feedback.
Lean vs. Enriched Doughs: A Comparison
The presence of fat, sugar, eggs, or dairy fundamentally alters dough behavior. Enriched doughs — such as brioche, challah, or sandwich bread — incorporate these ingredients to modify texture, flavor, and keeping quality. Fat tenderizes by shortening gluten strands, sugar provides food for yeast and promotes browning, and eggs contribute structure and emulsification. However, these additions also interfere with gluten development and increase thermal sensitivity during baking.
The table below contrasts a typical lean dough with an enriched version, highlighting differences in hydration, fat, sugar, and expected outcomes.
| Characteristic | Lean Dough (e.g., Baguette) | Enriched Dough (e.g., Brioche) |
|---|---|---|
| Flour | 100% | 100% |
| Water | 65% | 70% |
| Fat (butter/oil) | 0% | 20% |
| Sugar | 0% | 8% |
| Eggs | 0% | 10% (approx. 2 yolks per 100g flour) |
| Gluten Development | Strong, elastic network | Weaker due to fat interference |
| Crumb Structure | Open, irregular cells | Tighter, more uniform |
| Shelf Life | 1–2 days | 4–5 days (retards staling) |
| Baking Temp. | 220–250°C | 170–190°C (to prevent over-browning) |
For instance, a brioche formula using 500g flour includes 350g water (70%), 100g butter (20%), 40g sugar (8%), and 50g egg (10%). Despite higher hydration, the butter coats gluten proteins, limiting network formation. The result is a soft, tender crumb with rich flavor — but one that requires careful handling to avoid tearing during shaping. The baker compensates by using a slower mix, incorporating butter gradually after initial gluten development, and often employing a cold ferment to improve manageability.
Understanding these distinctions allows the baker to adjust expectations and technique. Lean doughs rely on gluten strength for structure and volume; enriched doughs derive tenderness from fat and sugar, trading some gas retention for flavor and softness. Neither is superior — each serves a different purpose in the baker’s repertoire. Mastery lies in recognizing how hydration, ingredients, and time interact to produce the desired outcome, whether it’s a crackling-crusted loaf or a golden, pull-apart bun.
Butter Consistency and Temperature Control
The success of laminated dough hinges on the butter’s physical state during enclosure and rolling. Butter must be cool yet pliable — ideally between 16 and 18°C — matching the temperature and firmness of the relaxed dough. At this range, the butter remains solid enough to resist melting under pressure but soft enough to deform uniformly without cracking or tearing the gluten network. If the butter is too cold, it will shatter when rolled, creating gaps that disrupt layer continuity. If too warm, it will smear into the dough, eliminating the distinct fat layers essential for lamination.
To achieve this consistency, remove butter from refrigeration 20–30 minutes before use, depending on ambient temperature. Test readiness by pressing a fingertip gently into the block; it should yield with slight resistance, leaving a shallow mark without oiling the skin. For precision, use an instant-read thermometer inserted into the center of the butter slab. Environmental factors such as kitchen humidity and radiant heat from ovens or sunlight can accelerate warming, so work in a cool environment and chill tools and surfaces when possible.
A common mistake is attempting to laminate butter straight from the refrigerator. In one test batch, butter at 8°C fractured during the first roll, producing uneven shards that created weak points in the dough. After baking, these areas showed minimal lift and dense, pastry-like patches where layers had failed to separate. Conversely, butter at 22°C melted into the dough during the second turn, resulting in a greasy texture and negligible puff. Only when maintained within the 16–18°C window did the butter form a continuous, cohesive sheet that rolled evenly and preserved distinct layers through multiple turns.
The Roll-and-Fold Technique: Single and Double Turns
Lamination builds layers through sequential rolling and folding, known as turns. Each turn multiplies the number of layers by trapping butter between dough sheets. The two primary methods are the single turn (also called a letter fold) and the double turn (also called a book fold), each suited to different dough types and desired layer counts.
In a single turn, the dough is rolled into a rectangle approximately three times as long as it is wide. The two shorter ends are then folded toward the center, meeting but not overlapping, and the dough is folded in half again along the centerline, creating three layers. This triples the layer count with each turn. For example, starting with a single layer of butter enclosed in dough (1 layer), after one single turn there are 3 layers; after two, 9; after three, 27.
A double turn begins similarly, with the dough rolled into a long rectangle. Instead of folding into thirds, both ends are brought to the center, then the dough is folded in half so that one end meets the other — like closing a book. This creates four layers per turn. Starting from 1 layer, one double turn yields 4 layers; two turns yield 16; three turns yield 64.
Puff pastry typically uses six single turns (729 layers), while croissants often employ a combination — such as two single turns followed by one double turn (3 × 3 × 4 = 36 layers) — to balance flakiness with a slightly tighter crumb structure. The choice depends on the desired texture: more turns yield finer, more delicate layers; fewer turns produce a heartier bite with visible separation.
Regardless of method, the dough must be rolled to a consistent thickness — usually 6–8 mm — before folding. Uneven rolling causes thin spots where butter may break through or thick areas that resist proper layering. Use rolling guides or measured dowels to maintain uniformity, and always roll from the center outward to prevent thinning at the edges.
Chilling Between Turns: Temperature Management
Chilling the dough between turns is non-negotiable for successful lamination. A minimum rest of 30 minutes at 4°C serves two critical purposes: it re-solidifies the butter to prevent melting during subsequent rolling, and it allows the gluten to relax, reducing shrinkage and resistance. Skipping or shortening this rest risks butter leakage, uneven layers, and a tough, bread-like texture due to overworked gluten.
During lamination, the mechanical action of rolling generates heat through friction, and the dough absorbs warmth from the environment and the baker’s hands. Even in a cool kitchen, the dough’s temperature can rise by 4–6°C per turn. Without chilling, butter approaches its melting point (32–35°C) and begins to ooze from the layers. Once melted, it migrates outward, pooling at the edges or seams, and fuses with the dough instead of remaining discrete.
In a side-by-side test, two batches of croissant dough were laminated identically except for inter-turn chilling. The chilled batch rested 30 minutes at 4°C between each of three single turns. The unchilled batch was rolled continuously with only 5-minute bench rests. After baking, the chilled batch displayed distinct, honeycombed layers with clean separation and a crisp, shattering texture. The unchilled batch showed butter pooling at the base, uneven rise, and a greasy mouthfeel. Microscopic cross-sections confirmed that the unchilled dough had fewer than 100 identifiable layers, while the chilled version retained over 500.
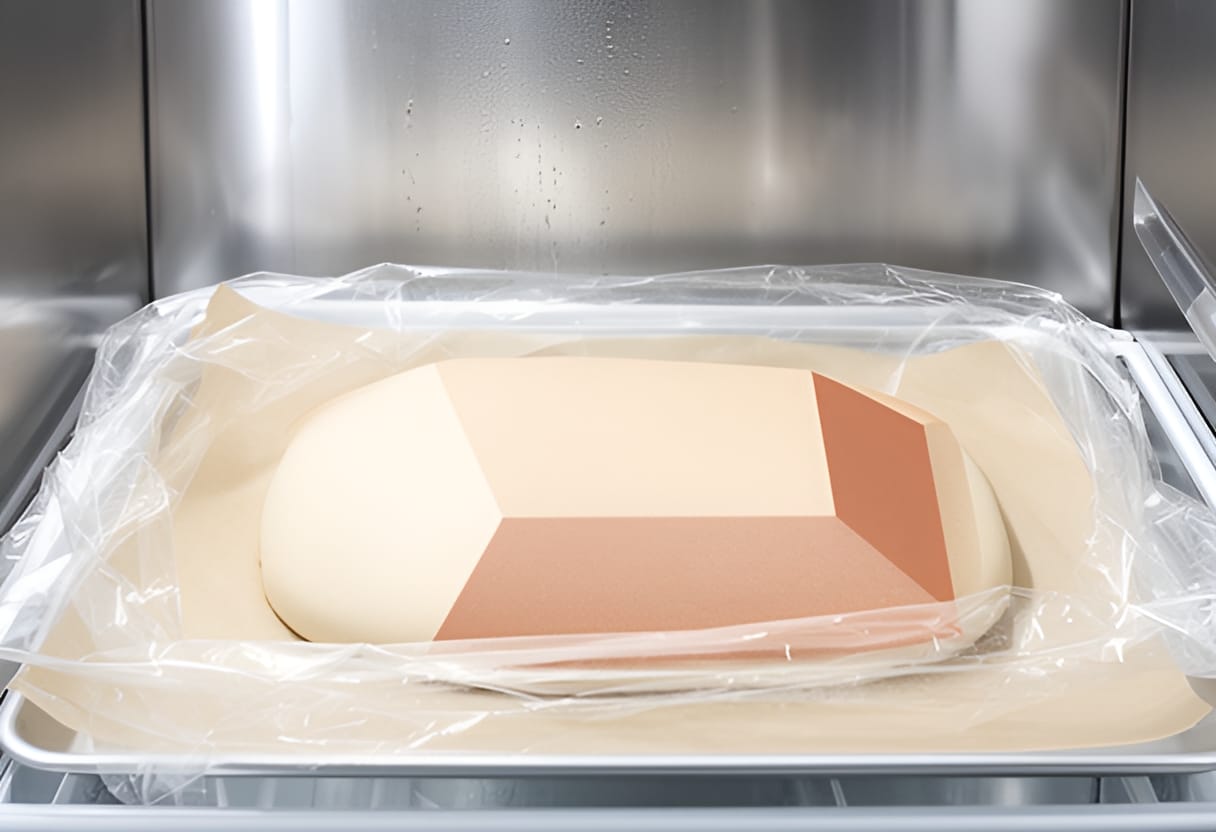
To manage temperature effectively, place the dough on a parchment-lined tray, cover it loosely with plastic to prevent drying, and refrigerate immediately after each turn. If the kitchen is warm, reduce bench time and use chilled rolling pins. For extended processes, such as overnight lamination, a single turn followed by extended refrigeration (8–12 hours) can improve flavor development and handling properties without compromising layer integrity.
Visual Guide to Lamination Faults
Even with precise technique, laminated doughs can develop faults that compromise texture and appearance. Recognizing these issues early allows for correction or informed adjustments in future batches. The most common problems stem from butter temperature mismatches, insufficient chilling, or uneven rolling.
Illustration
Cross-sectional diagram of laminated dough after three single turns, showing 729 distinct alternating layers of dough and butter. Each layer is labeled with its position in the stack, and the total count (3^6 = 729) is annotated at the base. Arrows indicate the direction of rolling and folding, with callouts noting that butter remains discrete and continuous only when temperature and resting protocols are followed.
Butter leakage appears as melted fat seeping from the edges or ends of the dough during rolling or baking. It results from butter that is too warm, insufficient chilling between turns, or excessive pressure during rolling. To prevent it, ensure butter matches dough temperature, chill for at least 30 minutes after each turn, and use gentle, even pressure when rolling — letting the pin do the work rather than forcing it.
Uneven layers occur when the dough is rolled to inconsistent thickness or folded misaligned. Thinner sections tear easily, allowing butter to migrate, while thicker areas resist compression and create dense patches. Use rolling guides or marked surfaces to maintain uniform thickness, and always align edges precisely before folding. A misaligned fold of just 5 mm can compound over multiple turns, leading to significant layer displacement.
Tunneling — large, irregular air pockets surrounded by dense dough — indicates under-lamination or butter that melted and pooled during proofing or baking. This often occurs when the dough is under-rolled before folding, creating thick butter centers that resist integration. Ensure the dough is rolled to a consistent 6–8 mm thickness before each turn, and verify that the butter sheet extends fully to the edges without being exposed.
Finally, lack of puff — where the dough bakes flat or with minimal lift — suggests either insufficient layers (too few turns), butter that fully incorporated into the dough, or gluten overdevelopment from inadequate resting. Review turn count, verify butter integrity between rolls, and ensure adequate chilling to relax gluten. When in doubt, reduce batch size to maintain control, as laminated dough is unforgiving of haste or inconsistency.
Batters: Pour, Drop, and Coat Consistencies
Batters differ from doughs in their higher liquid-to-flour ratio, which inhibits gluten development and creates a pourable or spreadable consistency. However, even in batters, the balance of ingredients and mixing technique critically influences texture. Three primary consistencies—pour, drop, and coat—serve distinct culinary purposes, each defined by specific ingredient ratios and handling methods. Understanding these categories allows cooks to predict batter behavior, troubleshoot common issues, and achieve reliable results across applications from delicate crêpes to hearty muffins and crisp tempura.
Pour Batter: Thin and Fluid
Pour batters are characterized by their high liquid content, resulting in a consistency similar to heavy cream that flows easily from a spoon or ladle. They are used for applications where a thin, even layer is desired, such as crêpes, pancakes, and certain types of battered fish. The standard ratio for a basic pour batter is 1:1:1 by weight of liquid to egg to flour. For example, a typical crêpe batter might use 100g of milk, 50g of egg (approximately one large egg), and 50g of all-purpose flour. This balance ensures sufficient structure from the flour and protein from the egg to form a cohesive film when cooked, while the high liquid content prevents excessive thickening.
The mixing method for pour batters emphasizes minimal gluten development. Ingredients are combined just until smooth, often with a whisk or blender, to avoid overworking the flour. Resting the batter for 20–30 minutes at room temperature allows the flour to fully hydrate and any gluten strands to relax, which improves flow and reduces tearing during cooking. A rested pour batter will coat the back of a spoon thinly and evenly, dripping off in a steady stream without clinging in thick drops.
A common issue with pour batters is uneven cooking or tearing, which often stems from insufficient resting or excessive mixing. For instance, if a crêpe batter is used immediately after mixing, the uneven hydration can cause thick, gummy spots that tear when flipped. Allowing the batter to rest resolves this by equalizing moisture distribution. Another frequent problem is thick, dense crêpes, which usually results from too much flour or overmixing. Correcting the ratio to maintain the 1:1:1 balance and limiting mixing to a few strokes after combining wet and dry ingredients preserves tenderness.
Drop Batter: Shape-Holding Viscosity
Drop batters are thicker than pour batters, holding their shape when scooped or dropped from a spoon but still soft enough to spread slightly during baking. They are typical of muffins, quick breads, and drop cookies. The standard ratio for a drop batter is 2:2:1 by weight of flour to liquid to egg. For example, a basic muffin recipe might use 200g of flour, 100g of milk, and 50g of egg (one large egg). This higher flour content provides the structure needed for a risen, tender crumb, while the liquid and egg contribute moisture and richness.
Mixing drop batters requires particular attention to avoid overdeveloping gluten. The typical method involves combining dry ingredients separately from wet ingredients, then mixing them together just until incorporated. A few lumps are acceptable and even desirable, as they indicate minimal stirring. Overmixing at this stage elongates gluten strands, which can trap gases unevenly during baking and lead to the formation of long, narrow holes known as tunnels. These tunnels create a tough, chewy texture and an unattractive appearance, especially in muffins where a uniform crumb is expected.
A practical example illustrates this principle: two batches of blueberry muffins were prepared using identical ingredients and baking conditions. The first batch was mixed for 15 seconds after combining wet and dry ingredients, leaving visible flour streaks. The second batch was mixed for 45 seconds until completely smooth. After baking, the first batch showed a tender, even crumb with small, irregular air pockets. The second batch exhibited three to four prominent tunnels running vertically through the muffins, with a noticeably denser and more elastic texture around them. The difference was solely due to mixing time, highlighting how even a short period of overmixing can significantly alter texture.
To prevent tunneling, bakers should mix drop batters only until no large streaks of flour remain, then stop immediately. Using a spatula rather than a mixer increases control and reduces the risk of overwork. Additionally, incorporating ingredients like melted butter or oil can coat flour proteins and limit gluten formation, though this does not compensate for excessive mixing. Resting the batter for 10–15 minutes before baking can also help, as it allows the flour to hydrate fully and reduces the urge to overmix in pursuit of smoothness.
Coat Batter: Light and Adhesive
Coat batters are designed to adhere thinly and evenly to food items, creating a crisp, light crust when fried. They are used for tempura, fritters, and certain types of fried vegetables or seafood. The consistency should be thin enough to flow off a utensil in a slow ribbon but thick enough to cling to the surface of the food without dripping excessively. A typical coat batter ratio is 1:1:0.5 by weight of flour to liquid to egg, though many recipes, especially for tempura, omit egg entirely and rely on flour and cold liquid (often sparkling water) to achieve the desired texture.
The key to a successful coat batter lies in temperature and minimal mixing. Ingredients should be kept cold—flour chilled, liquid iced—to inhibit gluten development and prevent the batter from absorbing too much oil during frying. Mixing is done briefly with chopsticks or a fork, leaving the batter intentionally lumpy. Overmixing develops gluten, which results in a dense, oily crust instead of a light, crisp one. The batter should be used immediately after mixing, as resting allows gluten to form and leavening agents (if used) to lose potency.
A visual cue for proper coat batter consistency is the "ribbon test": when lifted, the batter should fall off the utensil in a thick, slow-moving stream that holds its shape for a second or two before dissolving back into the bowl. If it runs off quickly like water, it is too thin and will not adhere well. If it clings in a stiff lump, it is too thick and will produce a doughy, undercooked interior. Adjusting with small amounts of liquid or flour corrects the balance.
An illustrative case involves preparing shrimp tempura. Two batches were made with identical ingredient ratios but different mixing techniques. The first batch was stirred gently for 10 seconds with chopsticks, leaving visible lumps of flour. The second batch was whisked vigorously for 20 seconds until smooth. When fried at 180°C, the first batch produced a lacy, crisp coating that puffed slightly and remained light and non-greasy. The second batch formed a thicker, uniform crust that absorbed more oil, resulting in a heavier, denser texture with a noticeable chew. The difference underscored how mixing intensity directly affects gluten development and, consequently, the final texture of the fried coating.
Troubleshooting Common Batter Issues
Batter consistency and texture are sensitive to ingredient ratios, mixing technique, and temperature. Recognizing the symptoms of common problems enables quick correction and prevents wasted ingredients. The following table summarizes frequent issues, their likely causes, and practical solutions for each batter type.
| Batter Type | Common Issue | Likely Cause | Solution |
|---|---|---|---|
| Pour | Tears when cooking | Insufficient rest or overmixing | Rest batter 20–30 min; mix just until smooth |
| Pour | Thick, dense texture | Too much flour or overmixing | Verify 1:1:1 ratio; limit mixing to a few strokes |
| Drop | Tunnels in crumb | Overmixing developing gluten | Mix until just combined; stop at first sign of uniformity |
| Drop | Flat, poor rise | Expired leavening or overmixed batter | Check baking powder/soda freshness; reduce mixing time |
| Coat | Soggy, oily crust | Batter too warm or overmixed | Keep ingredients cold; mix minimally; use immediately |
| Coat | Poor adhesion | Batter too thin | Add flour 1 tsp at a time until ribbon test passes |
For pour batters, the most frequent issue is tearing during cooking, which typically results from inadequate resting or excessive mixing. Allowing the batter to rest ensures even hydration, while limiting mixing prevents gluten formation that reduces flexibility. For drop batters, tunneling remains the primary concern, directly linked to overmixing. Educating the eye to accept small lumps as a sign of proper technique helps avoid this pitfall. In coat batters, temperature control is paramount; even a slight increase in ingredient temperature can accelerate gluten formation and oil absorption, undermining the desired lightness. Keeping all components chilled and using the batter promptly are non-negotiable for success.
By internalizing the distinctions between pour, drop, and coat consistencies—and the specific ratios, mixing methods, and visual cues that define each—cooks gain the ability to adapt batters to a wide range of applications with confidence. This foundational understanding transforms batter preparation from a guessing game into a predictable, repeatable process, setting the stage for consistent results in both sweet and savory contexts.
Leavening Agents: Chemical and Biological
Leavening transforms dense mixtures into light, aerated structures by introducing gas bubbles that expand during baking. While batters and doughs rely on mixing, hydration, and gluten development for structure, leavening agents provide the lift that defines texture in breads, cakes, and pastries. The choice between chemical and biological leaveners affects not only rise but also flavor, timing, and handling. Understanding how each works—and when to use them—enables bakers to troubleshoot failures and adapt recipes with confidence.
Baking Soda: Immediate Reaction with Acid
Baking soda, or sodium bicarbonate, is a pure chemical leavener that requires both acid and liquid to activate. When dissolved in a wet mixture containing an acidic ingredient—such as buttermilk, yogurt, molasses, or vinegar—it undergoes an immediate chemical reaction that releases carbon dioxide gas. This reaction begins the moment the dry and wet ingredients are combined, meaning there is no delay between mixing and gas production. As a result, batters leavened solely with baking soda must be baked promptly; otherwise, the gas escapes, leading to poor rise and dense texture.
The amount of acid in the recipe must be sufficient to neutralize the baking soda. Too little acid leaves unreacted soda, which can impart a bitter, soapy flavor. Too much acid, while not harmful, wastes leavening potential and may overly tart the final product. A general guideline is about 1/4 teaspoon of baking soda per 1 cup of flour when paired with adequate acidity.
For example, in gingerbread, molasses provides the necessary acidity to activate baking soda. The dough is mixed, shaped, and baked immediately to capture the gas release. If rested too long before baking, the cookies spread excessively and lack lift. This immediacy makes baking soda ideal for quick breads and cookies where speed and a tender crumb are desired, but it demands precise timing and acid balance.
Baking Powder: Controlled, Two-Stage Release
Baking powder is a complete chemical leavener that contains both sodium bicarbonate and one or more dry acids (commonly monocalcium phosphate and sodium aluminum sulfate), along with a starch filler to prevent premature reaction. It is designed to release carbon dioxide in two distinct phases: first when moistened, and second when heated. This double-acting behavior provides a more forgiving window for mixing and resting, making it the preferred leavener for many home bakers.
The first rise occurs as soon as the baking powder comes into contact with liquid, releasing about one-third of its total gas. The second rise happens during baking, typically when the internal temperature of the batter or dough exceeds 60°C (140°F), triggering the remaining acid-base reaction. This two-stage release allows for a brief rest—up to 15–20 minutes—without significant loss of lift, which is helpful when preparing multiple batches or shaping doughs.
Because baking powder is self-contained, it does not rely on acidic ingredients in the recipe. This makes it ideal for neutral batters like biscuits, scones, and pancakes, where flavor balance is key. A standard ratio is 1 to 1 1/4 teaspoons of baking powder per 1 cup of flour. Using too much can cause a bitter aftertaste and a coarse, uneven crumb, as excess gas creates large, unstable bubbles that collapse during baking.
Consider a batch of buttermilk biscuits. The recipe calls for baking powder, not soda, because the buttermilk’s acidity is already balanced for tenderness, not leavening. If baking soda were used alone, the reaction would be too fast and uneven. Instead, the double-acting powder provides a steady lift during mixing and a strong second rise in the oven, resulting in flaky, layered biscuits with consistent height.
Yeast: Biological Fermentation Over Time
Unlike chemical leaveners, yeast is a living organism—Saccharomyces cerevisiae—that produces carbon dioxide through fermentation. As yeast consumes sugars in the dough, it releases gas and alcohol, contributing not only to rise but also to flavor development. This biological process is slower than chemical leavening, typically requiring 1 to 2 hours for the first rise at room temperature (around 24–27°C / 75–80°F), though timing varies with yeast quantity, sugar availability, and ambient conditions.
Yeast thrives in a moist, slightly acidic environment with access to fermentable sugars. Salt regulates its activity, slowing fermentation to prevent over-proofing, while fat (as in enriched doughs) tenderizes the gluten but can inhibit yeast if used in excess. The fermentation process also strengthens gluten through mild acid production, improving dough elasticity and gas retention.
For instance, in brioche, a rich, egg- and butter-enriched dough, yeast fermentation occurs over two rises: first after mixing, and again after shaping. The cold butter is incorporated gradually to avoid inhibiting yeast, and the dough is proofed slowly to develop a tender, open crumb with a subtle sweetness from fermentation. Rushing the rise by increasing temperature can cause the butter to melt or the yeast to exhaust its food supply, leading to poor volume and a bland flavor.
Yeast’s sensitivity to temperature means that dough proofed in a cool refrigerator (retardation) develops more complex flavors over 12–16 hours, while a warm proof speeds up the process but risks uneven fermentation. Bakers often use the finger dent test—gently pressing a floured fingertip into the dough—to judge readiness: if the indentation springs back slowly and leaves a slight depression, the dough is ready to bake.
Comparing Leavening Agents
The choice of leavener depends on the desired texture, flavor profile, and timing of the recipe. Chemical leaveners act quickly and predictably, while yeast offers depth of flavor and superior structure in elastic doughs but requires time and careful temperature control. Substituting one for another is rarely a 1:1 exchange due to differences in reaction speed, gas yield, and interaction with other ingredients.
| Leavening Agent | Activation Condition | Gas Yield & Timing | Best-Use Examples |
|---|---|---|---|
| Baking soda | Acid + liquid | Immediate, single release | Gingerbread, molasses cookies |
| Baking powder | Liquid (first), heat >60°C (second) | Two-stage: wet then hot | Biscuits, pancakes, quick breads |
| Yeast | Moisture, warmth, sugar | Slow, continuous fermentation (1–2 hrs first rise) | Bread, brioche, rolls |
This table highlights how each agent functions in practice. Baking soda’s immediacy demands acidic ingredients and prompt baking. Baking powder’s dual action allows flexibility in mixing and resting. Yeast’s biological nature enables flavor development but requires planning for fermentation time.
Substituting Leaveners: Adjusting for Balance
Direct substitution between leaveners often fails without recipe adjustments. For example, replacing baking powder with baking soda requires adding an acid to trigger the reaction and reducing the soda amount—typically using 1/4 teaspoon baking soda per 1 teaspoon baking powder, plus 1/2 teaspoon of an acid like cream of tartar or lemon juice. Conversely, substituting baking powder for baking soda is not recommended unless the recipe already contains sufficient acid, as the powder’s dry acids may unbalance flavor.
Yeast cannot be directly swapped for chemical leaveners in quick breads or cakes, as the structure and timing are incompatible. However, in some batter-based recipes like certain types of waffles or pancakes, a small amount of yeast can be used for overnight refrigeration to develop flavor, followed by a brief warm rest before cooking.
When adapting recipes, consider the role of the leavener beyond rise: does it affect flavor (yeast adds complexity; excess soda adds bitterness)? Does it interact with other ingredients (acid for soda, heat for powder)? And does the mixing method support the leavener’s timing (minimal for chemical, developed for yeast)? Answering these questions ensures that substitutions enhance rather than undermine the final product.
Try This
This week, test how leavening timing affects texture with a simple side-by-side comparison.
- Prepare two small batches of pancake batter using the same recipe: one with baking powder, one with baking soda plus 1/2 tablespoon lemon juice (to provide acid).
- Cook the first batch immediately after mixing. Let the second batch rest for 20 minutes before cooking.
- Compare the height, texture, and flavor of the pancakes. Note whether the rested batter lost lift or developed off-flavors, and how the acid in the soda batch affected taste.
This exercise reveals the immediacy of soda-leavened batters and the stability of double-acting powder, reinforcing why timing matters in chemical leavening.
Key Takeaways
- Baking soda requires acid and liquid to activate and releases gas immediately upon mixing, demanding prompt baking to retain lift.
- Baking powder is double-acting: it releases gas when wet and again when heated above 60°C, allowing for brief resting periods without significant loss of rise.
- Yeast ferments sugars over 1–2 hours for the first rise, producing carbon dioxide and flavor compounds that define bread aroma and texture.
- Substituting leaveners requires adjusting for acidity, timing, and gas yield; direct swaps often fail without recipe rebalancing.
- Matching the leavener to the dough or batter’s structure, mixing method, and desired flavor ensures consistent, predictable results.
Chapter 3
From Pan to Plate: Composition and Service
Flavor Profiling and Balance
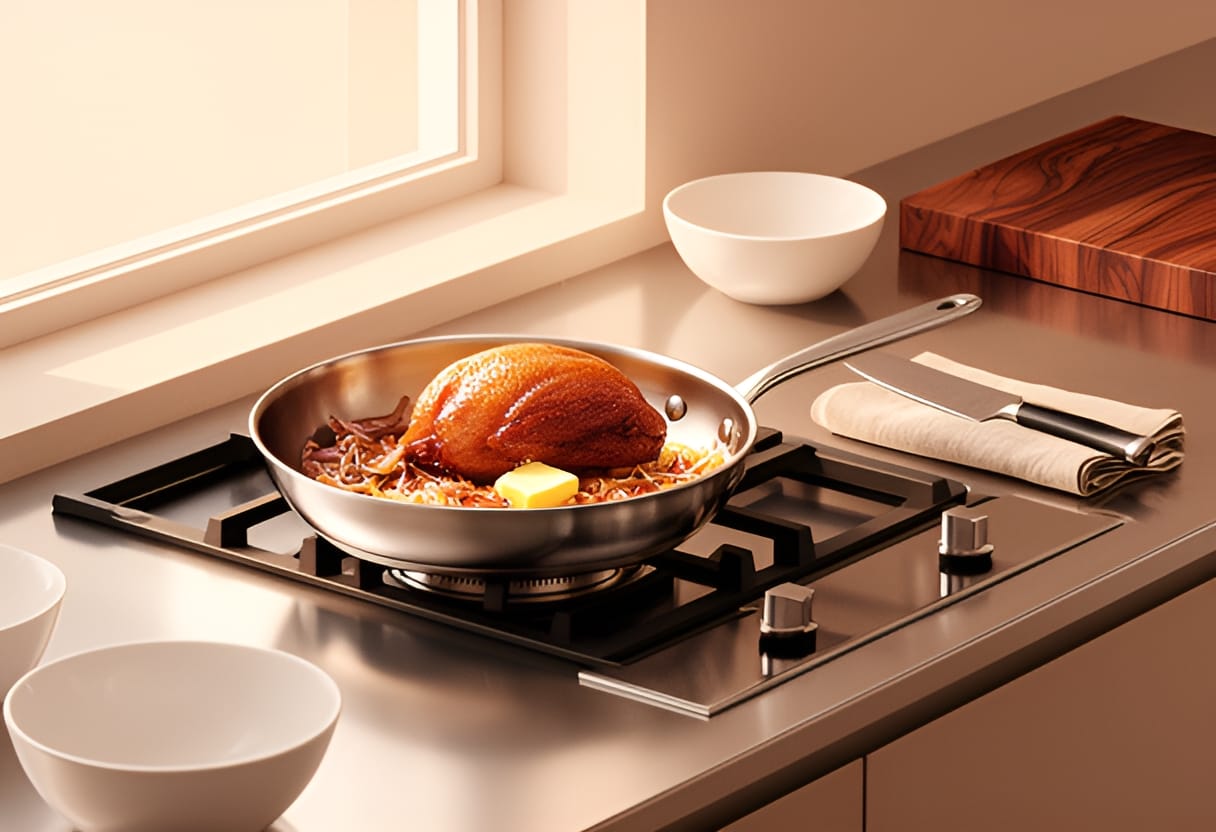
The scent of browning butter and caramelizing shallots rises from the pan as the duck confit finishes reheating, its skin crisping under the broiler. On the cutting board, frisée leaves glisten with a light vinaigrette, their pale green edges tinged with bitterness. A small ramekin holds a glossy cherry gastrique, its deep red surface catching the light. This is the moment when technique meets intention — when the cook moves beyond executing steps to shaping an experience. Flavor is not merely detected; it is composed.
The Five Tastes as Building Blocks
Every dish communicates through a language of taste, rooted in five basic perceptions: sweet, salty, sour, bitter, and umami. These are not isolated sensations but interacting signals that the brain integrates into a unified impression of flavor. Sweetness often signals energy; saltiness regulates fluid balance; sourness can indicate ripeness or spoilage; bitterness warns of potential toxins; umami reveals the presence of proteins and nucleotides, guiding us toward nourishment. In cooking, understanding how these tastes influence one another allows for deliberate adjustment rather than guesswork.
For example, a reduction of veal stock may taste deeply savory but flat on its own. The umami from glutamates and inosinates is present, yet without a touch of acidity — say, a splash of sherry vinegar — the flavor lacks lift. Conversely, a tomato salad might taste overly sharp until a pinch of salt suppresses the perception of acid and enhances the fruit’s natural sweetness. These interactions are not additive; they are modulating. Salt, in particular, acts as a flavor enhancer, suppressing bitterness while amplifying sweet and umami notes. This is why seasoning in layers — during sautéing, deglazing, and finishing — builds complexity that a single end-of-cooking salt adjustment cannot match.
Fat, while not a basic taste, profoundly shapes perception. It carries fat-soluble flavor compounds, coats the tongue to prolong taste sensation, and contributes to mouthfeel, which in turn affects how intensely flavors are experienced. A rich duck leg confit, slow-cooked in its own fat, delivers unctuousness that can overwhelm the palate if not balanced. Here, acidity — from the cherry gastrique — cuts through the fat, cleansing the palate and reactivating taste buds. Sweetness, in turn, can soften the impact of salt or spice, while bitterness, as in the frisée, provides a contrasting edge that prevents the dish from feeling cloying.
Umami: The Depth Behind Savory
Umami, often described as savory or meaty, arises from glutamate, inosinate, and guanylate compounds found in specific ingredients. Unlike the other tastes, umami is less about immediate impact and more about depth, roundness, and lingering satisfaction. It is the taste that makes a broth feel substantial, a sauce feel complete, or a grilled mushroom feel deeply satisfying.
Key umami sources include aged cheeses like Parmigiano-Reggiano, where proteolysis breaks down proteins into free glutamates; tomatoes, especially when cooked or sun-dried, which concentrate glutamates; mushrooms such as shiitake and porcini, rich in guanylate; fermented products like soy sauce and fish sauce, which develop umami through enzymatic breakdown; and meat glazes, particularly those made by reducing stocks to a syrupy consistency, concentrating both gelatin and flavor nucleotides.
In practice, umami is rarely added as a standalone ingredient but is layered to reinforce other flavors. A Bolognese sauce gains its backbone not just from meat but from the combination of tomato paste (sautéed to caramelize sugars and deepen umami), Parmesan rind simmered in the sauce, and a splash of soy sauce — not to make it taste Asian, but to deepen its savory foundation. Similarly, a mushroom risotto derives its earthy richness from sautéed cremini and porcini, finished with a knob of butter and grated Grana Padano, each step amplifying the umami foundation without making any single ingredient dominant.
The power of umami lies in its ability to make food feel more satisfying with less salt or fat. A study published in the Journal of Food Science found that dishes with enhanced umami allowed for up to a 30% reduction in sodium while maintaining perceived saltiness and overall palatability. This makes umami not just a flavor enhancer but a tool for healthier cooking — one that relies on technique and ingredient choice rather than restriction.
Balancing Richness with Contrast
Richness, whether from fat, starch, or protein, creates a luxurious mouthfeel but can lead to palate fatigue if unopposed. The cook’s toolkit for balancing richness includes acidity, bitterness, and texture contrast — each serving to refresh the palate and renew perception.
Acidity is the most direct counterpoint to fat. Vinegar, citrus juice, or even acidic fruits like cherries or pomegranates can cut through greasiness by stimulating salivary flow, which helps dissolve and clear fat residues from the tongue. The effectiveness depends on both pH and flavor profile. A French vinaigrette, with its 1:3 vinegar-to-oil ratio and 6% acidity wine vinegar, provides a sharp, fruity lift ideal for bitter greens. An Asian-inspired vinaigrette, often at a 1:1 to 2:1 oil-to-acid ratio using rice vinegar or citrus, offers a milder, sweeter tartness suited to delicate fish or vegetables. American-style vinaigrette, with its 1:2 vinegar-to-oil ratio and 5% acidity, strikes a middle ground — robust enough for hearty salads but not overpowering.
Consider the duck confit again. Its richness comes from prolonged cooking in duck fat, rendering the meat tender and the skin unctuous. Served alone, it risks feeling heavy. But when paired with a cherry gastrique — made by reducing cherry juice, red wine vinegar, and a touch of sugar to a syrupy consistency — the dish gains a bright, fruity acidity that slices through the fat. The gastrique’s sweetness also balances the vinegar’s sharpness, while its slight bitterness from tannins in the cherries adds complexity. Meanwhile, the frisée salad, dressed lightly with that same French vinaigrette, contributes a clean, bitter crunch that resets the palate between bites.
Sweetness, while often thought of as a dessert component, plays a crucial role in savory balance. It can counteract excessive salt or spice, not by neutralizing them but by providing a competing sensation that the brain interprets as relief. A splash of maple syrup in a black bean chili, for instance, doesn’t make the dish sweet — it makes the heat more tolerable. Similarly, a touch of honey in a soy-ginger glaze for salmon tempers the saltiness of the soy while enhancing the gloss and depth of flavor.
Bitterness, frequently misunderstood as undesirable, is essential for balance. It prevents sweetness from becoming cloying and richness from feeling heavy. Beyond frisée, bitter elements include radicchio, endive, grapefruit peel, dark chocolate, coffee, and even certain herbs like turmeric or fenugreek. In a dessert, a bitter cocoa crust can offset a sweet caramel filling; in a savory dish, a charred lemon half adds both acidity and a smoky bitterness that lifts grilled fish.
The Flavor Wheel: A Tool for Correction
When a dish feels off, the cook must diagnose not just what is missing but what is in excess. The flavor wheel — a conceptual tool modeled after those used in sensory science — helps guide corrections by showing how tastes influence one another. Unlike a recipe, it does not prescribe amounts but suggests directions for adjustment based on perceived imbalance.
If a dish tastes too sweet, the remedy is to add acid or bitter — never more sweetness. Acid cuts through cloying sweetness (e.g., adding lime juice to an over-sweetened mango salsa), while bitterness introduces complexity that diverts attention from sugar (e.g., adding chopped toasted walnuts to a sweet potato dish). If a dish is too salty, the solution is not to add water — which dilutes flavor — but to introduce sweetness or fat. A pinch of sugar in an over-salted soup can mask excess salt perception, while stirring in a tablespoon of cream or butter coats the tongue and reduces salt’s intensity. If a dish feels too sour, sweetness or fat can round it out (e.g., adding a touch of honey to a sharp vinaigrette or swirling yogurt into a tangy lentil soup). If it’s too bitter, sweetness or fat can soften the edge (e.g., adding maple syrup to bitter greens or finishing a bitter espresso custard with cream). If it’s too umami-rich — rare but possible in concentrated reductions — a touch of acidity or sweetness can restore balance.
This wheel is not rigid; it reflects tendencies, not rules. A dish that is both too sweet and too sour might need dilution or increased umami to round it out. The key is tasting critically, identifying the dominant sensation, and applying a counterweight with purpose.
As the duck confit rests, the cook lifts a frisée leaf dipped in vinaigrette, then a bite of meat, then a spoonful of gastrique. The fat, salt, and umami of the duck meet the acid and sweetness of the cherry reduction, the bitterness of the greens, and the subtle salt of the vinaigrette. No single taste dominates; instead, they converse. This is flavor in balance — not accident, but design.
Texture and Mouthfeel Contrast
The duck confit rests, the cook lifts a frisée leaf dipped in vinaigrette, then a bite of meat, then a spoonful of gastrique. The fat, salt, and umami of the duck meet the acid and sweetness of the cherry reduction, the bitterness of the greens, and the subtle salt of the vinaigrette. No single taste dominates; instead, they converse. This is flavor in balance — not accident, but design.
Texture, however, is where the dish truly comes alive. While flavor engages the senses of smell and taste, texture speaks to touch — the way food feels against the lips, teeth, tongue, and palate. A dish can be perfectly seasoned yet fall flat if every component yields the same sensation. Contrast in texture creates rhythm, draws attention, and sustains interest from the first bite to the last. It is the difference between eating and experiencing.
Consider again the duck confit. The meat yields under slight pressure, tender and fibrous, almost melting. The skin, when crisped under the broiler, offers a sudden resistance — a delicate shatter that gives way to unctuous fat beneath. The frisée provides a crisp, slightly fibrous crunch, its leaves breaking with a clean snap. The cherry gastrique, syrupy and viscous, clings to the spoon before slowly releasing its weight. Each element occupies a distinct point on the texture spectrum, and together they create a dynamic interplay that keeps the palate engaged.
Crispy Contrast: The Power of Sudden Resistance
Crispiness is one of the most universally appealing textures in cooking. It signals freshness, triggers a satisfying auditory response, and provides a momentary break from softer, more yielding components. When applied thoughtfully, a crispy element can elevate a dish from pleasant to memorable.
Take creamy risotto, for example. Arborio rice, stirred slowly with warm stock, releases its starch to create a luxuriously thick, creamy consistency that coats the palate. On its own, it is comforting but can feel one-dimensional. Now imagine the same risotto topped with a scattering of fried shallots. Thinly sliced and cooked in hot oil until golden and brittle, these shallots shatter instantly upon contact with the teeth, releasing a deep, savory aroma and a clean, oily crunch. The contrast is immediate: the yielding, starchy creaminess of the rice against the sudden, dry crispness of the shallot. One invites slow savoring; the other demands attention.
This principle extends beyond garnishes. A tuile — a thin, crisp cookie made from reduced fruit purée or nut butter — placed beside a panna cotta does more than decorate. The panna cotta, set with gelatin, trembles slightly under the spoon, offering a smooth, dense resistance that melts slowly on the tongue. The tuile, by contrast, is rigid and brittle, snapping cleanly with a light, airy crunch. Together, they create a dialogue between yielding and resisting, soft and firm.
To apply crispy contrast effectively, the element must retain its integrity until the moment of eating. If fried shallots sit too long in the risotto’s steam, they soften and lose their textural punch. Similarly, a tuile placed on a wet surface will absorb moisture and lose its snap. Timing and moisture control are critical: crispy components should be added just before service, or served on the side for the diner to apply.
Creamy Elements: The Palate’s Canvas
Creaminess is not merely a texture — it is a vehicle. It carries flavor, coats the mouth, and prolongs the sensory experience. Unlike watery or thin sauces that slide quickly across the palate, creamy preparations linger, allowing time for aroma and taste to develop.
This quality comes from emulsified fats, suspended starches, or stabilized proteins. A potato purée, passed through a ricer and blended with warm butter and cream, becomes smooth and dense, each particle coated in fat that melts at body temperature. A hollandaise sauce, emulsified egg yolk and butter, flows thickly but breaks into rich, unctuous droplets on the tongue. Even a well-reduced demi-glace, though not dairy-based, gains a creamy mouthfeel from concentrated collagen and gelatin that lubricate the palate.
In the duck confit plate, the cherry gastrique provides a viscous, syrup-like body that clings to the meat, extending the contact time of its sweet-tart flavor. The fat rendered from the duck skin, when warm, coats the tongue in a thin, oily layer that enhances unctuousness. These are not sauces in the traditional sense, but they function as creamy elements by altering mouthfeel and flavor delivery.
To create effective creaminess, balance is key. Too much fat can feel greasy; too little, and the preparation lacks body. Temperature matters as well — a cold custard feels firm and dense, while the same custard warmed to just below body temperature flows more freely, releasing aroma and enhancing perceived richness. The goal is not thickness for its own sake, but a texture that supports flavor without overwhelming it.
Aerated Textures: Lightness and Volume
Where creamy textures ground a dish, aerated ones lift it. By incorporating air — whether through whipping, folding, or chemical leavening — cooks create preparations that feel light, ethereal, and often fleeting. These textures contrast not only with density but with expectation: they disappear quickly, leaving a clean palate ready for the next bite.
Meringue is a prime example. Egg whites, whipped to stiff peaks and gradually combined with sugar, form a foam stabilized by denatured proteins. When baked slowly, the moisture evaporates, leaving a crisp, dry shell that gives way to a tender, chewy interior. The initial bite offers resistance, then a sudden dissolution — a textural journey from crisp to melt.
In a deconstructed lemon tart, meringue serves as both structural and textural counterpoint. The shortbread crust is dense and crumbly, breaking with a soft, sandy collapse. The lemon curd, thick and glossy, yields slowly under pressure, coating the palate with bright acidity and rich fat. The meringue, piped and torched, presents a contrast: its exterior is lightly charred and crisp, while the interior remains marshmallow-soft, stretching slightly before breaking. This progression — from crisp crust to creamy curd to aerated meringue — creates a sequence of sensations that keeps the eating experience dynamic.
Other aerated textures follow similar principles. A chocolate mousse, made by folding whipped cream into melted chocolate, gains volume and lightness without losing richness. A savory espuma, created by blending a flavored liquid with lecithin and charging it with nitrous oxide, dispenses as a foam that collicits on the tongue, releasing aroma before vanishing. Even a well-whipped crema on espresso adds a fleeting layer of velvet that enhances the first sip.
The key to aerated textures is stability. Overwhipped egg whites become grainy and collapse; underwhipped foam lacks structure. Environmental factors like humidity and temperature affect longevity — meringues weep in damp air, foams deflate quickly. For service, aerated components are often prepared last and applied immediately, or protected by a barrier (such as a dry crust) to delay moisture transfer.
Texture Pairings: Mapping Contrast for Cohesion
Contrast is most effective when intentional. Rather than relying on chance, cooks can map textures against one another to ensure each bite offers variety. The following table outlines classic pairings, explaining why they work and providing concrete examples from both sweet and savory applications.
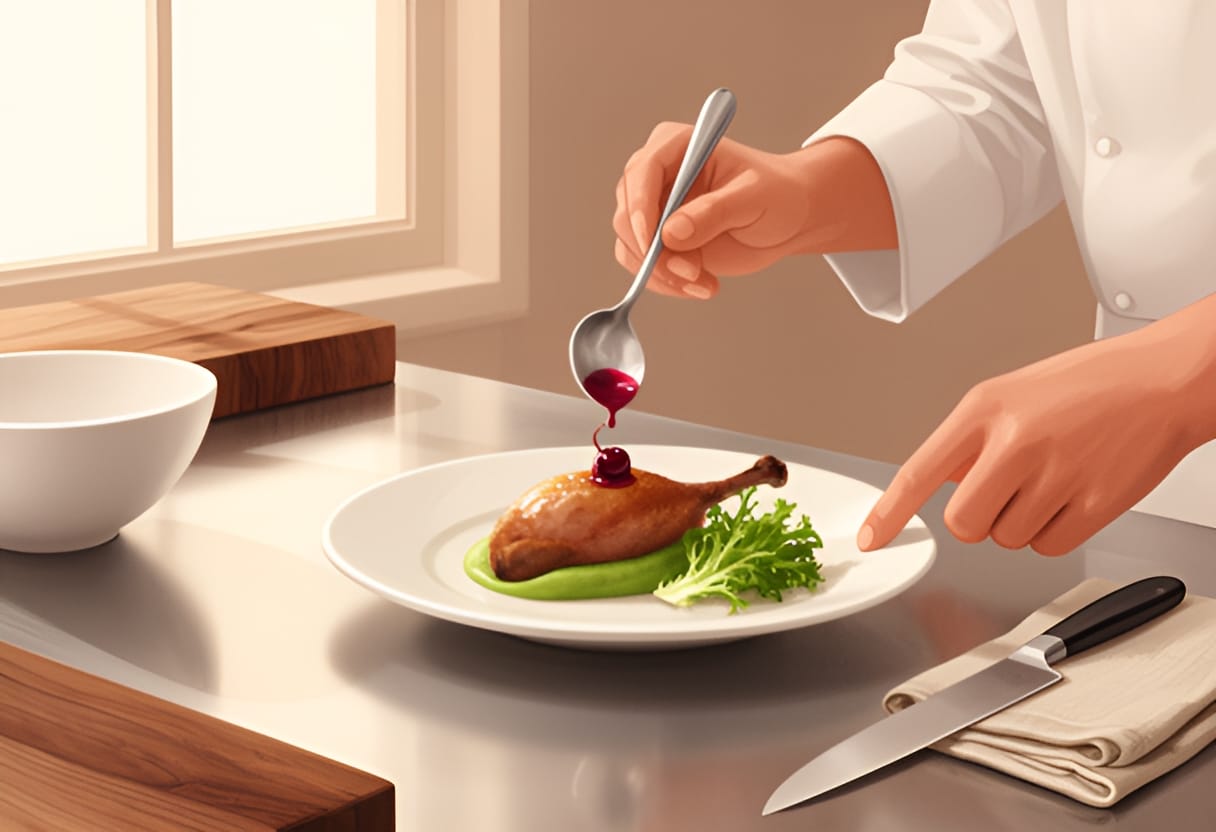
| Texture 1 | Texture 2 | Why It Works | Dish Example |
|---|---|---|---|
| Crispy | Silky | The sudden shatter of crispness interrupts the slow melt of silkiness, creating a clear sensory break. | Fried shallots on silky potato purée |
| Crunchy | Creamy | Crunch demands mastication; creaminess coats and soothes, balancing effort with reward. | Candied pecans on creamy goat cheese salad |
| Chewy | Crisp | Chewy resistance prolongs flavor release; crispness offers a clean, finite contrast that resets the palate. | Meringue (chewy interior) on shortbread (crisp) |
| Aerated | Dense | Lightness cuts through heaviness, preventing the dish from feeling stagnant or overly rich. | Espresso foam on dense chocolate torte |
| Fibrous | Unctuous | Fibrous textures scrub the palate; unctuousness replenishes lubrication, creating a cyclical refreshment. | Frisée leaves with duck confit fat |
| Granular | Smooth | Granular particles provide subtle texture; smoothness allows them to be perceived without distraction. | Sandy shortbread base with smooth lemon curd |
These pairings are not rigid rules but starting points. A single dish can contain multiple contrasts — the lemon tart, for instance, combines crisp (shortbread), creamy (curd), chewy/aerated (meringue), and crisp again (candied zest). The goal is not to maximize contrast for its own sake, but to ensure that no single texture dominates to the point of monotony.
To apply this in practice, the cook should evaluate each component during mise en place. Ask: What is the primary texture of this element? How does it feel in the mouth? Then, consider the plate as a whole: where are the repetitions? Where are the gaps? A seared scallop on pea purée may need a crisp element — pancetta crumble or fried capers — to break the uniformity of softness. A rich braised short rib might benefit from a pickled vegetable with a firm bite to cut through the gelatinous meat.
Texture, like flavor, is best understood through repetition and reflection. By training attention to the physical sensations of eating — the resistance, the release, the lingering coating — the cook begins to design not just for taste, but for the full arc of the bite. It is in this attention to detail that technique becomes intuition, and a plate becomes a moment.
Sauce Design and Nappe Consistency
The sauce is often the final conductor of a dish, binding components into a unified experience. Its texture determines how flavors are delivered, how long they linger, and how they interact with other elements on the plate. A sauce that is too thin runs and dilutes; one that is too thick coats the mouth excessively, masking subtlety. The ideal consistency — known as nappe — allows the sauce to cling to food, enhancing without overwhelming. Achieving this balance requires attention to reduction, emulsification, and finishing techniques, each of which alters both body and mouthfeel.
Understanding Nappe Consistency
Nappe, from the French naper meaning “to coat,” describes a sauce that evenly covers the back of a spoon and holds a clear line when a finger is drawn through it. This test is not arbitrary; it reflects a viscosity that allows the sauce to adhere to ingredients during plating and eating, ensuring each bite carries a proportional amount of flavor. A sauce at nappe thickness flows slowly off the spoon, leaving a smooth, continuous film rather than beading up or dripping in streams.
To perform the test, dip a clean spoon into the sauce, lift it horizontally, and observe the coating. If the sauce runs off quickly or forms droplets, it is too thin. If it clings in a thick, uneven layer or does not move at all, it is too thick. When the sauce coats the spoon uniformly and a finger drawn through the center leaves a clean, defined path that does not immediately fill in, the sauce has reached nappe.
This consistency is especially important for sauces served with proteins or vegetables, where uneven coating can lead to bites that are either sauce-dominant or bare. For example, a velouté intended to nappe a poached chicken breast should cling to the meat in a glossy, even layer, delivering flavor with each forkful without sliding off or overwhelming the delicate texture of the protein.
Achieving Nappe Through Reduction
Reduction is the most direct method for thickening a sauce and reaching nappe consistency. By simmering a liquid — such as stock, wine, or fruit juice — water evaporates, concentrating flavors and increasing viscosity. The process must be monitored carefully; excessive heat can cause scorching or break emulsions, while insufficient reduction leaves the sauce weak and watery.
A classic example is a red wine reduction for steak. Begin with 500 milliliters of full-bodied red wine, one finely chopped shallot, and a sprig of thyme. Simmer over medium heat until the volume reduces to approximately 125 milliliters — about one-fourth of the original. At this stage, the syrup should coat the back of a spoon and hold a clear line when traced with a finger. The reduction will have a glossy sheen and a viscous flow, indicating that sugars and phenolic compounds have concentrated enough to modify the liquid’s rheology.
Temperature control is critical. A bare simmer — just below boiling, where small bubbles break the surface intermittently — ensures gentle evaporation without agitating the liquid or denaturing delicate compounds. Stirring occasionally prevents hot spots and promotes even reduction. If the sauce begins to smell burnt or develops a skin, remove it from heat immediately and strain if necessary.
Reduction alone may not always achieve nappe, particularly with low-solids liquids like clear broths. In such cases, combining reduction with other thickening agents — such as a roux or liaison — provides more reliable control.
Using Liaison for Enrichment and Thickness
A liaison is a tempered mixture of egg yolks and cream used to enrich and thicken sauces off the heat. It adds body through the coagulation of egg proteins and the emulsifying power of fat, creating a velvety texture that coats the palate smoothly. Because egg yolks coagulate between 70–80°C, the liaison must be incorporated carefully to avoid curdling.
To prepare a liaison, whisk together two egg yolks and 60 milliliters of heavy cream per liter of sauce. Temper the mixture by slowly whisking in a small amount of the hot sauce, gradually raising its temperature. Once tempered, stir the liaison back into the main sauce off the heat. The sauce should thicken within minutes as the proteins denature and form a network that traps liquid.
A common application is finishing a suprême sauce — a velouté enriched with cream and liaison. After reducing chicken velouté to nappe consistency through reduction, whisk in the tempered liaison. The sauce will deepen in color, gain a luxurious mouthfeel, and cling evenly to the back of a spoon. This technique is especially effective for sauces served with delicate proteins like fish or poultry, where a heavy roux might overwhelm the dish.
Liaison also stabilizes sauces prone to separation. The lecithin in egg yolks acts as an emulsifier, helping to bind fat and water phases. However, sauces finished with liaison should not be reheated to boiling, as this risks breaking the emulsion and causing the sauce to split.
Mounting with Butter for Shine and Body
Mounting, or monter au beurre, is the technique of whisking cold butter into a sauce off the heat to add shine, roundness, and slight thickening. The butter emulsifies into the sauce, dispersing fat globules that scatter light and create a glossy appearance. It also lowers the perceived acidity and enhances mouthfeel by coating the tongue.
To mount a sauce, remove it from the heat and whisk in small pieces of well-chilled butter — typically 20 to 30 grams per 250 milliliters of sauce — a few pieces at a time. Each addition must be fully incorporated before adding more. The sauce should remain off the heat; if it becomes too warm, the emulsion can break, resulting in a greasy layer on the surface.
A classic example is finishing a beurre blanc. After reducing white wine, vinegar, and shallots to a syrup, whisk in cold butter gradually until the sauce becomes smooth and creamy. The mounted butter gives the sauce a silky texture that clings to fish or vegetables without feeling heavy. The same principle applies to pan sauces for seared meats: after deglazing and reducing the fond, mounting with butter unifies the flavors and gives the sauce a restaurant-quality sheen.
Mounting also provides a final opportunity to adjust seasoning. Because butter mellows sharp flavors, taste the sauce after mounting and adjust with a touch of acid — such as lemon juice or vinegar — or salt if needed. This ensures the sauce remains balanced, with brightness cutting through the richness.
Testing Nappe with the Ribbon and Wood Spoon Methods
Beyond the standard spoon test, two additional techniques help verify nappe consistency: the ribbon test and the wood spoon method. These are particularly useful for thicker sauces or those containing starches or emulsifiers.
For the ribbon test, dip a spatula or spoon into the sauce and lift it horizontally. If the sauce falls in a thick, continuous ribbon that holds its shape for a moment before sinking back into the pool, it is at or near nappe. If it breaks immediately or falls in thin streams, it is too thin. If it clings stubbornly and does not flow, it is too thick.
The wood spoon method relies on visual and tactile cues. Dip a wooden spoon into the sauce and lift it. If the sauce coats the spoon evenly and a finger drawn across the coating leaves a clear line that does not immediately blur, the sauce has reached nappe. Wood is preferred because it provides a slightly porous surface that holds sauce better than metal, making inconsistencies easier to see.
These tests are best performed off the heat, as residual heat can continue to thicken the sauce through evaporation or starch gelatinization. For example, a béchamel sauce may appear thin off the heat but thicken slightly as it rests. Testing at multiple stages ensures the final consistency matches the intended use — whether it is to nappe a vegetable gratin, coat a pasta, or serve as a base for a soufflé.
Mastering nappe consistency allows the cook to exercise precise control over a sauce’s behavior on the plate. It transforms the sauce from a mere accompaniment into an integrated component that enhances texture, flavor, and presentation. Through reduction, liaison, and mounting, the cook can adjust not only thickness but also mouthfeel and shine, tailoring each sauce to its role in the dish. When the sauce clings just right — leaving a clean line on the spoon and a balanced presence on the palate — it signals that technique has served intention.
Applying the Rule of Thirds
The rule of thirds divides the plate into a 3x3 grid, creating four intersection points that naturally draw the eye. Placing the main protein off-center, at one of these points, establishes visual hierarchy and leaves space for complementary elements. This approach avoids the static, centered presentation that can feel amateurish and instead guides the diner’s gaze across the plate in a deliberate sequence.
For a seared scallop dish, position the scallop slightly above and to the left of center. The pea purée, acting as the starch base, occupies the lower right quadrant, spreading in a smooth arc that follows the curve of the plate. The pancetta crumble, providing salty crunch, is scattered in the upper right quadrant, near but not touching the purée. Microgreens are placed sparingly along the upper left edge, near the scallop, to complete the balance. This arrangement ensures no quadrant feels overloaded or empty, and each component has room to be appreciated individually before being experienced together.
The rule also supports practical service. By keeping the protein elevated and separate from moist elements like purée, the scallop retains its crisp sear longer during plating. Guests are less likely to accidentally drag the purée onto the scallop while cutting, preserving textural contrast until the first bite.
Creating Color Contrast
Color contrast enhances perceived freshness and appetite by signaling variety and ripeness. A monochromatic plate, even if flavors are complex, can appear dull or heavy. Introducing hues opposite each other on the color wheel — such as green against yellow or red — creates visual vibration that makes each component pop.
In the scallop example, the golden-brown sear of the scallop sits atop a vibrant yellow pea purée. The purée’s hue comes from the natural carotenoids in peas, intensified by a touch of lemon zest and a knob of warmed butter. Microgreens, with their deep green stems and leaves, provide a cool counterpoint that frames the scallop and breaks up the warmth of the purée. The pancetta crumble adds russet tones that bridge the warm and cool zones, adding depth without clashing.
This contrast works because it mirrors natural food associations: green suggests herbaceousness, yellow evokes richness from eggs or corn, and brown indicates Maillard development. When these colors appear together intentionally, the brain interprets the plate as balanced and thoughtfully composed, even before tasting.
Avoid overloading the plate with competing colors. Limit the palette to three dominant hues — one warm, one cool, and one neutral — and let accents like a single edible flower or a drop of reduced balsamic provide focal points. Too many colors create visual noise, making it harder for the diner to focus on the intended flavor journey.
Building Height and Dimension
Flat plates read as careless, no matter how precise the technique. Height introduces dynamism, invites exploration, and signals that components have been considered individually before being brought together. Stacking or leaning elements creates shadow and light play, making the plate more engaging under restaurant lighting.
For the scallop, do not lay it flat on the purée. Instead, warm the pea purée and pipe or spoon it into a slight mound off-center. Place the seared scallop leaning against this mound, so it rests at a 30-degree angle, with the golden-brown side facing up. This exposes the maximum surface area of the sear to light and allows the pancetta crumble to be scattered over the top and down the side, catching on the angled surface. Microgreens are tucked beneath the overhang of the scallop, where they remain upright and visible.
Height also serves a functional purpose. Elevating the scallop prevents it from sitting in pooled juices or purée, which could soften the crust. The angle allows sauce or jus, if used, to pool gently at the base without touching the scallop until the diner cuts into it. This controlled interaction preserves texture until the moment of eating.
Avoid excessive height that compromises stability. A tower that wobbles or collapses when the plate is moved risks ruining service. Aim for a single, confident lean or stack — no more than two layers high — that feels intentional and secure. Use components with natural rigidity, like a seared protein or a crisp tuile, as structural supports.
Service Timeline for a Three-Course Menu
Executing a complete meal within 90 minutes requires strict mise en place and staggered cooking. Break the process into three phases: preparation (30 minutes), active cooking (45 minutes), and plating and service (15 minutes). Assign tasks to each phase based on duration, dependency, and hands-off time.
During prep, focus on tasks that can be done ahead without degradation: chopping aromatics, measuring spices, making sauces that reheat well, and preparing components that benefit from resting. For a menu of seared scallop with pea purée and pancetta crumble (appetizer), roasted chicken thigh with mushroom duxelles and pomme purée (entrée), and dark chocolate fondant with raspberry coulis and vanilla tuile (dessert), the prep phase includes:
- Making pea purée (cook peas, blend with butter and cream, pass through chinois, chill)
- Preparing pancetta crumble (dice pancetta, render until crisp, drain on paper)
- Mashing and chilling pomme purée (boil potatoes, pass through ricer, blend with butter and cream)
- Whisking dry ingredients for fondant (flour, cocoa, sugar, salt)
- Preparing raspberry coulis (thaw and strain raspberries, reduce with sugar, chill)
- Shaping vanilla tuile batter into circles on parchment
- Cleaning and drying scallops, seasoning chicken thighs, slicing mushrooms
This yields approximately 30 minutes of work, much of it parallelizable.
The cooking phase begins 30 minutes before service and overlaps where possible. Start with items that require long, undisturbed time:
- Roast chicken thighs at 200°C (25 minutes, flip halfway)
- Bake vanilla tuiles (4 minutes per tray, cool on rack)
- Reduce raspberry coulis to syrup consistency (10 minutes)
- Prepare mushroom duxelles (sauté shallots and mushrooms, deglaze with wine, reduce)
While these cook, use stovetop time for quick tasks:
- Reheat pea purée and pomme purée gently (5 minutes each, stir frequently)
- Cook duxelles and stuff under chicken skin (5 minutes)
- Warm plates in low oven
In the final 15 minutes, execute last-minute steps and plate:
- Sear scallops (90 seconds per side)
- Re-crisp pancetta crumble in dry pan (30 seconds)
- Fry final tuiles if needed (2 minutes)
- Dust fondant molds with cocoa, fill 3/4 with batter
- Bake fondants (12 minutes at 200°C — start when scallops go in)
- Plate appetizer: pea purée mound, leaning scallop, pancetta, microgreens
- Plate entrée: pomme purée base, sliced chicken, duxelles spooned alongside
- Plate dessert: unmold fondant, pool of coulis, tuile leaning against cake
- Wipe rims, garnish, and send to table
This timeline assumes two burners and one oven are available. Adjust sequencing based on equipment — for example, if only one burner exists, prepare duxelles during chicken roast and reheat purées in the oven at low heat. The key is to identify tasks with active versus passive time and stack them efficiently.
Try This
This week, practice one complete plating sequence using the rule of thirds and height:
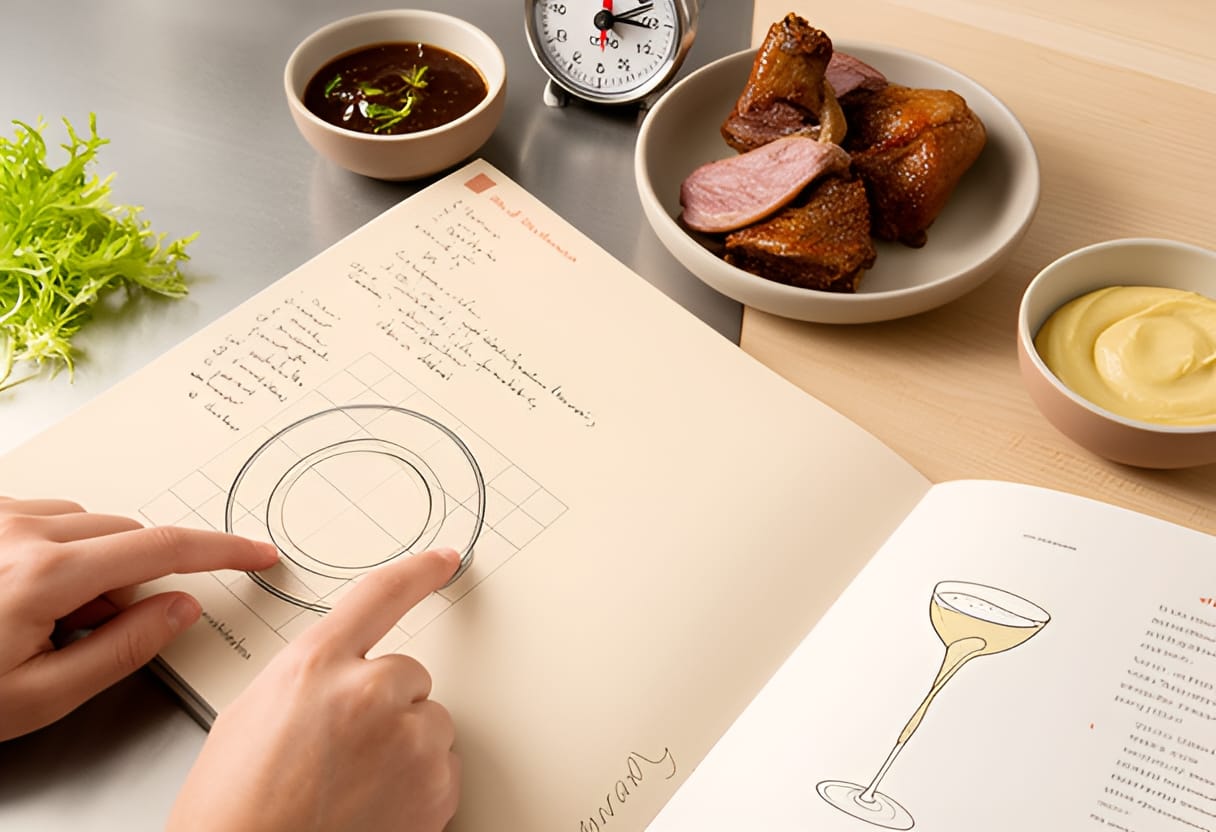
- Choose a protein (scallop, chicken breast, or tofu), a starch purée (pea, carrot, or potato), and a crunchy garnish (nuts, seeds, or fried shallots).
- On a white plate, place the purée off-center in a mound, lean the protein against it, and scatter the garnish on the high side.
- Take a photo before and after eating — note how the height changed during the meal and whether the first bite delivered intended texture contrast.
Key Takeaways
- Mastery of technique enables creativity: consistent knife cuts, proper sauce consistency, and controlled dough handling free the cook to focus on flavor, texture, and presentation.
- Flavor balancing relies on the five tastes, with umami reducing perceived need for salt and fat acting as a flavor carrier to extend aroma and mouthfeel.
- Texture contrast creates rhythm in eating; crisp, creamy, and chewy elements should be sequenced to maintain interest from first to last bite.
- Plating is intentional composition: use the rule of thirds for balance, color contrast for appeal, and height for dynamism — all in service of the dining experience.
- Service timelines turn complexity into calm: prep components ahead, stagger cooking by duration, and reserve the final minutes for searing, assembling, and wiping rims.