Technology
Master Sewing Blueprint Matrix
by Marizelle Swanepoel
3 chapters1.2 hr read
Chapter 1
Understanding Sewing Patterns
Decoding the Pattern Envelope
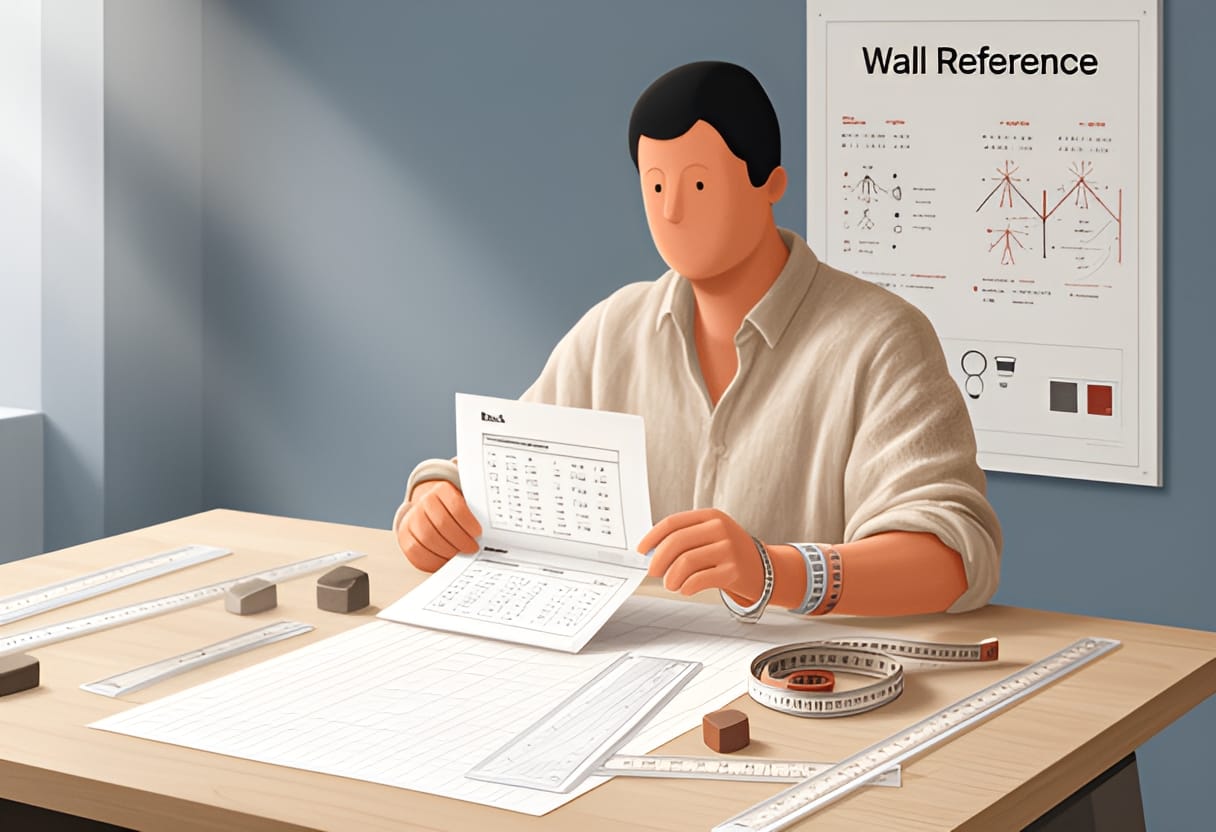
You pick up a pattern envelope, excited to start a new project, but the charts, numbers, and abbreviations feel like a foreign language. Understanding this information is the first step to sewing success—it ensures you buy the right amount of fabric, choose the correct size, and avoid costly mistakes before you even cut a thread.
Reading Body Measurement Charts
Pattern companies provide body measurement charts on the envelope back to help you select your starting size. These charts list key measurements—bust, waist, hip—and correlate them to numbered pattern sizes. To use the chart, measure your body accurately while wearing the undergarments you plan to wear with the finished garment. Use a flexible tape measure, keeping it snug but not tight, and record your bust (fullest part), waist (natural indentation), and hip (fullest part around the seat).
Compare your measurements to the chart. If your bust is 38 inches, waist 30 inches, and hip 40 inches, you might find that your bust aligns with size 12, waist with size 10, and hip with size 14. Since no single size matches all three, you must choose a size or plan to grade between sizes. Selecting the size that matches your largest measurement (in this case, hip at size 14) and altering down is often easier than adding fabric, especially for skirts and pants. For tops and dresses, the bust measurement is often the primary guide, with alterations made at the waist and hip.
Consider a real example: a pattern for a fitted sheath dress lists size 10 as bust 34", waist 26", hip 36". Your measurements are bust 36", waist 28", hip 38". Your bust is 2 inches larger than the size 10 bust, so you would start with size 12 (bust 36") and plan to take in the waist and hip slightly, or grade the pattern from size 12 at the bust to size 10 at the waist and hip if the pattern includes multiple sizes on the tissue.
Calculating Wearing and Design Ease
Finished garment measurements on the envelope show the actual dimensions of the sewn item, which include both wearing ease and design ease. Wearing ease is the minimum amount of ease needed for comfort and movement—typically 2–4 inches at the bust, 1–2 inches at the waist, and 2–4 inches at the hip for woven fabrics. Design ease is the extra fullness added for style, such as the volume in a gathered skirt or the oversized silhouette of a drop-shoulder top.
To calculate the total ease in a pattern, subtract your body measurement from the finished garment measurement. For example, if the finished bust measurement of a blouse is 40 inches and your bust is 36 inches, the total ease is 4 inches. If you know that 2.5 inches of that is standard wearing ease for a fitted blouse, then the remaining 1.5 inches is design ease, perhaps for a slight blousing effect over the waistband.
Imagine you are evaluating a pattern for relaxed-fit trousers. The finished hip measurement is 44 inches, and your hip is 40 inches, giving 4 inches of total ease. For trousers, wearing ease at the hip is usually 2–3 inches, so the extra 1–2 inches is design ease contributing to the relaxed look. If you prefer a slimmer fit, you could choose a size with less finished hip measurement or subtract that design ease during alterations.
Interpreting Fabric Width and Yardage Requirements
The envelope specifies fabric requirements based on standard fabric widths, most commonly 45 inches and 60 inches. Yardage estimates assume you are cutting all pattern pieces on a single layer of fabric, following the suggested layout. Always check the width of the fabric you intend to buy—quilting cotton is often 44–45 inches, while home decor fabric and many dressmaking fabrics are 58–60 inches wide.
If your fabric is narrower than the layout assumes, you may need more yardage to fit all pieces. Conversely, wider fabric might allow you to buy less. For example, a pattern calls for 2 yards of 45-inch fabric for a simple A-line skirt. If you find a beautiful 60-inch wide linen, you might only need 1.5 yards because the wider width accommodates the pattern pieces more efficiently. Always buy a little extra—typically 1/4 to 1/2 yard—to account for shrinkage, cutting errors, or matching patterns like stripes or plaids.
Consider a dress pattern requiring 3 yards of 45-inch fabric for the main fabric and 1/2 yard of 45-inch interfacing. If your chosen fabric is 60 inches wide, you could reduce the main fabric to 2.25 yards (a 25% reduction, proportional to the width increase) and still have enough. However, if the fabric has a directional print or nap, you must cut all pieces in the same direction, which may negate any yardage savings from wider fabric.
Identifying Notions and Trims
The back of the envelope lists all necessary notions—thread, zippers, buttons, hooks and eyes, elastic, interfacing, and any specialty items like bias tape or shoulder pads. This list is essential for budgeting and preparation. Note the type and size specified: a pattern might call for a 7-inch nylon zipper, 1/2-inch buttons, or 1-inch wide elastic.
For instance, a pattern for a child’s pajama set might list: 1/2 yard of 1/4-inch elastic for waistbands, 3/4 yard of 1/2-inch elastic for cuffs, coordinating thread, and no other notions. Overlooking the elastic could halt your project mid-sew. Similarly, a tailored jacket pattern may require fusible interfacing for the facings, hair canvas for the chest, sleeve heads, and a specific button size—say, 16mm quatrefoil buttons. Substituting a different interfacing weight could alter the drape and structure of the garment.
Always verify the notions list before leaving the store. If a pattern calls for a 22-inch separating zipper and you accidentally buy a 20-inch closed-end zipper, it will not function as intended. Keeping a well-stocked notions kit with basics like various thread colors, assorted zippers, buttons, and elastics helps, but matching the specified type and size ensures the best results. Use this list to create a shopping checklist, and check items off as you gather them to avoid returns or delays.
Understanding Pattern Symbols and Markings
Grainline, Fold, and Bias Symbols
Grainline arrows indicate the direction parallel to the selvage edge of the fabric, which is the strongest and most stable grain. When you place a pattern piece on fabric, you align the grainline arrow with the selvage or with a true grain line you have established by tearing or pulling a thread. This ensures the garment hangs correctly and resists twisting. For example, if you misalign the grainline on a skirt front, the side seam may spiral toward the front as you wear it, causing discomfort and an uneven hem.
Fold lines, marked with a solid or broken line and often labeled "place on fold," tell you to position the pattern piece so that its edge lies exactly on the folded edge of the fabric. This creates a symmetrical piece without a center seam, such as a bodice front or a skirt back. If you accidentally cut two separate pieces instead of placing on the fold, you will have a center seam where none was intended, altering the garment’s structure and potentially causing fit issues.
Bias lines, typically marked with a double-headed arrow or a series of parallel lines at a 45-degree angle to the grainline, indicate where the fabric should be cut on the bias. Cutting on the bias gives the fabric more stretch and drape, which is useful for items like neckbands, armhole facings, or flared skirts. For instance, a bias-cut skirt will cling and flow differently than a straight-grain skirt, and failing to cut on the bias as marked can result in a stiff or ill-fitting garment.
Notches, Dots, and Squares for Alignment
Notches are small triangular or T-shaped marks along the cutting edge of a pattern piece. They serve as alignment points when sewing seams together. Single notches usually indicate the front of a garment, double notches the back, and triple notches may mark a specific point like a sleeve cap or waistband junction. For example, when setting in a sleeve, you match the single notch on the sleeve cap to the shoulder seam and the double notches to the front and back armhole notches, ensuring the sleeve is oriented correctly and the ease is distributed evenly.
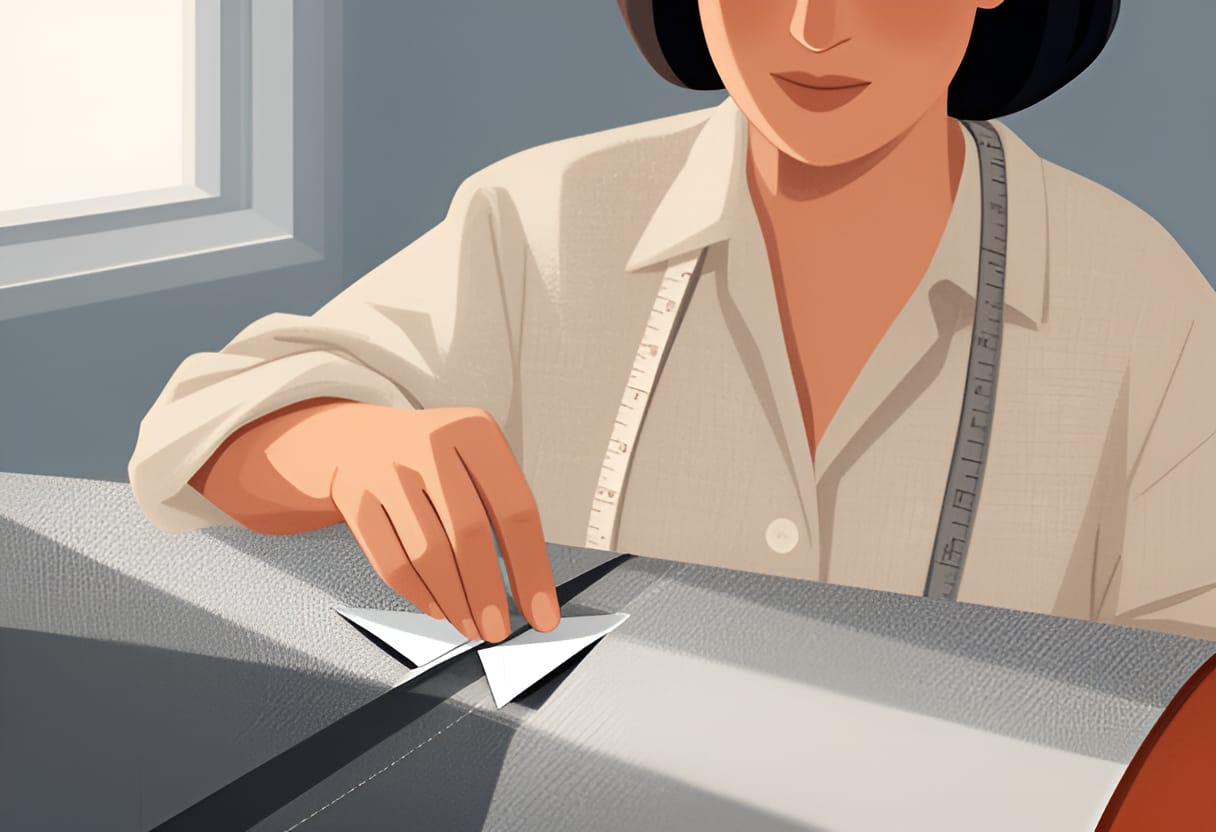
Dots and squares, often called placement marks, indicate where to match points, attach elements, or stop and start stitching. A dot might mark the end of a dart, the placement of a buttonhole, or the point where a pocket should be attached. Squares frequently denote the corners of a patch pocket or the stopping point for a zipper. For instance, when attaching a collar, you match the dots on the collar band to the dots on the neckline to ensure even spacing and proper alignment. If you overlook a dot marking for a buttonhole, your buttons may be misaligned, causing the garment to gap or pull.
Dart Markings and Shape Indication
Darts are shown as tapered lines, usually beginning and ending at dots or notches, with the wide end indicating where fabric is removed to create shape. The point of the dart, marked by a dot, is where the stitching ends and the fabric is pressed. Darts control fullness over curves such as the bust, waist, or hips. For example, a bust dart typically starts at the side seam or armhole and points toward the bust apex, removing excess fabric to allow the garment to curve over the bust. If you sew a dart too short or too long, the garment may pull or bubble at the bust point.
The width and length of a dart affect how much shape it creates. A wider dart removes more fabric and creates more curve, suitable for a fuller bust, while a narrow dart provides subtle shaping. On a pattern, you might see a bust dart marked as 1.5 inches wide at the seam and 4 inches long to the point. Transferring this accurately to fabric ensures the dart will shape the garment as intended. When you sew the dart, you stitch from the wide end to the point, then tie off the threads or backstitch securely to prevent unraveling.
Brand-Specific Symbol Variations
While many symbols are standardized, some pattern brands use variations in line style, labeling, or additional markings. For example, one brand might use a solid line with arrows for grainline, while another uses a broken line or a line with a single arrow and a tail. Fold lines may be marked with a solid line and the words "place on fold" in one brand, and a broken line with a scissors icon in another. Notches can vary from simple triangles to slanted lines or even letters like "F" for front and "B" for back.
Dart markings also differ: some brands use solid lines, others use broken lines, and some include a circle at the dart point instead of a dot. Button and buttonhole placements might be marked with a horizontal line for buttonholes and a vertical line for buttons in one system, while another uses dots for both but labels them with "B" and "BH." These variations mean that when you switch between brands, you must consult the pattern’s symbol key, usually found on the instruction sheet or envelope back, to avoid misinterpreting marks.
Consider a scenario where you are using a European pattern that marks notches with numbers instead of shapes. A single notch might be labeled "1," a double notch "2," and so on. If you assume the standard single/double notch convention, you might sew a sleeve in backward. By checking the symbol key, you see that "1" corresponds to front and "2" to back, allowing you to align the pieces correctly. Similarly, a vintage pattern might use a series of dots along a seam to indicate ease distribution, whereas a modern pattern uses notches for the same purpose. Recognizing these differences prevents errors and ensures accurate construction regardless of the pattern’s origin.
Transferring Markings to Fabric
Accurately transferring pattern symbols to fabric is essential for correct assembly. Use tools such as tracing paper and a tracing wheel, washable fabric markers, tailor’s tacks, or small snips in the seam allowance for notches. For dots and squares, place a pin through the pattern dot and fabric, then mark the fabric where the pin exits, or use a tracing wheel to leave a clear dot. When working with delicate or sheer fabrics, opt for tailor’s tacks—loose thread loops—to avoid damaging the material.
For grainlines, use a ruler and fabric chalk or a water-soluble pen to draw a line parallel to the selvage, matching the grainline arrow on the pattern. Extend the line beyond the pattern piece so you can realign it if the piece shifts during cutting. For fold lines, crease the fabric precisely along the fold before placing the pattern, or mark the fold line with a soft pencil if the fabric holds a crease poorly. Always double-check that the grainline is truly parallel to the selvage by measuring from the line to the edge at multiple points.
When transferring darts, mark the dart legs and point clearly. Connect the dots at the wide end with a ruler to draw the stitching line, then mark the dart point with a small cross or dot. Some sewers prefer to clip the fabric at the dart point instead of marking it, but this can weaken the edge; a discreet mark is often safer. For example, when marking a waist dart on a pair of trousers, ensure the dart point aligns with the fullest part of the hip curve, and that the dart legs are symmetrical when the fabric is folded along the dart’s centerline.
After marking, verify that all notches, dots, and lines match between corresponding pieces—such as the front and back of a bodice or the two sleeves—before removing the pattern. This final check catches errors like reversed pieces or mismatched seam lengths, saving time and frustration during sewing. Once markings are transferred, you are ready to cut and sew with confidence, knowing each piece will align as intended.
The Sewing Blueprint Matrix Framework
The Sewing Blueprint Matrix is a structured grid system that transforms flat pattern pieces into analyzable zones, allowing you to isolate and evaluate fit, ease, and design elements with precision. Rather than viewing a pattern as a collection of lines and notches, the matrix breaks it down into standardized vertical and horizontal sections, creating a coordinate system for garment analysis. This framework enables you to pinpoint where tension occurs, identify imbalance, and make informed adjustments before cutting fabric. By applying the matrix to any pattern piece—bodice, sleeve, skirt, or pant—you gain a consistent method for decoding how the garment will behave on the body.
Defining the Vertical Zones
The vertical zones of the Sewing Blueprint Matrix divide the garment into key anatomical regions: bust, waist, hip, and height. These zones run parallel to the body’s vertical axis and are defined by specific landmark measurements rather than arbitrary grid lines. The bust zone spans from the high bust (under the arms) to the fullest part of the bust, typically corresponding to the apex-to-apex measurement. The waist zone lies between the bust and hip, centered on the natural waistline or the garment’s intended waist position. The hip zone extends from the waist to the fullest part of the hip, usually 7 to 9 inches below the waist for most body types. The height zone encompasses the full vertical length from shoulder to hem, subdivided as needed for sleeve cap, torso, and skirt or pant length.
These zones are not fixed in size but scale relative to the individual’s measurements and the garment’s ease. For example, on a bodice pattern, the bust zone might measure 8 inches vertically for a B cup but 10 inches for a DD cup, reflecting differences in breast projection and torso length. When you overlay the matrix, you align the bust zone’s bottom edge with the full bust line on the pattern, the waist zone with the waistline, and the hip zone with the hip line. This alignment allows you to assess whether the pattern provides adequate room in each region. If the bust zone feels tight when compared to your bust measurement plus wearing ease, you know to add width in that vertical band. Similarly, if the hip zone shows excess fabric when laid flat, it may indicate too much design ease or a need to taper the side seams.
Consider a basic bodice block with a bust measurement of 36 inches, a waist of 28 inches, and hips of 38 inches. Applying 2.5 inches of wearing ease at the bust, 1.5 inches at the waist, and 3 inches at the hip gives finished garment measurements of 38.5 inches (bust), 29.5 inches (waist), and 41.5 inches (hip). When you place the Sewing Blueprint Matrix over the front bodice piece, you mark the bust zone from 1 inch below the armhole to the apex line, the waist zone from the bust zone’s bottom to the waistline, and the hip zone from the waistline to 7.5 inches below. Within each zone, you can then measure the pattern’s width at the side seam and compare it to half the finished garment measurement plus seam allowance. If the bust zone measures 19.25 inches (half of 38.5) but your pattern shows only 18.5 inches, you identify a 0.75-inch deficit per side—indicating the need to add width in the bust zone to achieve proper fit.
Defining the Horizontal Zones
The horizontal zones divide the garment into front, side, back, and sleeve regions, running perpendicular to the vertical zones. These zones create a grid that isolates specific areas for evaluation, such as the front bust, side waist, or back shoulder. The front zone spans from center front to the side seam or armhole plate line, depending on the garment. The back zone runs from center back to the same side seam or armhole line. The side zones are narrow bands along the side seams, often used to assess ease distribution and seam integrity. The sleeve zone is treated separately, encompassing the sleeve cap, bicep, elbow, and wrist areas when analyzing set-in sleeves.
This horizontal division allows you to analyze symmetry and balance between left and right, front and back. For instance, when evaluating a bodice, you can compare the front bust zone width to the back bust zone width to determine if the apex is centered or shifted. In most standard patterns, the bust apex lies closer to the center front than the center back, resulting in a wider front bust zone and a narrower back bust zone. The matrix makes this relationship visible: if your front bust zone measures 10 inches and the back bust zone measures 8 inches (at the same horizontal level), you can calculate that the apex is offset toward the front—a common configuration for accommodating breast volume.
When analyzing a sleeve, the horizontal zones help isolate the sleeve cap (front, side, and back) from the bicep and lower arm. The sleeve cap is often divided into thirds: front, side, and back, each contributing to the arm’s range of motion. If the front sleeve cap zone is too narrow, it may restrict forward reach; if the back is too tight, it can cause pulling across the upper back. By measuring the curve length in each horizontal sleeve zone and comparing it to the armhole’s corresponding zone, you can detect mismatches that lead to discomfort or distortion.
For example, when setting in a sleeve, you might find that the front sleeve cap measures 5.5 inches along the seam line, while the armhole’s front curve measures only 5 inches. This 0.5-inch excess in the sleeve cap front zone indicates potential puckering when sewn. Using the matrix, you can decide whether to ease the sleeve cap, reduce its height, or adjust the armhole shape—all while keeping changes localized to the specific zone causing the issue.
Locating Key Landmarks with the Matrix
The Sewing Blueprint Matrix excels at locating critical fit landmarks: the bust apex, apex-to-apex distance, and shoulder slope. These points are essential for aligning darts, placing design elements, and ensuring the garment follows the body’s natural contours. The bust apex is the fullest point of the bust and serves as the origin for vertical and horizontal dart legs, princess seams, and bust adjustments. The apex-to-apex measurement is the horizontal distance between the left and right bust apexes, which determines spacing for bust darts, button placement, and neckline depth. Shoulder slope refers to the angle of the shoulder seam from neck to armhole, affecting how well the garment hangs and whether it pulls or gaps at the neckline.
To locate the bust apex using the matrix, first establish the vertical bust zone using your high bust and full bust measurements. Then, within that zone, use the horizontal zones to find the apex’s side-to-side position. On a standard bodice block, the apex typically lies 1 inch to 2 inches toward the center front from the side seam, depending on bust size and torso width. For example, if your apex-to-apex measurement is 8 inches and the pattern’s front width at the bust level is 10 inches (half of 20 inches finished bust), the apex is 1 inch from the center front (since (10 - 8)/2 = 1). You mark this point on the pattern, then draw vertical and horizontal lines through it to form the matrix’s origin for that side.
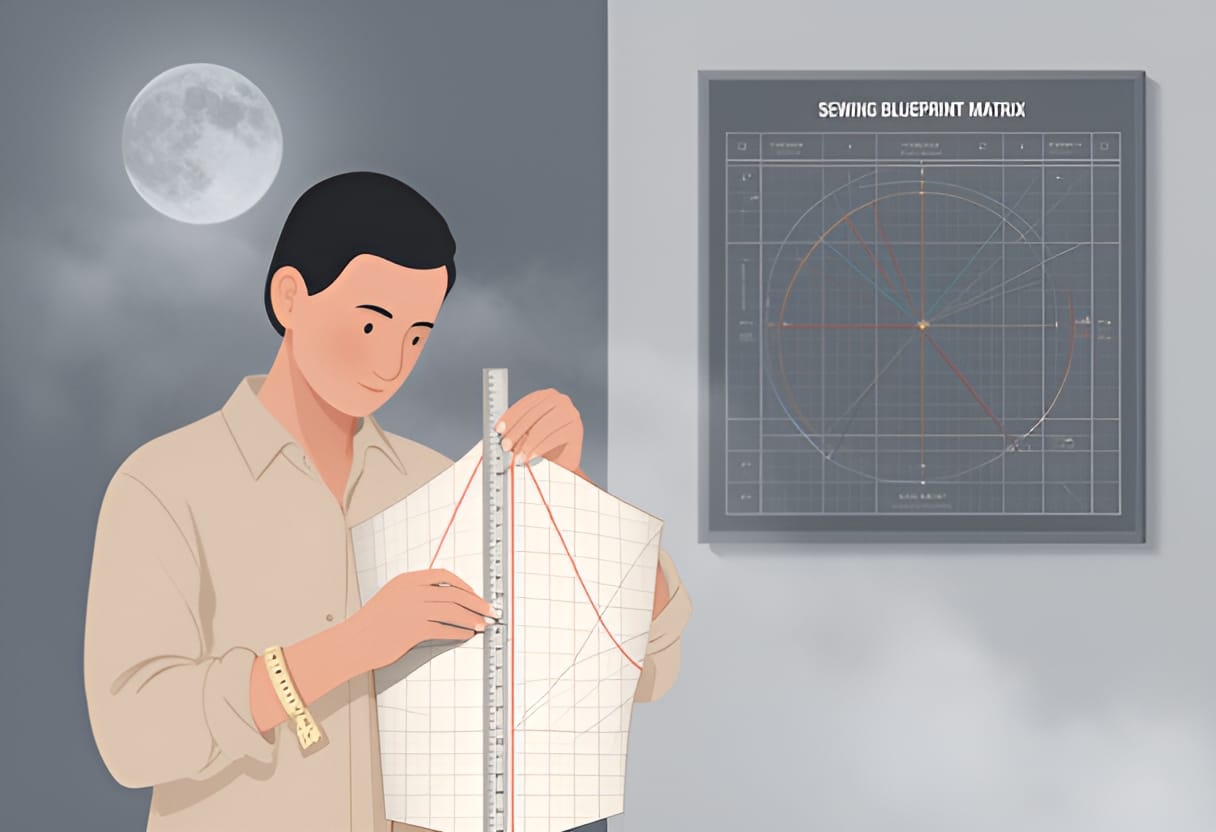
Apex-to-apex distance is measured horizontally across the bust zone at the full bust line. If your measurement is 9 inches and the pattern shows 10.5 inches at that level, the excess indicates too much width in the bust zone—possibly due to oversized darts or incorrect ease. Conversely, if the pattern measures 8 inches, it may be too tight, risking pulling across the bust. This comparison is most accurate when done within the bust zone of the matrix, isolating vertical fabric distribution from hip or waist influences.
Shoulder slope is evaluated by connecting the neck point to the armhole point within the shoulder zone of the matrix. A typical shoulder slope drops 0.5 to 1 inch vertically from neck to armhole over a horizontal distance of 5 to 6 inches. If the pattern’s shoulder seam is too horizontal (little drop), the garment may slip off the shoulders; if too steep, it can bind across the upper back. For example, a shoulder that measures 5.5 inches long but only drops 0.3 inches from neck to armhole has a shallow slope. To correct this, you might lower the armhole slightly or adjust the neckline—changes best visualized within the matrix’s shoulder zone, where you can see how alterations affect both the armhole and neckline simultaneously.
Analyzing Ease Distribution and Balance
The matrix reveals how ease is distributed across the garment, distinguishing between wearing ease (for comfort and movement) and design ease (for style). By isolating each zone, you can determine whether ease is placed where it’s needed or if it’s creating imbalance—for example, excess fabric at the waist when the bust and hip are snug, or tightness across the back despite room in the front. This targeted analysis prevents over-correction and ensures adjustments address the actual source of fit issues.
To analyze ease distribution, measure the pattern’s width at key points within each vertical zone and compare it to half the finished garment measurement (plus seam allowance). Do this for the bust, waist, and hip zones, both front and back. Record the differences to identify where the pattern adds or removes fabric relative to the body. For example, a dress pattern might show:
- Bust zone: front +0.5 inch, back +0.5 inch (total ease 1 inch, likely wearing ease)
- Waist zone: front +1.0 inch, back +1.0 inch (total ease 2 inches, possibly design ease for a slightly loose waist)
- Hip zone: front +1.5 inch, back +1.5 inch (total ease 3 inches, typical for hip wearing ease)
If the waist zone shows significantly more ease than the bust or hip, you may be looking at a dropped-waist or blouson style. If the ease is uneven—say, front +0.5 inch, back +1.5 inch at the waist—it suggests the pattern is designed for a swayed posture or has a design detail like a draped back.
Balance is assessed by comparing left and right, front and back, or top and bottom within the matrix. A garment is balanced when ease and shape are distributed symmetrically or intentionally asymmetrical for design. For example, a well-balanced bodice has equal dart volume on both sides, side seams that hang perpendicular to the floor, and a waistline that stays level. If the matrix shows the back waist zone is 1 inch wider than the front, but your body measurements are symmetrical, the pattern may be cut for a lordotic posture or have an error in the waistline shaping.
Consider a pair of trousers where the front hip zone measures 1 inch tighter than the back hip zone, but your hip measurement is even. Using the matrix, you identify that the imbalance lies in the horizontal distribution within the hip zone. Rather than taking out the side seam evenly (which would worsen the front tightness), you adjust only the back hip zone—perhaps by reducing a back dart or taking in the inner back seam—thereby restoring balance without over-correcting the front.
By consistently applying the Sewing Blueprint Matrix to evaluate vertical and horizontal zones, locate landmarks, and assess ease and balance, you develop a repeatable method for diagnosing fit issues and planning alterations. This framework turns abstract pattern lines into actionable data, giving you control over how the garment fits, moves, and looks on the body.
Comparing Pattern Types: Blocks, Slopers, and Fashion Patterns
The previous section demonstrated how the Sewing Blueprint Matrix isolates vertical and horizontal zones to evaluate ease distribution and balance within a pattern piece. By measuring key points and comparing them to body measurements, you can diagnose fit issues and understand how a pattern is intended to drape on the body. This analytical foundation enables you to move beyond reading individual patterns and begin classifying them by type and intent. Understanding the differences between basic blocks, slopers, and fashion patterns is essential for both modifying existing designs and creating your own from scratch.
Characteristics of a Basic Block
A basic block, also known as a sloper, is a foundational pattern drafted to the exact body measurements with only the minimum wearing ease required for comfort and movement. It contains no design elements such as style lines, gathers, pleats, or fullness beyond what is necessary to accommodate the three-dimensional form of the body. The block serves as a neutral starting point—like a canvas—onto which design details can be added to create fashion patterns.
In the Sewing Blueprint Matrix, a basic block appears as a clean, symmetrical grid where ease is distributed predictably and minimally across zones. For example, a bodice block for a woven fabric typically shows:
- Bust zone: +1 inch total ease (0.5 inch front, 0.5 inch back)
- Waist zone: +0.5 inch total ease (0.25 inch front, 0.25 inch back)
- Hip zone: +1 inch total ease (0.5 inch front, 0.5 inch back)
These values reflect wearing ease only—enough to allow breathing and sitting without strain. There are no darts placed for stylistic effect, no curved seams for visual interest, and no added length for drape. The side seams are straight or slightly curved to follow the body’s natural silhouette, and the waistline is level when measured against a horizontal reference in the matrix.
The block’s value lies in its consistency. Because it is derived directly from body measurements with standardized ease, it provides a reliable reference for comparing other patterns. When you overlay a fashion pattern onto the block using the matrix, any deviations become visible as added design ease or style modifications.
How Fashion Patterns Add Design Ease and Style Lines
Fashion patterns begin with a basic block but modify it extensively to achieve a specific silhouette, aesthetic, or functional goal. These modifications fall into two categories: design ease and style lines.
Design ease refers to the intentional addition of fullness beyond wearing ease to create volume, drape, or a particular look. For example, a gathered skirt adds significant design ease at the waist to create gathers, while an oversized jacket may add 4–6 inches of ease across the bust and hip zones to achieve a loose, relaxed fit. Unlike wearing ease, which is relatively consistent across body types, design ease varies widely depending on the garment’s intended style.
Style lines are seams or edges that alter the basic block’s silhouette for visual or structural purposes. These include princess seams, yokes, peplums, asymmetrical hems, and cutouts. Unlike darts, which are primarily functional (shaping fabric to the body), style lines often serve both aesthetic and structural roles. A princess seam, for instance, replaces side bust darts and waist darts with a continuous curved seam that runs from the armhole to the hem, providing both shaping and a design feature.
In the matrix, design ease appears as uniform or zone-specific increases in width across multiple measurement points. A blouse with bust gathers, for example, will show increased width in the bust zone—say, +2.5 inches front and +2.5 inches back—compared to the block’s +0.5 inch per side. Style lines, meanwhile, disrupt the block’s symmetry or introduce new seam paths. A princess seam bodice will show the side seam shifted toward the center front, with a new curved line replacing the dart intake in the bust and waist zones.
Using the Matrix to Isolate the Block Within a Fashion Pattern
To reverse-engineer a fashion pattern and identify its underlying block, use the Sewing Blueprint Matrix to strip away design elements and isolate the foundational shape. This process involves three steps:
- Measure the pattern at key points (high bust, full bust, waist, hip) in each vertical zone.
- Subtract known wearing ease (based on fabric type and garment area) to estimate the block’s dimensions.
- Identify and remove style lines by tracing the pattern back to a simplified silhouette—straight side seams, level waist, and minimal darting.
For example, consider a fashion pattern for a semi-fitted dress with a gathered waist and short sleeves. Your matrix measurements show:
- Bust zone: front +2.0 inch, back +2.0 inch (total ease 4 inches)
- Waist zone: front +3.0 inch, back +3.0 inch (total ease 6 inches)
- Hip zone: front +2.0 inch, back +2.0 inch (total ease 4 inches)
Given that wearing ease for woven fabrics is typically 1–2 inches at bust and hip and 0.5–1.5 inches at waist, you can infer that the bust and hip zones contain about 1 inch of wearing ease and 1–3 inches of design ease. The waist zone’s 6 inches of total ease suggests significant design ease for gathers. By mentally removing the gathers (i.e., subtracting the excess fabric distributed evenly around the waist), you reduce the waist ease to approximately 1 inch front and back—consistent with a basic block.
Next, examine the side seam. If it curves inward at the waist to create a fitted silhouette, this reflects waist suppression in the block. If the bust dart is present and pointing toward the apex, it confirms the block’s shaping function. Any additional seams—such as a yoke or princess line—can be ignored for block identification, as they are style additions.
This method allows you to see past surface details and understand the pattern’s structural core. Once you isolate the block, you can use it as a template for creating variations—changing the neckline, altering the sleeve, or adjusting the length—while maintaining a consistent fit.
Case Study: Transforming a Bodice Sloper into a Princess-Seam Blouse
To illustrate how a basic block evolves into a fashion pattern, consider the transformation of a bodice sloper into a princess-seam blouse with a rounded neckline and short set-in sleeves.
Starting Point: The Bodice Sloper The sloper is drafted to the body with 1 inch of bust ease (0.5 inch per side), 0.5 inch of waist ease, and 1 inch of hip ease. It includes:
- A vertical dart from the side seam to the bust apex (1.5 inches wide at the side seam, tapering to nothing at the apex)
- A waist dart from the side seam to the waistline (1 inch wide, tapering to nothing)
- A straight side seam from underarm to hip
- A neckline that drops 0.5 inch from the center front to the shoulder point
- An armhole that curves 0.75 inch vertically from the neck point over a 5.5-inch horizontal distance (typical shoulder slope)
Step 1: Eliminate Darts via Seam Transfer Using the slash-and-spread method guided by the matrix, you close the bust and waist darts by cutting along their legs and spreading the pieces apart at the side seam. This transfers the dart intake into the side seam, causing it to curve outward at the bust and waist. The side seam now bulges slightly to accommodate the former dart volume.
Step 2: Introduce the Princess Seam You draw a new seam line from the armhole notch to the waistline, passing through the bust apex. This line splits the bulging side seam into two sections: the front princess piece and the side-back piece. The matrix shows this seam as a vertical curve in the bust and waist zones, replacing the dart intake with a structural seam.
Step 3: Add Design Ease and Style Details To create a blouse rather than a fitted bodice, you add 1 inch of design ease at the bust (0.5 inch per side) and 0.5 inch at the waist. This increases the total bust ease to 2 inches (1 inch wearing, 1 inch design) and waist ease to 1.5 inches. You also round the neckline by lowering the center front by 0.25 inch and shortening the shoulder strap by 0.25 inch, then redraw the armhole to maintain consistency.
Final Pattern in the Matrix The resulting princess-seam blouse shows:
- Bust zone: front +1.0 inch, back +1.0 inch (total ease 2 inches)
- Waist zone: front +0.75 inch, back +0.75 inch (total ease 1.5 inches)
- Hip zone: front +0.5 inch, back +0.5 inch (total ease 1 inch)
- A curved princess seam running from armhole to waist, passing through the bust apex
- No darts; shaping achieved entirely through seams
- Neckline and armhole adjusted for style and comfort
By comparing the sloper and blouse in the matrix, you see how design ease adds volume and how style lines replace dart-driven shaping. The matrix makes it clear that the blouse’s fit still derives from the sloper—only the path to achieving that fit has changed.
Try This
This week, practice identifying the underlying block in a fashion pattern using the Sewing Blueprint Matrix:
- Select a simple fashion pattern (e.g., a gathered skirt, A-line dress, or basic blouse).
- Measure the pattern at the high bust, full bust, waist, and hip on both front and back pieces.
- Subtract standard wearing ease (1 inch bust, 0.5 inch waist, 1 inch hip for woven fabrics) and note where the remaining excess occurs—this indicates design ease or style modifications.
Key Takeaways
- A basic block (sloper) is a minimal-ease foundation pattern with no style lines, used as the starting point for all garment design.
- Fashion patterns add design ease for style and volume and introduce style lines (like princess seams or yokes) to alter the block’s silhouette.
- The Sewing Blueprint Matrix allows you to isolate the block within a fashion pattern by measuring ease distribution and removing style elements visually.
- Understanding the relationship between blocks and fashion patterns enables you to modify existing designs and draft custom garments with consistent fit.
Chapter 2
Core Pattern Alterations
Identifying Fit Issues with the Matrix
You hold up a muslin test garment and notice diagonal wrinkles pulling from the bust toward the underarm, while the side seam twists forward. These visual clues signal fit issues, but translating them into pattern corrections can feel guesswork without a systematic approach. The Sewing Blueprint Matrix transforms this process by mapping garment tension directly to pattern zones, turning visual diagnosis into precise action.
Understanding the Matrix as a Diagnostic Grid
The Sewing Blueprint Matrix overlays a garment with horizontal and vertical zones that correspond to key body measurements and ease distributions. Horizontal zones—bust, waist, and hip—run perpendicular to the grainline and capture circumference ease. Vertical zones—length from high bust to waist, waist to hip, and hip to hem—run parallel to the grainline and reflect vertical ease. When you assess a muslin, wrinkles and drag lines reveal where ease is imbalanced within these zones.
For example, horizontal wrinkles across the bust indicate excess circumference ease in the bust zone, while vertical wrinkles at the center back length suggest shortage in the vertical waist-to-hip zone. The matrix isolates these impressions, preventing misdiagnosis. Instead of assuming a tight shoulder requires letting out the side seam, you check whether the wrinkle originates in the shoulder slope zone or the bust zone, directing your correction to the correct pattern area.
Consider a bodice muslin with horizontal wrinkles above the bustline and diagonal lines from the bust apex to the armhole. Mapping these to the matrix shows excess ease in the upper bust zone (above the apex) and insufficient ease radiating from the apex—a classic full bust adjustment signal. Without the matrix, you might incorrectly add width at the side seam, worsening the fit above the bust.
Mapping Horizontal Wrinkles to Zone Excess or Shortage
Horizontal wrinkles form when fabric strains against the body’s circumference, signaling either too much or too little ease in a specific horizontal zone. Their orientation and location reveal whether to add or remove width and where.
Wrinkles that pull perpendicular to the grainline and appear as loose folds indicate excess ease in that zone. Tight, horizontal wrinkles that reveal strain lines or pulling fabric indicate shortage. For instance, diagonal wrinkles from the side seam toward the bust apex often mean shortage in the bust zone, while horizontal folds above the waistline suggest excess ease in the waist zone.
To apply this, pin the muslin flat and observe wrinkle direction. If wrinkles radiate outward from a point, that point is likely the epicenter of shortage. If wrinkles pool or fold away from the body, excess ease is present. Record which matrix zone contains the epicenter or the folded fabric.
As a concrete example, imagine a muslin with horizontal wrinkles pooling at the center front waist, disappearing toward the side seams. This indicates excess ease isolated to the front waist zone. The matrix shows you should remove width only at the center front waist, perhaps by taking in a dart or adjusting a princess seam, leaving the side and back waist untouched to preserve fit elsewhere.
Interpreting Vertical Wrinkles as Length Imbalance
Vertical wrinkles run parallel to the grainline and reveal imbalances in vertical ease—either too much or too little length in a specific vertical zone. Unlike horizontal wrinkles, which respond to circumference changes, vertical wrinkles respond to length adjustments that shift the garment’s position on the body.
Length excess appears as loose, vertical folds or fabric that sags away from the body. Length shortage appears as tight, vertical pull lines that distort horizontal elements like the bustline or waistline. For example, vertical wrinkles at the center back waistline pulling upward indicate shortage in the waist-to-hip vertical zone, causing the hem to ride up in back. Conversely, horizontal folds at the back hip suggest excess length in the hip-to-hem zone.
To diagnose, identify whether the wrinkle disrupts horizontal balance. If a wrinkle pulls a horizontal line (like the waistline) diagonally, it indicates vertical shortage pulling that line out of place. If horizontal lines remain level but fabric folds vertically, excess length is likely.
Take a pair of trousers with vertical wrinkles at the front thigh pulling the knee line upward. This indicates shortage in the crotch-to-knee vertical zone. The matrix directs you to add length at the front crotch curve or knee, not at the ankle, preserving the intended hem placement while resolving the pull.
Using Diagonal Wrinkles to Locate Pivot Points for Dart Adjustment
Diagonal wrinkles are the most telling visual cues, often pointing directly to the source of fit strain and the ideal pivot point for dart manipulation. These wrinkles form when fabric resists a change in direction, such as over a bust curve or around the hip, and their angle reveals where shaping is misplaced.
A diagonal wrinkle running from the bust apex to the armhole typically indicates insufficient dart intake or misplaced dart volume, signaling that the dart point needs to shift or rotate. Similarly, diagonal wrinkles from the waist to the hip often suggest that waist dart excess is being forced into the hip zone, requiring a pivot to redirect that fullness.
To use this, trace the wrinkle’s path on the muslin. The starting point often marks where excess fabric originates (such as a dart point), and the endpoint shows where it is being misdirected (such as a seam or edge). The matrix helps you decide whether to pivot the dart, slide it, or adjust its intensity.
For example, a dress muslin shows diagonal wrinkles from the waist dart tip to the side seam hip. This indicates that the waist dart’s excess is being pulled toward the hip instead of being contained at the waist. The matrix identifies the waist zone as the source and the hip zone as the misdirection point. You pivot the dart toward the side seam or convert it to a princess seam, redirecting the shaping where it belongs without adding or removing total volume.
Linking Shoulder Slope Misalignment to Zone Rotation
Shoulder fit issues often manifest as diagonal wrinkles from the neck to the shoulder point or as the shoulder seam sitting too far forward or backward. These symptoms frequently stem not from shoulder width error but from incorrect shoulder slope relative to the bust zone, causing the armhole to bind or gap.
When the shoulder slope is too steep, the armhole pulls forward, creating diagonal wrinkles from the neck to the shoulder tip and tightness across the upper back. When the slope is too shallow, the armhole sags backward, causing wrinkles from the shoulder blade to the armhole and excess fabric at the upper back. The matrix treats this as a rotation of the shoulder and bust zones relative to each other.
To correct, you do not simply widen or narrow the shoulder seam. Instead, you rotate the shoulder zone within the matrix, adjusting the angle where it meets the bust zone while keeping the shoulder point anchored. This preserves neck and armhole size while changing the slope.
For instance, a jacket muslin shows the shoulder seam sitting 0.5 inch forward of the shoulder point with tightness across the upper back and diagonal wrinkles from the neck to the armhole. The matrix reveals the shoulder zone is rotated forward relative to the bust zone. You rotate the shoulder seam backward by 0.5 inch at the armhole, redrawing the armhole curve to maintain its size, which realigns the slope and releases the upper back tension without altering neck or shoulder width.
By consistently applying the matrix to read wrinkles as zone-specific signals, you move from reactive pinning to targeted pattern surgery. Each wrinkle becomes a data point, guiding you to slash, spread, pivot, or true with confidence, knowing the correction addresses the root cause rather than chasing symptoms. This diagnostic rigor sets the foundation for the precise alterations to come in the sections ahead.
Length Adjustments: Shortening and Lengthening
Length excess appears as loose, vertical folds or fabric that sags away from the body. Length shortage appears as tight, vertical pull lines that distort horizontal elements like the bustline or waistline. For example, vertical wrinkles at the center back waistline pulling upward indicate shortage in the waist-to-hip vertical zone, causing the hem to ride up in back. Conversely, horizontal folds at the back hip suggest excess length in the hip-to-hem zone.
To diagnose, identify whether the wrinkle disrupts horizontal balance. If a wrinkle pulls a horizontal line (like the waistline) diagonally, it indicates vertical shortage pulling that line out of place. If horizontal lines remain level but fabric folds vertically, excess length is likely.
Take a pair of trousers with vertical wrinkles at the front thigh pulling the knee line upward. This indicates shortage in the crotch-to-knee vertical zone. The matrix directs you to add length at the front crotch curve or knee, not at the ankle, preserving the intended hem placement while resolving the pull.
Using Diagonal Wrinkles to Locate Pivot Points for Dart Adjustment
Diagonal wrinkles are the most telling visual cues, often pointing directly to the source of fit strain and the ideal pivot point for dart manipulation. These wrinkles form when fabric resists a change in direction, such as over a bust curve or around the hip, and their angle reveals where shaping is misplaced.
A diagonal wrinkle running from the bust apex to the armhole typically indicates insufficient dart intake or misplaced dart volume, signaling that the dart point needs to shift or rotate. Similarly, diagonal wrinkles from the waist to the hip often suggest that waist dart excess is being forced into the hip zone, requiring a pivot to redirect that fullness.
To use this, trace the wrinkle’s path on the muslin. The starting point often marks where excess fabric originates (such as a dart point), and the endpoint shows where it is being misdirected (such as a seam or edge). The matrix helps you decide whether to pivot the dart, slide it, or adjust its intensity.
For example, a dress muslin shows diagonal wrinkles from the waist dart tip to the side seam hip. This indicates that the waist dart’s excess is being pulled toward the hip instead of being contained at the waist. The matrix identifies the waist zone as the source and the hip zone as the misdirection point. You pivot the dart toward the side seam or convert it to a princess seam, redirecting the shaping where it belongs without adding or removing total volume.
Linking Shoulder Slope Misalignment to Zone Rotation
Shoulder fit issues often manifest as diagonal wrinkles from the neck to the shoulder point or as the shoulder seam sitting too far forward or backward. These symptoms frequently stem not from shoulder width error but from incorrect shoulder slope relative to the bust zone, causing the armhole to bind or gap.
When the shoulder slope is too steep, the armhole pulls forward, creating diagonal wrinkles from the neck to the shoulder tip and tightness across the upper back. When the slope is too shallow, the armhole sags backward, causing wrinkles from the shoulder blade to the armhole and excess fabric at the upper back. The matrix treats this as a rotation of the shoulder and bust zones relative to each.
To correct, you do not simply widen or narrow the shoulder seam. Instead, you rotate the shoulder zone within the matrix, adjusting the angle where it meets the bust zone while keeping the shoulder point anchored. This preserves neck and armhole size while changing the slope.
For instance, a jacket muslin shows the shoulder seam sitting 0.5 inch forward of the shoulder point with tightness across the upper back and diagonal wrinkles from the neck to the armhole. The matrix reveals the shoulder zone is rotated forward relative to the bust zone. You rotate the shoulder seam backward by 0.5 inch at the armhole, redrawing the armhole curve to maintain its size, which realigns the slope and releases the upper back tension without altering neck or shoulder width.
By consistently applying the matrix to read wrinkles as zone-specific signals, you move from reactive pinning to targeted pattern surgery. Each wrinkle becomes a data point, guiding you to slash, spread, pivot, or true with confidence, knowing the correction addresses the root cause rather than chasing symptoms. This diagnostic rigor sets the foundation for the precise alterations to come in the sections ahead.
Shortening at the Waistline vs. Shortening at the Hip Line
Shortening a garment at the waistline versus the hip line produces different visual and functional results because each zone corresponds to a specific body measurement and ease distribution in the Sewing Blueprint Matrix. The matrix divides the vertical axis into three zones: high bust to waist, waist to hip, and hip to hem. Altering length in one zone affects fit and proportion differently than altering another.
Shortening at the waistline removes length from the waist-to-hip vertical zone. This raises the hip line and can create a higher-waisted silhouette. It is appropriate when the garment sags in the seat or the crotch depth is excessive in pants, or when a dress or skirt hem rides up in the front due to excess length between waist and hip. To shorten at the waistline, draw a horizontal line across the pattern piece at the waist level, parallel to the grainline. Cut along this line, overlap the pieces by the desired amount, and redraw the waistline curve to maintain its original shape. True the side seam by ensuring the front and back waistline notches align after the adjustment.
Shortening at the hip line removes length from the hip-to-hem vertical zone. This lowers the hem relative to the hip and is used when the garment is too long overall but the waist-to-hip fit is correct. For example, a skirt that fits well at the waist and hip but pools at the ankle should be shortened at the hip line to preserve the intended waist-to-hip proportion. Draw a horizontal line at the hip level, cut, overlap, and redraw the hip line if necessary. Keep the hemline parallel to the original unless a different length is desired.
A case study illustrates the difference: A pair of trousers shows horizontal folds at the back hip and a hem that drags on the floor. The matrix indicates excess length in the hip-to-hem zone. Shortening at the hip line by 2 inches removes the drag without altering the waist or crotch depth. In contrast, if the same trousers showed vertical wrinkles at the front thigh pulling the knee upward, indicating shortage in the crotch-to-knee zone, shortening at the waistline would worsen the fit by reducing the rise. Instead, length would need to be added at the front crotch curve.
Lengthening Tapered Sleeves While Maintaining Bicep Circumference
Lengthening a tapered sleeve requires careful technique to avoid flaring the bicep or distorting the sleeve cap. The Sewing Blueprint Matrix treats the bicep zone as a horizontal circumference measurement, so any length adjustment must preserve this zone’s integrity. Length is added or removed in the vertical zones above and below the bicep line, typically from bicep to elbow and elbow to hem.
To lengthen a tapered sleeve, first locate the bicep line on the pattern—a horizontal line across the sleeve at the fullest part of the upper arm, usually perpendicular to the grainline. Cut along this line, separating the sleeve into cap and lower portions. Insert a strip of pattern paper between the two pieces, adding the desired length evenly to both front and back sleeve sections if the sleeve is symmetrical. Redraw the side seams as straight or slightly curved lines to maintain the taper. Ensure the bicep circumference remains unchanged by measuring across the inserted strip and adjusting the side seams inward if flare occurs.
For example, a jacket sleeve is 1 inch too short at the wrist but fits correctly at the bicep. The matrix shows excess length is needed in the elbow-to-hem zone. Cut at the bicep line, insert a 1-inch strip, and redraw the side seams. The bicep measurement stays at 12 inches, and the sleeve now reaches the correct wrist point without puffing at the upper arm. If the sleeve were lengthened only at the hem without cutting at the bicep, the taper would be lost, resulting in a wider cuff and altered drape.
Always true the sleeve cap to the armhole after lengthening. The cap height and curve must remain consistent to prevent puckering or gaping at the shoulder. Use the matrix to confirm that no unintended changes occurred in the bust or shoulder zones.
Adjusting Both Front and Back Pieces for Symmetrical Length Changes
Symmetrical length changes require identical adjustments to front and back pattern pieces to maintain balance and prevent twisting. The Sewing Blueprint Matrix emphasizes that vertical zones apply equally to both halves of the garment unless asymmetry is intentional, such as in a design with a dropped back hem.
When shortening or lengthening at the waistline, hip line, or bicep, apply the same measurement change to both front and back pieces. For example, to shorten a dress by 1.5 inches at the waistline, measure 1.5 inches upward from the original waistline on both front and back bodice pieces, draw a new waistline parallel to the original, and true the side seams. This ensures the side seam remains perpendicular to the waistline and the garment hangs evenly.
An example demonstrates the consequence of uneven adjustment: A blouse is shortened by 1 inch at the front waistline but left unchanged at the back. The matrix shows the front waist-to-hip zone is now shorter than the back, causing the side seam to twist forward and the blouse to pull across the chest. Correcting this requires removing the extra length from the back or adding it to the front to restore symmetry.
Use the matrix to verify that horizontal zones (bust, waist, hip) remain level after adjustment. If the waistline appears diagonal when the pieces are sewn together, the front and back lengths are mismatched. Always true seams by walking them with a tape measure or notch alignment to confirm equal length.
For garments with a center back seam or princess seams, apply changes to each piece individually but keep the total adjustment consistent across all sections. A princess-seamed bodice shortened at the waist requires the same overlap on the center front, side front, side back, and center back pieces. This preserves the curvature of the seams and prevents puckering.
Using the Matrix to Avoid Altering Unintended Zones
The Sewing Blueprint Matrix prevents unintended alterations by mapping each adjustment to a specific vertical or horizontal zone. Before cutting or spreading a pattern piece, identify which zone corresponds to the fit issue. This ensures that length changes do not accidentally affect circumference or slope.
For example, vertical wrinkles at the calf indicate shortage in the knee-to-hem zone. Lengthening here adds length below the knee without altering the thigh or crotch depth. If length were added at the ankle only, the hem would drop but the calf tightness would remain, as the shortage zone was not addressed.
Similarly, horizontal folds above the bust indicate excess length in the high bust-to-bust zone. Shortening at the bustline (not the waist) removes length where it is needed. Shortening at the waist in this case would misalign the bust dart and create a diagonal pull from bust to waist.
A numbered list outlines the matrix-guided process:
- Diagnose the wrinkle: Is it horizontal, vertical, or diagonal?
- Map to zone: Does it indicate excess or shortage in high bust to waist, waist to hip, or hip to hem?
- Locate the line: Cut horizontally at the zone boundary (waist, hip, or bicep line).
- Apply the change: Overlap to shorten, spread to lengthen.
- True the seams: Ensure notch, grainline, and curve continuity.
- Verify fit: Re-muslin or measure to confirm the issue is resolved without new imbalances.
A table summarizes common length adjustments and their matrix zones:
| Adjustment Type | Target Vertical Zone | Cut Line Location | Effect on Garment |
|---|---|---|---|
| Shorten waistline | Waist to hip | At waist level | Raises hip line, increases rise |
| Shorten hip line | Hip to hem | At hip level | Lowers hem, preserves waist-hip fit |
| Lengthen sleeve | Elbow to hem or bicep to elbow | At bicep line | Adds length without altering bicep |
| Lengthen pant leg | Knee to hem | At knee line | Lowers hem, preserves thigh fit |
| Shorten pant leg | Hip to knee | At mid-thigh | Shortens leg above knee, preserves hem depth |
By anchoring each alteration to a matrix zone, you ensure that changes are proportional, balanced, and true to the garment’s design intent. This method transforms length adjustment from guesswork into a repeatable, reliable process.
Taking In or Letting Out at the Side Seam Using Matrix Zones
Width adjustments begin with identifying whether excess or shortage occurs in the bust, waist, or hip horizontal zones of the Sewing Blueprint Matrix. Horizontal wrinkles that pull perpendicular to the grainline indicate ease imbalance in the corresponding zone. For example, diagonal wrinkles radiating from the side seam toward the bust apex suggest excess in the bust zone, while horizontal folds above the hipbone indicate shortage in the hip zone.
To take in width at the side seam, first pin the muslin to determine the total amount needed. Divide this amount equally between the front and back pattern pieces unless asymmetry is required, such as for a fuller abdomen or sway back. For instance, if 2 inches of excess fabric are pinned at the side seam waistline, remove 1 inch from each front and back piece at the waist level.
Locate the waistline on the pattern piece, which corresponds to the boundary between the bust and waist zones. Cut horizontally along this line, then overlap the pattern pieces by the calculated amount to take in width. True the side seam by redrawing it as a smooth curve between the armhole and hip, ensuring the grainline remains parallel to the center front. After adjustment, verify that the bust and hip zones retain their intended ease by checking that no new wrinkles appear in those areas when the muslin is re-pinned.
Letting out width follows the reverse process. If horizontal wrinkles appear below the waistline, indicating shortage in the hip zone, cut at the waistline and spread the pattern pieces by the required amount. Add paper beneath the spread, then true the side seam. Always confirm that the adjustment does not encroach on adjacent zones—for example, letting out at the waist should not create excess in the bust zone, which would manifest as diagonal wrinkles pointing toward the bust apex.
Grading Between Sizes for Bust, Waist, and Hip Discrepancies
Grading between sizes allows you to combine different size lines for bust, waist, and hip measurements when they fall across multiple size categories. The Sewing Blueprint Matrix guides this process by isolating adjustments to specific horizontal zones, preventing unintended changes in other areas.
Begin by tracing the pattern pieces in three stages: bust, waist, and hip. For the bust zone (high bust to fullest bust), use the size line that matches your bust measurement. For the waist zone (waistline), transition to the size line that matches your waist measurement. For the hip zone (hip to hem), use the size line that matches your hip measurement. Blend the lines smoothly between zones using a French curve or flexible ruler.
For example, if your bust measures 38 inches (size 14), waist 30 inches (size 10), and hips 40 inches (size 16), trace the bodice from the shoulder to the bust using the size 14 line. At the bust apex, begin grading inward to the size 10 line by the waistline. From the waist to the hip, grade outward to the size 16 line, then continue down the leg or skirt using the size 16 line. This creates a pattern that fits your unique proportions without over-fitting or under-fitting any zone.
When grading, preserve the integrity of darts and seams. If a bust dart exists, ensure its point remains aligned with the bust apex after grading. Adjust the dart width proportionally if the bust size changes, but keep the dart tip pointing toward the apex. For princess seams, maintain the smooth curve of the seam by blending the grade line across the seam without introducing angles or breaks.
Preserving Dart Point Position During Width Adjustments
Width adjustments at the side seam can shift the position of dart points if not carefully managed, leading to poor fit and distorted style lines. The Sewing Blueprint Matrix prevents this by anchoring adjustments to specific zones and preserving the relationship between the dart and the bust apex.
When taking in or letting out at the side seam below the armhole, the bust zone remains unaffected if the cut line is placed at or below the waistline. However, if adjustment is needed above the waist—for example, to correct excess in the upper bust—cut within the bust zone, between the high bust and fullest bust lines. In this case, the dart point may shift if the side seam moves.
To preserve dart point position, first determine the direction and amount of side seam change. If taking in 0.5 inch at the side seam at bust level, measure 0.25 inch inward from the original side seam on both front and back pieces at the bust line. Redraw the side seam, then measure the same distance from the original dart leg to find its new position. Redraw both dart legs to converge at the unchanged bust apex, maintaining the original dart width if the bust measurement has not changed.
For example, a bodice with a 1-inch dart at the side seam requires adjustment after taking in 0.5 inch at the side seam. Remove 0.25 inch from the side seam on each piece. The dart now has 0.5 inch of excess to absorb. Reduce the dart width to 0.5 inch by taking 0.25 inch from each dart leg, keeping the dart tip fixed at the apex. True the dart by folding it along the center line and smoothing the excess fabric toward the tip.
If letting out at the side seam, reverse the process: add width to the side seam, then increase the dart width proportionally to maintain the same fit. Always verify that the dart point remains pointing toward the bust apex and that the dart folds smoothly toward the tip without puckering or twisting.
Using the Matrix to Avoid Over-Correcting in Adjacent Zones
Over-correction occurs when width adjustments in one zone create new imbalances in neighboring zones, often due to misunderstanding the source of the fit issue. The Sewing Blueprint Matrix prevents this by mapping each symptom to its origin zone, ensuring adjustments stay contained.
For example, horizontal wrinkles above the waistline may suggest excess in the waist zone, but if they are actually caused by a forward-tilted pelvis (sway back), the real issue lies in the waist-to-hip vertical zone. Taking in at the waistline in this case would create shortage above the waist, leading to diagonal wrinkles from bust to waist. Instead, the matrix guides you to shorten the waist-to-hip zone at the center back or sway the back pattern piece to accommodate the pelvic tilt.
Similarly, if horizontal folds appear at the hipbone but the muslin is tight across the fullest hip, the issue may be insufficient length in the waist-to-hip zone rather than shortage in the hip zone. Letting out at the hip line would add width where it is not needed, creating excess that causes the fabric to ripple. The matrix directs you to lengthen the waist-to-hip zone by spreading at the waistline or reducing the sway back adjustment.
To avoid over-correcting, follow this matrix-guided sequence:
- Identify the wrinkle type: horizontal, vertical, or diagonal.
- Map to zone: Determine if the issue is in bust, waist, or hip (horizontal) or high bust-to-waist, waist-to-hip, or hip-to-hem (vertical).
- Confirm direction: Is it excess or shortage? Horizontal pulls indicate excess; loose folds indicate shortage.
- Apply change only to the identified zone using the appropriate cut line.
- True seams and re-pin muslin to verify no new imbalances emerged.
A case study illustrates this: A test garment shows diagonal wrinkles from the bust apex to the side seam waistline. Initial assessment suggests excess in the bust zone, prompting a dart increase. However, the matrix reveals the wrinkle originates from the waist dart tip pulling toward the hip—indicating waist dart excess misdirected due to a short waist-to-hip zone. Correcting the waist-to-hip length by lengthening at the waistline resolves the diagonal pull without altering the bust dart. This prevents over-fitting the bust and maintains the intended ease distribution.
By consistently applying the matrix to isolate zones and verify effects, you ensure that width adjustments are precise, balanced, and true to the garment’s design. This method transforms fitting from reactive correction to proactive diagnosis, enabling reliable results across diverse body types.
Pivoting Darts Around the Bust Point
The pivot method rotates a dart around the bust apex to change its angle while preserving the dart’s intake and fit. This technique is essential for relocating darts to new positions—such as from the waist to the shoulder, armhole, or neckline—without altering the garment’s silhouette or ease distribution. The bust apex acts as a fixed fulcrum, ensuring that the dart’s point remains anchored to the body’s fullest point, which maintains proper shaping and prevents distortion.
To pivot a dart, first locate the bust apex on your pattern piece. This point is typically 1 to 2 inches toward the center front from the side seam at the fullest bust level. Draw the original dart legs from the seam edge (e.g., waistline or side seam) to the apex. To move the dart to a new location—say, the shoulder seam—mark the new dart origin point on that seam. Then, anchor your pattern at the bust apex using a pin or pivot point. Rotate the pattern piece so that the original dart leg aligns with the new seam line at the desired origin. Trace the shifted dart leg, then redraw the second dart leg from the apex to the new origin point, maintaining the original dart width.
For example, to convert a 1-inch waist dart to a shoulder dart, measure 0.5 inch inward from the waistline on both the front and back pattern pieces at the side seam to establish the dart’s width. After closing the waist dart by taping the legs together, pivot the pattern at the bust apex until the taped dart edge aligns with the shoulder seam. Trace along the folded edge to mark the new dart leg, then open the dart and redraw both legs from the apex to the shoulder seam, each 0.5 inch long. True the dart by folding it along its center line and smoothing excess fabric toward the apex. This preserves the dart’s intake while redirecting its shaping power to the shoulder.
The Sewing Blueprint Matrix ensures the dart remains within the bust zone during pivoting. Since the bust zone spans from high bust to fullest bust, any dart originating in this area must stay within those horizontal boundaries when pivoted. If the rotated dart leg extends above the high bust line, it encroaches on the high bust-to-waist vertical zone, potentially creating tension or diagonal wrinkles. Similarly, if it drops below the fullest bust line, it enters the waist zone, risking excess fabric or horizontal folds. Always verify that both dart legs and the apex lie within the bust zone’s horizontal limits after manipulation.
Sliding Darts Along the Waist or Hip Edge
The slide method moves a dart parallel to its original orientation along a seam edge—such as the waistline or hip line—without changing its angle. This technique adjusts the dart’s location to better fit individual body contours, such as accommodating a prominent hip or shifting dart pressure away from a sensitive area. Unlike pivoting, sliding preserves the dart’s angle relative to the grainline and keeps the bust apex fixed in vertical position, though its horizontal position may shift.
To slide a dart, first true the dart legs and fold the dart closed along its center line to create a smooth intake. Place a piece of tracing paper beneath the pattern and trace the dart and seam edge. Then, slide the traced dart along the waist or hip line to the desired new position—say, 0.5 inch toward the center front. Retrace the dart legs at the new location, ensuring they maintain the same length and angle as the original. Remove the tracing paper and redraw the dart on the pattern piece, then true it again by folding and smoothing.
For instance, if a waist dart is causing discomfort at the side seam due to a full hip, slide it 0.75 inch toward the center front. Begin by closing the dart and tracing it onto paper. Slide the dart closure 0.75 inch inward along the waistline, keeping it parallel to the original. Retrace the dart legs at the new position, then transfer them back to the pattern. The dart now originates closer to the center front, reducing pressure at the side seam while preserving the same shaping effect. True the dart by refolding it along its center line and verifying that the fabric lies flat without puckering.
The matrix guides sliding by confirming that the dart remains within its designated horizontal zone. A waist dart must stay within the waist zone—between the bust and hip horizontal lines—when slid along the waist edge. If the dart slides above the bust line, it enters the bust zone, altering ease distribution and potentially creating diagonal wrinkles from bust to waist. If it slips below the hip line, it invades the hip zone, risking shortness or horizontal folds at the thigh. Always check that the dart’s entire length, from origin to apex, stays within the waist zone’s vertical boundaries after sliding. The same principle applies to hip darts: they must remain within the hip zone (waist to fullest hip) when slid along the hip or thigh edge.
Trueing Dart Legs and Adjusting for Ease
Trueing ensures that dart legs are symmetrical, the dart folds smoothly toward the apex, and seam lines flow continuously after manipulation. This step is critical after pivoting or sliding, as tracing and shifting can introduce slight mismatches in length or angle that cause puckering, twisting, or uneven seams when sewn.
To true a dart, fold the pattern along the dart’s center line, matching the two dart legs exactly. Smooth the paper to create a crisp crease, then trace the dart’s shape onto a fresh piece of paper or directly onto the pattern. Check that both dart legs are equal in length from the apex to the seam edge. If one leg is longer, adjust it to match the shorter leg by trimming or blending the seam line. Then, verify that the dart opens evenly when unfolded, with no gaps or overlaps at the apex. Finally, walk the seam lines with a notcher or awl to ensure they align perfectly when the garment is assembled.
Ease adjustments may be necessary after dart manipulation, especially if the dart’s intake has been altered or redistributed. For example, when converting a waist dart to a shoulder dart, some of the waist ease may shift to the shoulder area. If the shoulder seam now feels tight, reduce the dart intake slightly or add a small amount of ease at the armhole. Conversely, if the waist area feels loose after dart removal, consider taking in the side seam within the waist zone or adding a tuck to compensate. Always re-pin a muslin to test the altered dart’s effect on fit and comfort before cutting fashion fabric.
The matrix helps determine whether ease adjustments are needed and where they should occur. After dart manipulation, re-examine the muslin for wrinkles: horizontal folds suggest ease imbalance in a horizontal zone, while diagonal pulls indicate misdirected excess in a vertical zone. For example, if pivoting a dart to the shoulder creates horizontal wrinkles above the bust, it may indicate excess in the bust zone due to overextension of the dart. In this case, reduce the dart width or shift the apex slightly downward within the bust zone. If sliding a hip dart causes vertical wrinkles at the thigh, it may signal shortage in the hip-to-hem vertical zone, requiring lengthening at the thigh or knee line.
Try This
Apply the pivot and slide methods to a basic bodice pattern this week using these steps:
- Pivot a waist dart to the neckline: Close the waist dart, pivot at the bust apex until the taped edge aligns with the neckline, trace the new dart legs, and true the dart. Sew a muslin to verify that the dart point remains at the apex and the neckline lies flat.
- Slide a hip dart 0.5 inch toward the center front: Trace the dart, slide it along the hip edge, retrace at the new position, and true the dart. Check for smooth folding and no twisting at the seam.
- Compare fit and ease: Before and after each manipulation, pin the muslin and note any horizontal or vertical wrinkles. Use the matrix to identify the originating zone and determine if ease adjustments are needed.
Key Takeaways
- The pivot method rotates a dart around the bust apex to change its angle while preserving intake and fit, ideal for relocating darts to the shoulder, armhole, or neckline.
- The slide method moves a dart parallel to its original orientation along a seam edge to adjust location without altering angle, useful for fitting individual contours.
- Always true dart legs after manipulation to ensure symmetry, smooth folding, and seamless seam alignment.
- Use the Sewing Blueprint Matrix to confirm that darts remain within their correct horizontal zone (bust, waist, or hip) and to diagnose any resulting ease imbalances.
- Re-pin a muslin after every dart change to verify fit and make targeted ease adjustments based on wrinkle direction and zone mapping.
Chapter 3
Advanced Pattern Design
Drafting a Basic Bodice Block
Now that you’ve learned how to adjust existing patterns for fit, you’re ready to build your own foundation: a personalized bodice block drafted from your measurements. This block becomes the canvas for all future designs, ensuring every garment starts with a fit that’s uniquely yours.
Preparing Your Measurements and Tools
Begin by taking accurate upper body measurements using a flexible tape measure. Record your high bust (under the arms, above the bust), full bust (at the fullest part), natural waist (the narrowest point), and hip (at the fullest part, though hip is less critical for a bodice block). Also measure your back width (between armholes, at armpit level), shoulder length (from neck point to armhole), and vertical trunk (from high bust point down to waist, over the bust). For example, if your high bust is 34 inches, full bust is 36 inches, waist is 28 inches, and back width is 14 inches, you’ll use these to calculate key arcs and placements.
You’ll need pattern paper, a ruler, a hip curve, a French curve, and a sharp pencil. The Sewing Blueprint Matrix divides the bodice into four quadrants: upper front, lower front, upper back, and lower back, separated by the bust line (horizontal) and side seam (vertical). This grid ensures proportional placement of key points like the bust apex and waistline.
Calculating Key Arcs and Points
Use your measurements to determine the bust arc, waist arc, and shoulder slope—essential for shaping the block to your body. The bust arc is half your front bust measurement plus ease. Start with half your full bust (e.g., 36 ÷ 2 = 18 inches), then add wearing ease: typically 1 inch for a fitted bodice. So your bust arc becomes 19 inches. Similarly, the waist arc is half your waist plus ease: half of 28 is 14, plus 0.5 inch ease gives 14.5 inches.
Shoulder slope is derived from your vertical trunk and shoulder length. Subtract your high bust from your vertical trunk to get the bust-to-waist length (e.g., 15 – 13.5 = 1.5 inches). Then, using similar triangles, calculate the shoulder drop: (shoulder length × bust-to-waist length) ÷ back width. For a shoulder length of 5.5 inches, back width of 14 inches, and bust-to-waist of 1.5 inches: (5.5 × 1.5) ÷ 14 ≈ 0.6 inches of drop. This means your shoulder line will slope 0.6 inches vertically over its 5.5-inch length.
Now place these on the matrix. Draw a horizontal line for the bust line and a vertical line for the center front. From the intersection (neck point), measure your shoulder length outward to set the shoulder point. Drop the shoulder point by your calculated slope (0.6 inches) to set the armhole height. From the bust line intersection on the center front, measure your bust arc (19 inches) along the bust line to locate the bust apex. From there, drop vertically to the waistline to mark the waist point.
Drawing the Seams and Curves
Connect the points to form the block’s edges. Draw the shoulder seam from neck point to shoulder point. For the armhole, use a French curve to create a smooth arc from the shoulder point, down to the bust apex level, then curving toward the side seam. The side seam runs from the armhole down to the waist, angled slightly inward (about 0.5 inch) to accommodate the torso’s taper. At the waist, mark your waist arc (14.5 inches) from center front along the waistline to locate the side seam point.
The underarm curve requires special attention: it should be a shallow concave curve between the bust apex and waist, allowing room for the ribcage. Use your hip curve to draw this, ensuring it’s no deeper than 0.25 inch. The center front and center back lines are straight vertical lines from neck to waist, though you may add a 0.125-inch forward shoulder adjustment if your posture is rounded.
Truing the Block for Accuracy
Before using the block, true all seams to ensure they match in length and angle. Measure the front and back shoulder seams—they should be equal. Check the armhole curves by walking the front and back armholes with a tape measure or notch matcher; they must match within 1/8 inch. Do the same for the side seams: from armhole to waist, front and back should be identical. If there’s a discrepancy, adjust the side seam evenly—e.g., if the back is 0.25 inch longer, take 0.125 inch from each side at the waist.
Also verify that the bust apex sits 1 to 2 inches toward the center front from the side seam, as established in earlier chapters. In our example, with a side seam at 9 inches from center front (half the bust arc), the apex at 19 inches along the bust line places it 1 inch toward center front—within the ideal range. Once trued, label your block with measurements, grainline (vertical, parallel to center front), and notches at shoulder, armhole, and waist. This block is now your reliable base for drafting necklines, collars, and sleeves in the sections to come.
Once your bodice block is trued and labeled, test its fit by creating a muslin mock-up. Cut the block in inexpensive cotton or muslin, adding ⅜-inch seam allowances on all edges. Sew the shoulder and side seams using a straight stitch, then press them open. Do not add darts or closures yet—the goal is to evaluate the basic silhouette and seam placement. Try the muslin on inside out, pinning the center front and center back together to simulate closure. Stand naturally in front of a mirror and assess ease, balance, and line.
Look for horizontal pulling across the bust or back, which indicates insufficient ease or incorrect bust apex placement. If the fabric strains horizontally at the bust, your bust arc may be too small—revisit your measurement and add ⅛ to ¼ inch to the bust arc, then redraw the side seam and underarm curve accordingly. Conversely, if the fabric sags or folds diagonally from the armhole toward the bust, you may have too much ease or the apex is too low; reduce the bust arc slightly and raise the apex point by ⅛ inch.
Check the shoulder seam: it should lie flat at the top of the shoulder, not slip forward or backward. If it pulls forward, your shoulder slope is too steep—reduce the drop by ⅛ inch and true the armhole. If it slips backward, increase the slope slightly. The armhole should feel neither binding nor gaping; you should be able to raise your arm comfortably without the fabric lifting excessively at the underarm. If binding occurs, widen the armhole by ⅛ inch at the bust level and true the curve with your French curve.
The waistline should sit at your natural waist without pinching or rolling. If it rides up, your waist arc may be too small—add ⅛ inch and redraw the side seam. If it sags below the waist, reduce the arc slightly. Once adjustments are made, repeat the muslin test until the block lies smoothly with minimal pulling or gaping. Remember, the block is a starting point—it should be snug but not tight, allowing for ease when you later add design elements like darts, seams, or facings.
After finalizing the fit, transfer any adjustments to your paper block. True the seams again, then label the final version as your personal bodice sloper. Store it separately from working patterns, and use it as the foundation for all future bodice drafts. With this block, you can now confidently proceed to modify necklines, collars, and sleeves, knowing each change begins from a fit that’s truly yours.
Neckline Modifications Using the Matrix
Adjusting the neckline of your bodice block begins with understanding how the Sewing Blueprint Matrix divides the upper torso into horizontal zones. The matrix places key reference lines at the high bust, full bust, underarm, and waist levels, but for neckline work, focus on the vertical measurement from the base of the neck to the waist. This vertical axis is divided into thirds: the upper third (neck to shoulder), middle third (shoulder to bust apex), and lower third (bust apex to waist). Neckline depth and width are primarily governed by the upper third, where changes must respect the body’s natural contours and the ease already built into your block.
To modify the neckline, first trace your trued bodice block onto fresh pattern paper, preserving the center front, center back, shoulder seam, and armhole curves. The matrix helps you determine how much you can safely lower or widen the neckline without compromising fit. For example, lowering a round neckline by more than 1.5 inches in the upper third may cause the armhole to feel tight or shift the shoulder seam forward. Instead, use the matrix to limit depth adjustments to 0.5 to 1.5 inches, depending on the style and fabric stretch. Width adjustments at the shoulder or center front should stay within the horizontal zone defined by the shoulder point to the neck point, typically spanning 5 to 6 inches horizontally. Widening beyond this risks distorting the shoulder slope or creating excess fabric that won’t lie flat.
Consider a practical example: you want to convert a basic round neckline into a sweetheart neckline. Start by marking the center front at the base of the neck. From this point, measure down 0.75 inch along the center front to set the lowest point of the sweetheart dip—this stays within the upper third and avoids pulling at the bust. Then, from each shoulder point, measure inward 1 inch along the shoulder seam to begin the curve. Using a French curve, draw a shallow arc from each shoulder point down to the center front dip, ensuring the curve is smooth and symmetrical. The resulting neckline will sit comfortably above the bust, with the matrix confirming that the depth (0.75 inch) and width (2 inches total from shoulder points) remain within the upper third’s safe limits. Always true the new neckline by measuring the front and back pieces if you’re altering both, or by folding the pattern at center front to check symmetry.
Drafting a Peter Pan Collar
The Peter Pan collar is a flat, round-cornered collar that lies close to the neckline and is ideal for lightweight fabrics like cotton or voile. To draft it, begin with your neckline-modified bodice block—whether round, sweetheart, or V-neck—as the foundation. The collar consists of two parts: the leaf (the visible flat portion) and the stand (the narrow band that lifts the leaf slightly off the neck for a clean fit). The matrix ensures both parts align with the neckline’s shape and the body’s natural neck curve.
First, measure the neckline of your bodice block from center front to center back, following the curve exactly. This measurement is your neckline length. For a size medium example, this might be 14 inches. Add 0.25 inch of ease to this measurement to allow the collar to sit comfortably without pulling—this is critical for fabrics with no stretch. The eased neckline length becomes the inner edge of your collar stand. Draw a horizontal line this length long (14.25 inches) on your pattern paper; this represents the center back to center front along the inner stand.
Next, determine the collar stand height. A standard Peter Pan stand ranges from 0.5 to 0.75 inch. Choose 0.625 inch for a balanced look. From each end of the inner stand line, draw a vertical line upward 0.625 inch to mark the outer edge of the stand. Connect these points with another horizontal line parallel to the inner line—this is the outer edge of the stand and the base where the leaf will attach. The stand is now complete: a rectangular band 0.625 inch tall and 14.25 inches long (including ease).
For the leaf, decide how far you want the collar to extend from the neckline. A typical Peter Pan leaf ranges from 1.5 to 2.5 inches wide at the center front, tapering to 0.5 inch at the shoulder. Using the matrix’s horizontal zones, limit the leaf width to stay within the upper third’s shoulder-to-neck span—here, 2 inches at center front is acceptable. From the outer stand line, measure outward perpendicular to the stand: 2 inches at center front, 1 inch at the quarter points, and 0.5 inch at the shoulder ends. Connect these points with a smooth, rounded curve using a French curve, creating a soft scallop or circular arc. Mirror this shape on the other side for symmetry.
Label the collar pieces: cut two leaves (one for each side) and one stand (cut on fold at center back). Add ¼-inch seam allowances to all edges. When assembling, sew the leaf to the outer edge of the stand, right sides together, then turn and press. Attach the completed collar to the garment neckline by matching the inner stand to the neckline, aligning notches at center front, center back, and shoulder points. The matrix ensures that the collar’s inner edge matches the eased neckline length, preventing gaps or puckering.
Calculating Collar Stand Height and Neckline Ease
Collar stand height and neckline ease are interdependent factors that determine whether a collar lies flat or stands awkwardly. The Sewing Blueprint Matrix guides both by relating collar dimensions to the vertical and horizontal zones of the neck and upper torso. Neckline ease—typically 0.125 to 0.25 inch for woven fabrics—allows the collar to encircle the neck without choking. Stand height, meanwhile, must compensate for the neck’s natural curve and the garment’s neckline depth.
Begin by measuring your neck’s circumference where the collar will sit. Add 0.125 inch ease for light to medium fabrics; increase to 0.25 inch for thicker materials like denim or coating. This total is the length of the collar stand’s inner edge. For example, if your neck measures 13 inches, add 0.125 inch ease to get 13.125 inches for the inner stand line.
Next, determine stand height based on the neckline’s depth and the desired collar effect. A deeper neckline (like a V-neck) requires a taller stand to prevent the collar from flipping outward, while a shallow neckline (like a jewel neck) works with a shorter stand. Use this rule: stand height (in inches) equals 0.25 plus 0.1 times the neckline depth (in inches) from the base of the neck. For a sweetheart neckline with a 0.75-inch dip, calculate: 0.25 + (0.1 × 0.75) = 0.325 inch. Round to 0.375 inch for practical drafting—this ensures the collar clears the neckline curve without standing too tall.
To apply this, draw your inner stand line at 13.125 inches (from the neck + ease example). At each end, erect a perpendicular line 0.375 inch tall. Connect the tops with a parallel line to form the outer stand. The leaf is then drafted outward from this outer edge, as described earlier. Always true the collar by folding it along the center back and checking that both sides match. When sewing, stretch the inner stand slightly as you attach it to the neckline to accommodate the curve—this is where the 0.125-inch ease becomes functional, allowing the collar to hug the neck without tension.
Using Notches for Collar Alignment
Notches are essential for aligning the collar with the garment neckline during assembly, especially when working with curved seams or multiple pieces. The Sewing Blueprint Matrix provides a consistent framework for placing notches at key junctions: center front, center back, and shoulder points. These marks ensure that the collar’s inner edge matches the garment’s neckline exactly, preventing twists, uneven gaps, or misaligned seams.
Begin by marking notches on your bodice block’s neckline. Place a single notch at center front and center back. At each shoulder point, where the neckline meets the shoulder seam, place a double notch (two short lines) to distinguish it from the single notches at front and back. If you’ve altered the neckline (e.g., widened a boat neck), add additional notches at quarter points between the shoulder and center front to help distribute ease evenly during sewing.
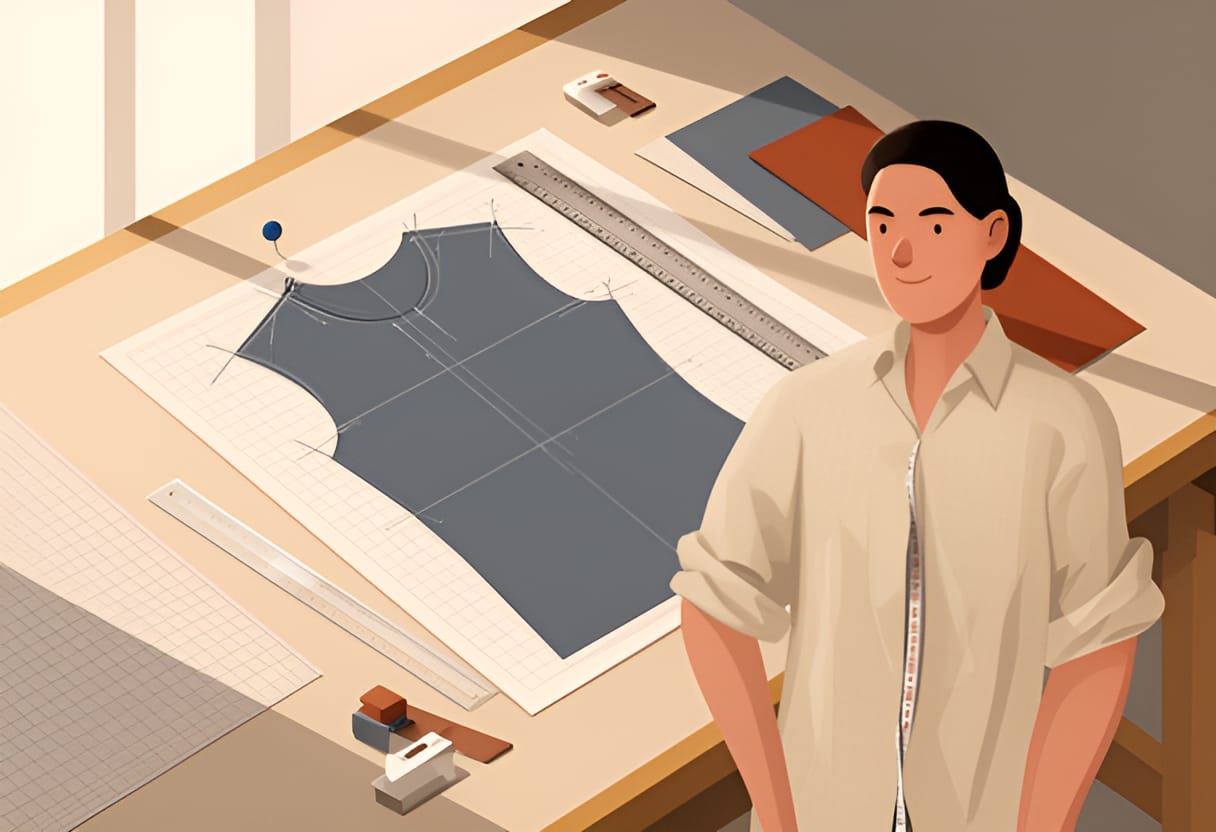
Transfer these notch marks to your collar pieces. On the collar stand, mark the inner edge with corresponding notches: single notches at center front and center back, double notches at the shoulder points. When the collar is assembled (leaf attached to stand), these notches should align perfectly with those on the garment neckline when the pieces are placed right sides together.
During sewing, match the notches first before pinning the rest of the seam. Start at the center back notch, pinning inward toward the shoulder, then repeat from the center front. This method prevents the collar from shifting and ensures that any ease is distributed symmetrically. For example, if your neckline has 0.125 inch of ease, the notches will guide you to ease the collar evenly between the shoulder and center front, avoiding puckering at one end or tightness at the other.
After sewing, press the seam allowance toward the collar or garment, depending on fabric weight. Check that the collar lies flat and the center front and center back align vertically. If the collar twists or flares, recheck your notch alignment and seam allowance consistency. Proper notching, guided by the matrix’s zone references, turns a complex curve into a manageable, repeatable process—one that gives your collars a professional, ready-to-wear finish.
Measuring for Sleeve Width Proportions
Accurate sleeve width begins with three key body measurements: bicep, elbow, and wrist. These determine the circumference at critical points along the arm and ensure the sleeve allows for movement without excess fabric or restriction. The bicep measurement is taken around the fullest part of the upper arm, typically with the arm relaxed at the side. The elbow measurement is taken around the bent elbow, capturing the width needed for flexion. The wrist measurement is taken just above the wrist bone, where the sleeve will terminate.
Using the Sewing Blueprint Matrix, these widths are mapped to horizontal zones that correspond to the arm’s natural taper. The matrix divides the sleeve into upper, middle, and lower thirds vertically, aligning with the bicep, elbow, and wrist landmarks. This vertical zoning ensures that width adjustments are proportional and maintain the sleeve’s natural shape.
For example, if your bicep measures 12 inches, elbow 10 inches, and wrist 7 inches, you would calculate the flat pattern widths by dividing each circumference by two (for the two halves of the sleeve) and adding wearing ease. For a fitted sleeve, add 1.5 inches of ease to the bicep, 1 inch to the elbow, and 0.5 inch to the wrist. This gives:
- Bicep width: (12 ÷ 2) + 0.75 = 6.75 inches
- Elbow width: (10 ÷ 2) + 0.5 = 5.5 inches
- Wrist width: (7 ÷ 2) + 0.25 = 3.75 inches
These widths are then plotted at their respective vertical zones on the matrix: bicep at the upper third (near the armhole), elbow at the middle third, and wrist at the lower third (cuff level). Connecting these points with a smooth curve creates the sleeve’s side seam, ensuring a natural taper that follows the arm’s shape.
Drafting the Sleeve Cap with Correct Ease Distribution
The sleeve cap must be drafted with precise ease to fit comfortably into the armhole without puckering or pulling. The Sewing Blueprint Matrix helps distribute this ease by aligning the cap’s curve with the armhole’s vertical zones—specifically, the upper torso zone from high bust to waist. The cap height is measured perpendicular from the bicep line to the top of the cap, and the ease is distributed between the notches at the front and back armhole.
Begin by establishing the bicep line as the base of the sleeve cap. From the center of this line, measure upward to set the cap height. A standard set-in sleeve cap height ranges from 1.25 to 1.75 inches, depending on the armhole depth and desired ease. Taller caps work for deeper armholes; shorter caps suit shallower ones.
Next, divide the cap into front and back halves using the shoulder notch as the apex. The total ease built into the sleeve cap—typically 1.25 to 1.5 inches for woven fabrics—is split between the front and back curves. For example, if your armhole measures 18 inches around, the sleeve cap seam length should be 19.25 to 19.5 inches to allow for 1.25 to 1.5 inches of ease.
Distribute this ease unevenly: about 60% in the back cap and 40% in the front. This accommodates the natural curve of the back shoulder and allows for greater range of motion. For a 1.5-inch total ease, this means 0.9 inch in the back cap and 0.6 inch in the front.
To draft, draw the bicep line (e.g., 13.5 inches wide for a 12-inch bicep with ease). At the center, erect a perpendicular line for the cap height (e.g., 1.5 inches). From the top, curve downward to the bicep line ends, ensuring the front curve is shallower and the back curve deeper. Use a French curve to blend the transitions smoothly. Verify that the front and back cap seams, when measured along the stitching line, match the required lengths with their respective ease allocations.
Adjusting Sleeve Length and Taper Using Vertical Zones
Sleeve length and taper are adjusted using the vertical zones of the Sewing Blueprint Matrix, which run parallel to the grainline from the bicep line to the cuff. These zones—upper (bicep to elbow), middle (elbow to wrist), and lower (wrist to hem)—allow for proportional lengthening or shortening while preserving the sleeve’s balance.
To lengthen or shorten the sleeve, measure the desired change and distribute it across the zones based on the arm’s natural proportions. For example, to add 2 inches to a long sleeve, add 0.8 inch to the upper zone, 0.7 inch to the middle, and 0.5 inch to the lower zone. This prevents the cuff from dropping too low or the elbow area from becoming baggy.
Taper adjustments are made by shifting the wrist width inward or outward while keeping the bicep width constant. A tapered sleeve narrows gradually from bicep to wrist; a bell sleeve flares at the elbow or wrist; a puff sleeve adds volume at the cap or upper arm.
For a tapered sleeve, reduce the wrist width by 0.5 to 1 inch while maintaining the bicep and elbow widths. For instance, if the original wrist width is 3.75 inches, taper it to 3.25 inches for a subtle narrow cuff. Redraw the side seam from the bicep line to the new wrist point, creating a gradual inward slope.
For a bell sleeve, keep the bicep and elbow widths unchanged but increase the wrist width by 1 to 1.5 inches. Using the earlier example, increase the wrist width from 3.75 to 5 inches. Draft the side seam to flare outward from the elbow zone, creating a soft bell shape. Ensure the flare begins no higher than the middle third to avoid excess bulk at the elbow.
In all cases, true the side seam by folding the sleeve along the grainline and checking that both edges match. Adjust any irregularities before proceeding to cap truing.
Truing the Sleeve Cap to Match the Armhole Curve
Truing ensures the sleeve cap seam length exactly matches the armhole seam length, preventing fit issues during sewing. The Sewing Blueprint Matrix provides reference points—specifically, the notches at the front armhole, shoulder, and back armhole—to align and measure both curves accurately.
Begin by tracing the armhole curve on your bodice block, marking the notches: single at center front (if applicable), double at the shoulder point, and single at center back. Measure the armhole seam length between the notches along the stitching line (typically 5/8 inch from the edge). For example, the front armhole (shoulder to front notch) might measure 4.5 inches, and the back armhole (shoulder to back notch) 5.0 inches, for a total of 9.5 inches per side.
Now, measure the sleeve cap seam length between the corresponding notches. The sleeve should have matching notches: double at the center top (shoulder), and singles at the front and back cap ends. If the front cap measures 4.3 inches and the back cap measures 5.2 inches, the total is 9.5 inches—matching the armhole. If not, adjust the cap curve.
To correct a mismatch, pivot the cap at the shoulder notch. If the sleeve cap is too long, deepen the curve slightly to shorten the seam length. If too short, flatten the curve to lengthen it. Make adjustments in small increments (1/8 inch), remeasuring after each change.
For instance, if the front cap measures only 4.0 inches (0.5 inch short), flare the front curve outward slightly between the shoulder and front notch to increase the seam length. If the back cap measures 5.5 inches (0.5 inch long), hollow the back curve to reduce it. Always preserve the cap height and bicep width unless intentional style changes are being made.
After truing, walk the seams: place the sleeve cap and armhole right sides together, aligning notches, and roll the sleeve cap along the armhole edge, checking for smooth contact at every point. Any gaps or overlaps indicate remaining discrepancies. Once the curves match perfectly, the sleeve is ready to be cut and sewn, ensuring a comfortable, professional fit that maintains mobility and drape.
Capstone Project: From Block to Wardrobe
…the sleeve is ready to be cut and sewn, ensuring a comfortable, professional fit that maintains mobility and drape.
Drafting the Sheath Dress Block
Begin by taking your key lower body measurements: waist, hip, and height, in addition to the bust and shoulder measurements already used for your bodice block. Record your waist circumference at the natural waistline, hip circumference at the fullest part of the seat, and your height from the high bust point to the desired hem length—typically knee-length for a classic sheath dress, around 20 to 22 inches from the waist for an average height. Use the Sewing Blueprint Matrix to establish the vertical zones: measure from your high bust to waist (upper torso), waist to hip (mid torso), and hip to hem (lower torso). These zones will guide the distribution of length and ease throughout the garment.
Draw a vertical center front line on your pattern paper, representing the grainline. From the high bust point, mark down the upper torso zone to the waistline, using your previously calculated bust arc and waist arc to establish the side seam shape. The bust arc is half your full bust measurement plus 1 inch wearing ease; the waist arc is half your waist measurement plus 0.5 inch ease. For example, if your full bust is 36 inches, your bust arc is 19 inches (18 + 1). If your waist is 28 inches, your waist arc is 14.5 inches (14 + 0.5). From the waistline, continue down the mid torso zone to the hip line, using the hip arc—half your hip measurement plus 1 inch ease for a fitted sheath. If your hips are 38 inches, your hip arc is 20 inches (19 + 1). Extend the center front line to your desired hem length in the lower torso zone.
True the side seam by walking it from the high bust to the hem, ensuring smooth transitions at the waist and hip. Add wearing ease vertically: typically 0.5 to 1 inch in the upper torso, 0.25 to 0.5 inch in the mid torso, and 0.5 to 1 inch in the lower torso for comfort and movement. For a standard sheath, add 0.75 inch total vertical ease, distributed as 0.3 inch in the upper zone, 0.2 inch in the mid zone, and 0.25 inch in the lower zone. Finally, add a 1-inch hem allowance at the bottom and a 5/8-inch seam allowance along all edges. Your sheath dress block is now complete and ready for transformation.
Adding a Peplum Using the Waist Matrix Zone
A peplum adds flair at the waist by expanding fabric horizontally while maintaining the bodice fit above. To draft a peplum, focus on the waist matrix zone—the horizontal line at your natural waistline. Measure your waist arc (half waist plus 0.5 inch ease) and decide on the peplum’s finished width. For a subtle 6-inch peplum, you’ll need 12 inches of total waist circumference at the peplum edge (6 inches front, 6 inches back). Subtract your waist arc to find the amount to add: if your waist arc is 14.5 inches, you need to add 12 - 14.5 = -2.5? Wait, that doesn’t work—let’s correct: the waist arc is the pattern measurement at the waistline; to create a peplum, you spread the pattern outward from this line.
Cut your sheath block along the waistline, separating the bodice from the skirt. Spread the pieces apart at the side seams and center front/back, keeping the waistline length constant. For a 6-inch deep peplum, spread the pattern 3 inches outward at the side seam and 1.5 inches at the center front and back (adjust for symmetry). For example, if your waist arc is 14.5 inches and you want a peplum that measures 20 inches at the lower edge, you need to add 5.5 inches total around the waistline—distribute this as 1.5 inches at each side seam and 1.25 inches at each center front and back. Redraw the side seams and center lines as straight or slightly curved lines connecting the waistline to the new peplum edge. Add a 5/8-inch seam allowance along the waistline for reattachment and a 1-inch hem at the peplum’s bottom edge. The peplum is now ready to be sewn to the bodice, creating a flared waist detail that enhances the silhouette without compromising the fitted upper body.
Converting to a Wrap Style Using Center Front Adjustments
Transform your sheath into a wrap dress by reworking the center front matrix zone. Begin by cutting your sheath block along the center front line, separating it into left and right front panels. Overlap the panels at the center front to create the wrap effect, using the matrix to guide the overlap width and placement. For a standard wrap, overlap the panels by 4 to 6 inches at the waistline, tapering to 2 inches at the bust and hip to maintain proportion. For example, if your waist arc is 14.5 inches, each front panel should be half of that plus the overlap: 7.25 inches plus 3 inches overlap = 10.25 inches wide at the waist for each side.
Redraw the center front edge as a diagonal line from the shoulder to the hem, ensuring the wrap crosses the body at a 45-degree angle for a flattering drape. Add a 1-inch facing or binding along the raw center front edges to finish the wrap. To secure the wrap, add a tie or use a side seam snap: extend one panel’s side seam by 2 inches at the waist to create a tie, or install a snap at the underbust and waist. Verify that the bust and hip arcs remain intact by measuring the curved seams—they should match your original calculations with ease. The wrap style redefines the garment’s silhouette while relying on the matrix to preserve fit at the bust, waist, and hip.
Creating Color-Blocked Panels with Vertical Zones
Use the vertical zones of the Sewing Blueprint Matrix to design color-blocked panels that enhance the sheath’s structure. Divide the garment into three vertical sections: left panel (center front to side seam), center panel (side seam to side seam), and right panel (side seam to center back). Each panel aligns with the body’s natural topography and allows for bold color placement without disrupting fit.
For example, assign a dark navy to the center panel (side seam to side seam) to create a slimming effect, and use a contrasting mustard yellow for the outer panels. Calculate each panel’s width using your horizontal arcs: the center panel spans from the front side seam to the back side seam, so its width is your bust arc minus twice the distance from center front to side seam. If your bust arc is 19 inches and the distance from center front to side seam is 5 inches, the center panel is 19 - (5 + 5) = 9 inches wide. The outer panels each take half of the remaining arc: (19 - 9) / 2 = 5 inches. Apply the same logic to the waist and hip arcs to ensure the panels align at each horizontal zone.
Draw vertical lines on your pattern at these calculated points, following the grainline. Cut your fabric accordingly, sewing the panels together with 5/8-inch seams. Match notches at the bust, waist, and hip to ensure the color blocks align perfectly. The result is a geometrically balanced sheath dress where color defines the silhouette, and the matrix ensures the fit remains true to your body.
Try This
This week, apply the matrix to a garment you already own:
- Take your bust, waist, and hip measurements and calculate the bust, waist, and hip arcs using the formulas from this book.
- Lay a fitted t-shirt or dress flat and measure its side seam from bust to waist to waist to hip—compare these to your arcs to see how ease is distributed.
- Sketch a simple sheath dress block on paper using your arcs and vertical zones, then identify one design change (like a peplum or color block) and draft it using the matrix as described.
Key Takeaways
- The Sewing Blueprint Matrix divides the body into horizontal and vertical zones to guide accurate block drafting and proportional design changes.
- Key arcs (bust, waist, hip) are calculated as half the body measurement plus wearing ease, ensuring consistent fit across garment types.
- Design transformations—peplums, wraps, and color blocks—are executed by manipulating specific matrix zones while preserving ease and grainline integrity.
- Truing seams and walking curves are essential steps to validate that alterations maintain match between pattern pieces before cutting fabric.
- Personal measurements, when applied systematically through the matrix, enable the creation of custom garments that fit flawlessly and reflect individual style.